p1-sentiments
EECS 285 IntelliJ Setup Tutorial
This tutorial will help walk you through setting up your computer with IntelliJ for Project 1. It is recommended to read through the Project 1 spec before beginning the setup tutorial.
- Set Up Your Computer
- Download and Install
- Configure Code Style
- Create an IntelliJ Project
- Create a Package
- Move in Starter Files
- Create New Java Classes
- Build and Run Project
- Setting Command-Line Arguments
Set Up Your Computer
Download and install the latest Java 8 SDK from the Oracle website for your platform. Be sure to download from the table titled “Java SE Development Kit 8u301”. Unfortuntely, you will have to make an Oracle account.
Create an EECS 285 folder and a sub folder for Project 1. For example, the file path on my computer looks like this:
~/Workspaces/eecs285/Project1
Download and Install IntelliJ
First, go to the JetBrains website and download and install IntelliJ Idea Community. Make sure you select Community, not Ultimate.
Configure Code Style
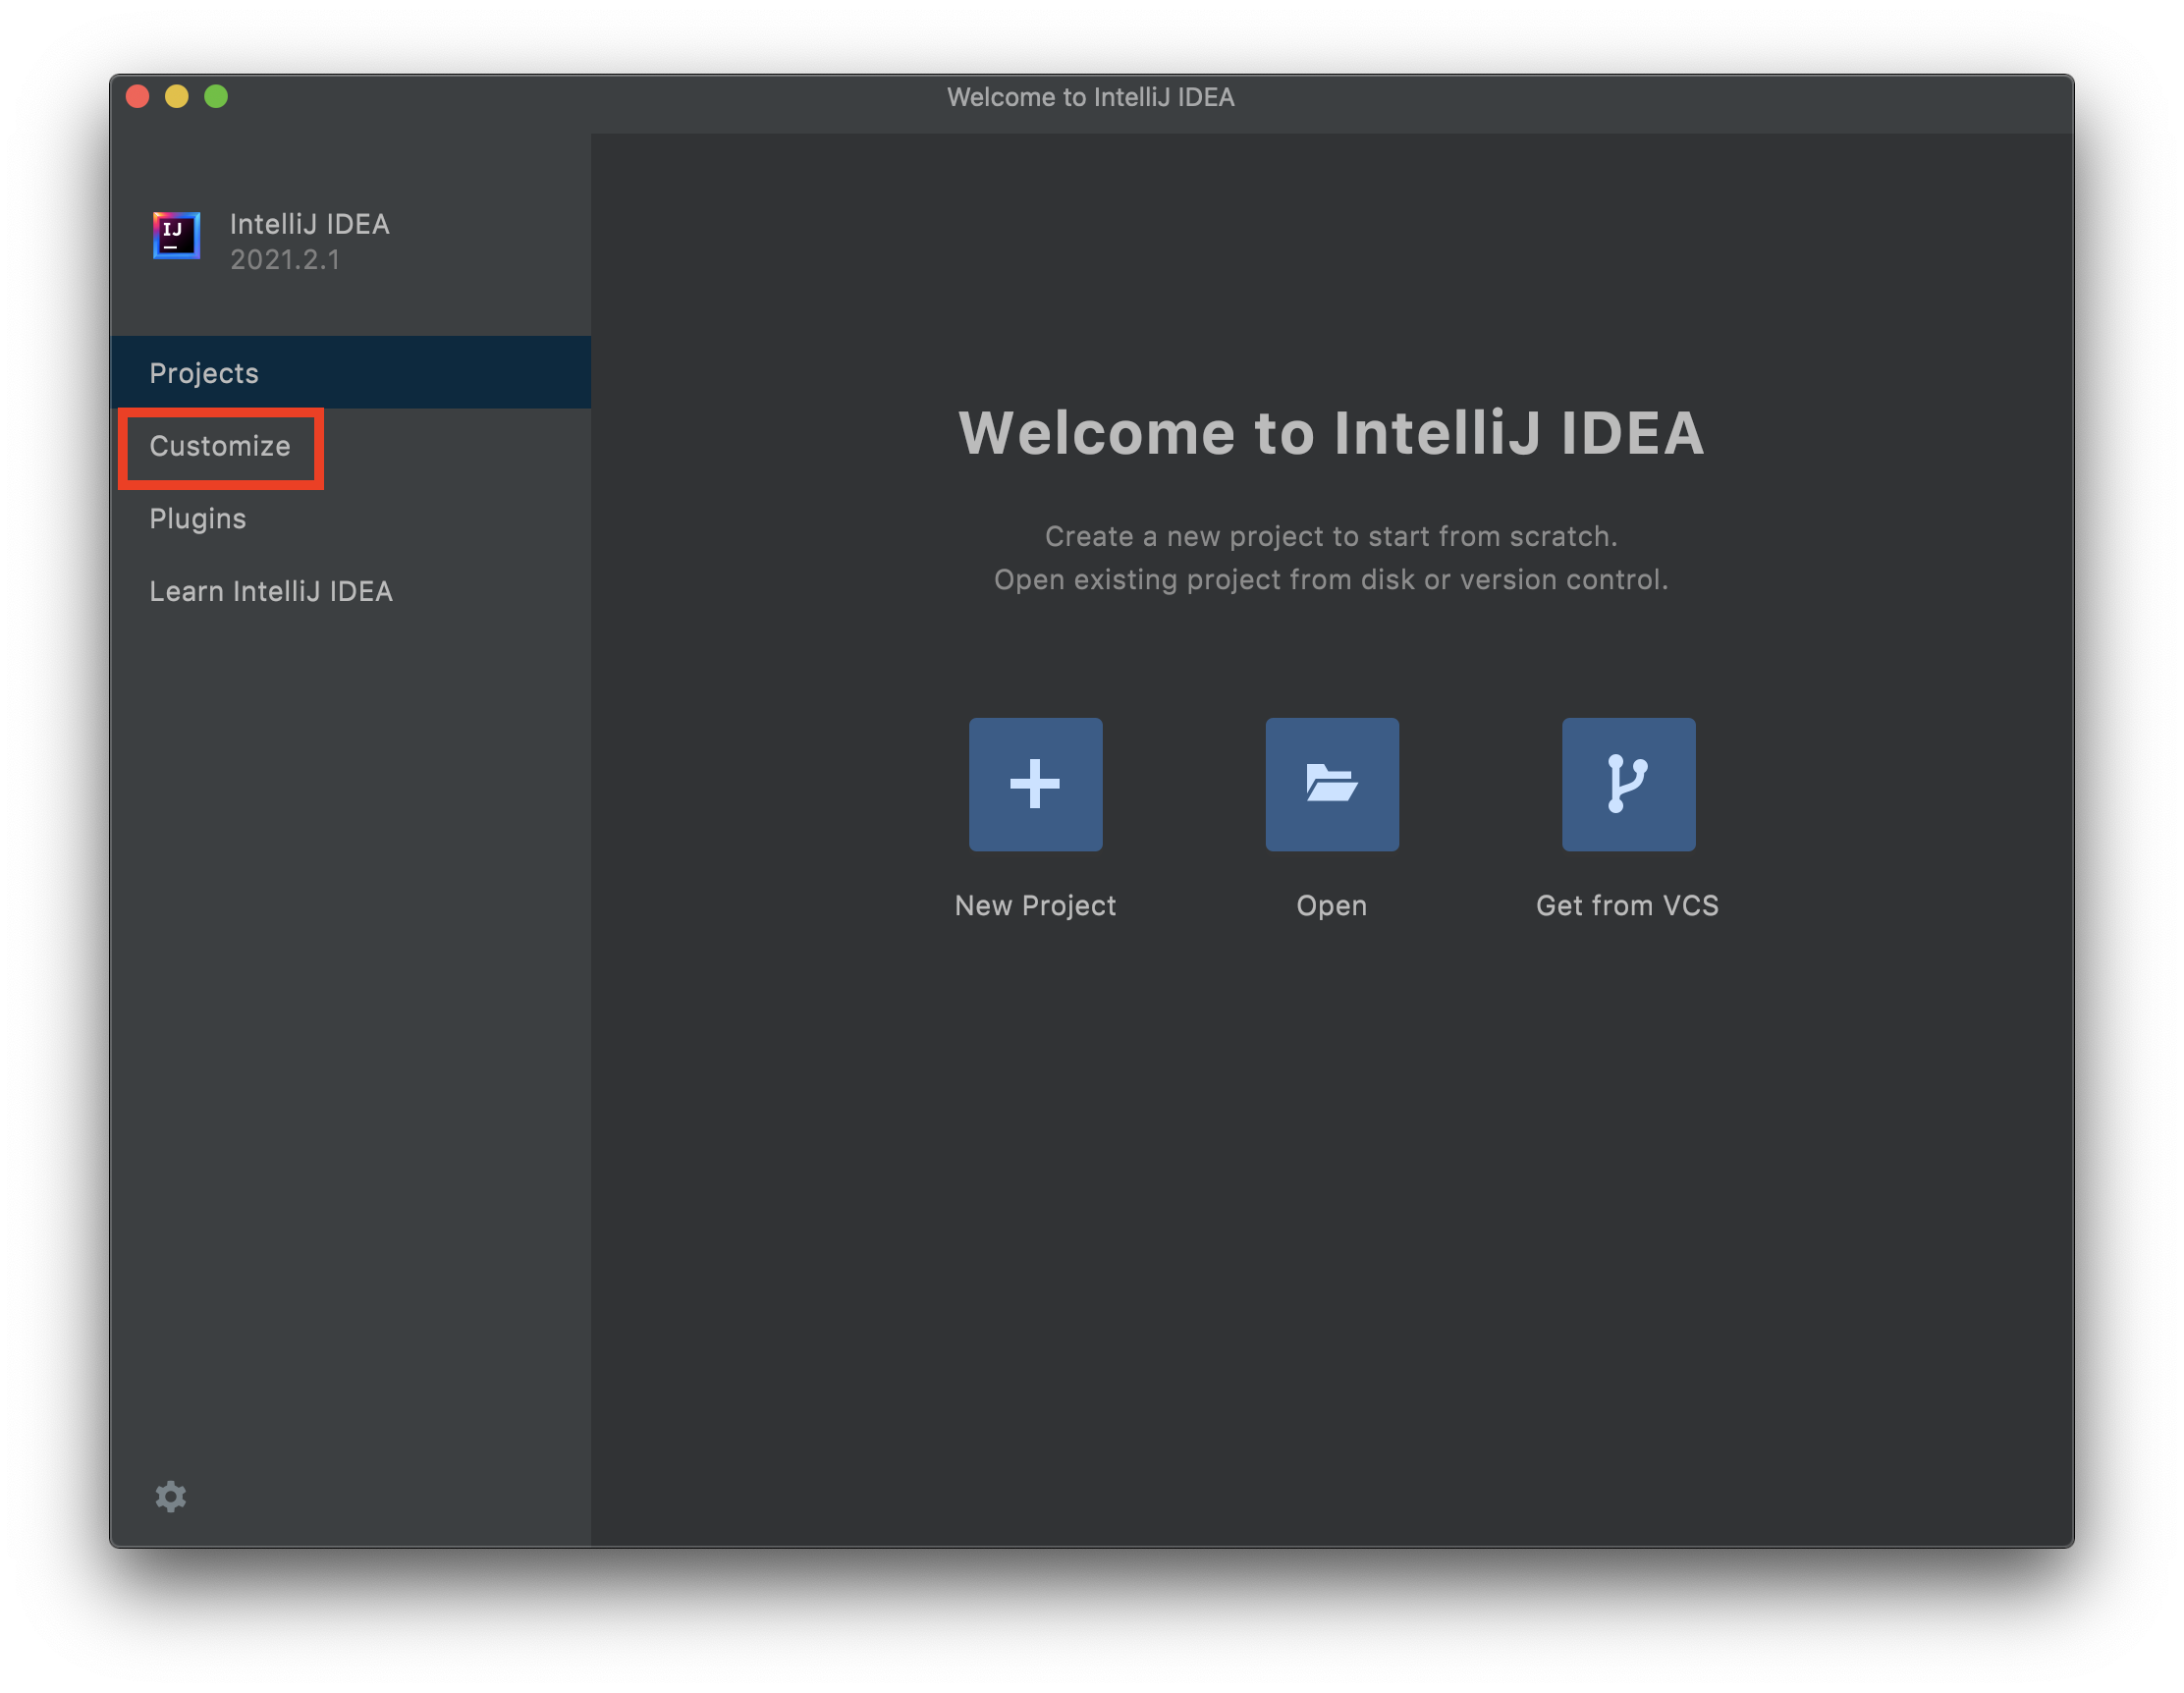
Open IntelliJ. The first time you open it, it will prompt you to setup the IDE. Select “Do not import settings”, choose your theme, and then select “Skip Remaining and Set Defaults”.
Once setup is complete, select “All Settings” from the “Customize” menu option at the Welcome screen.
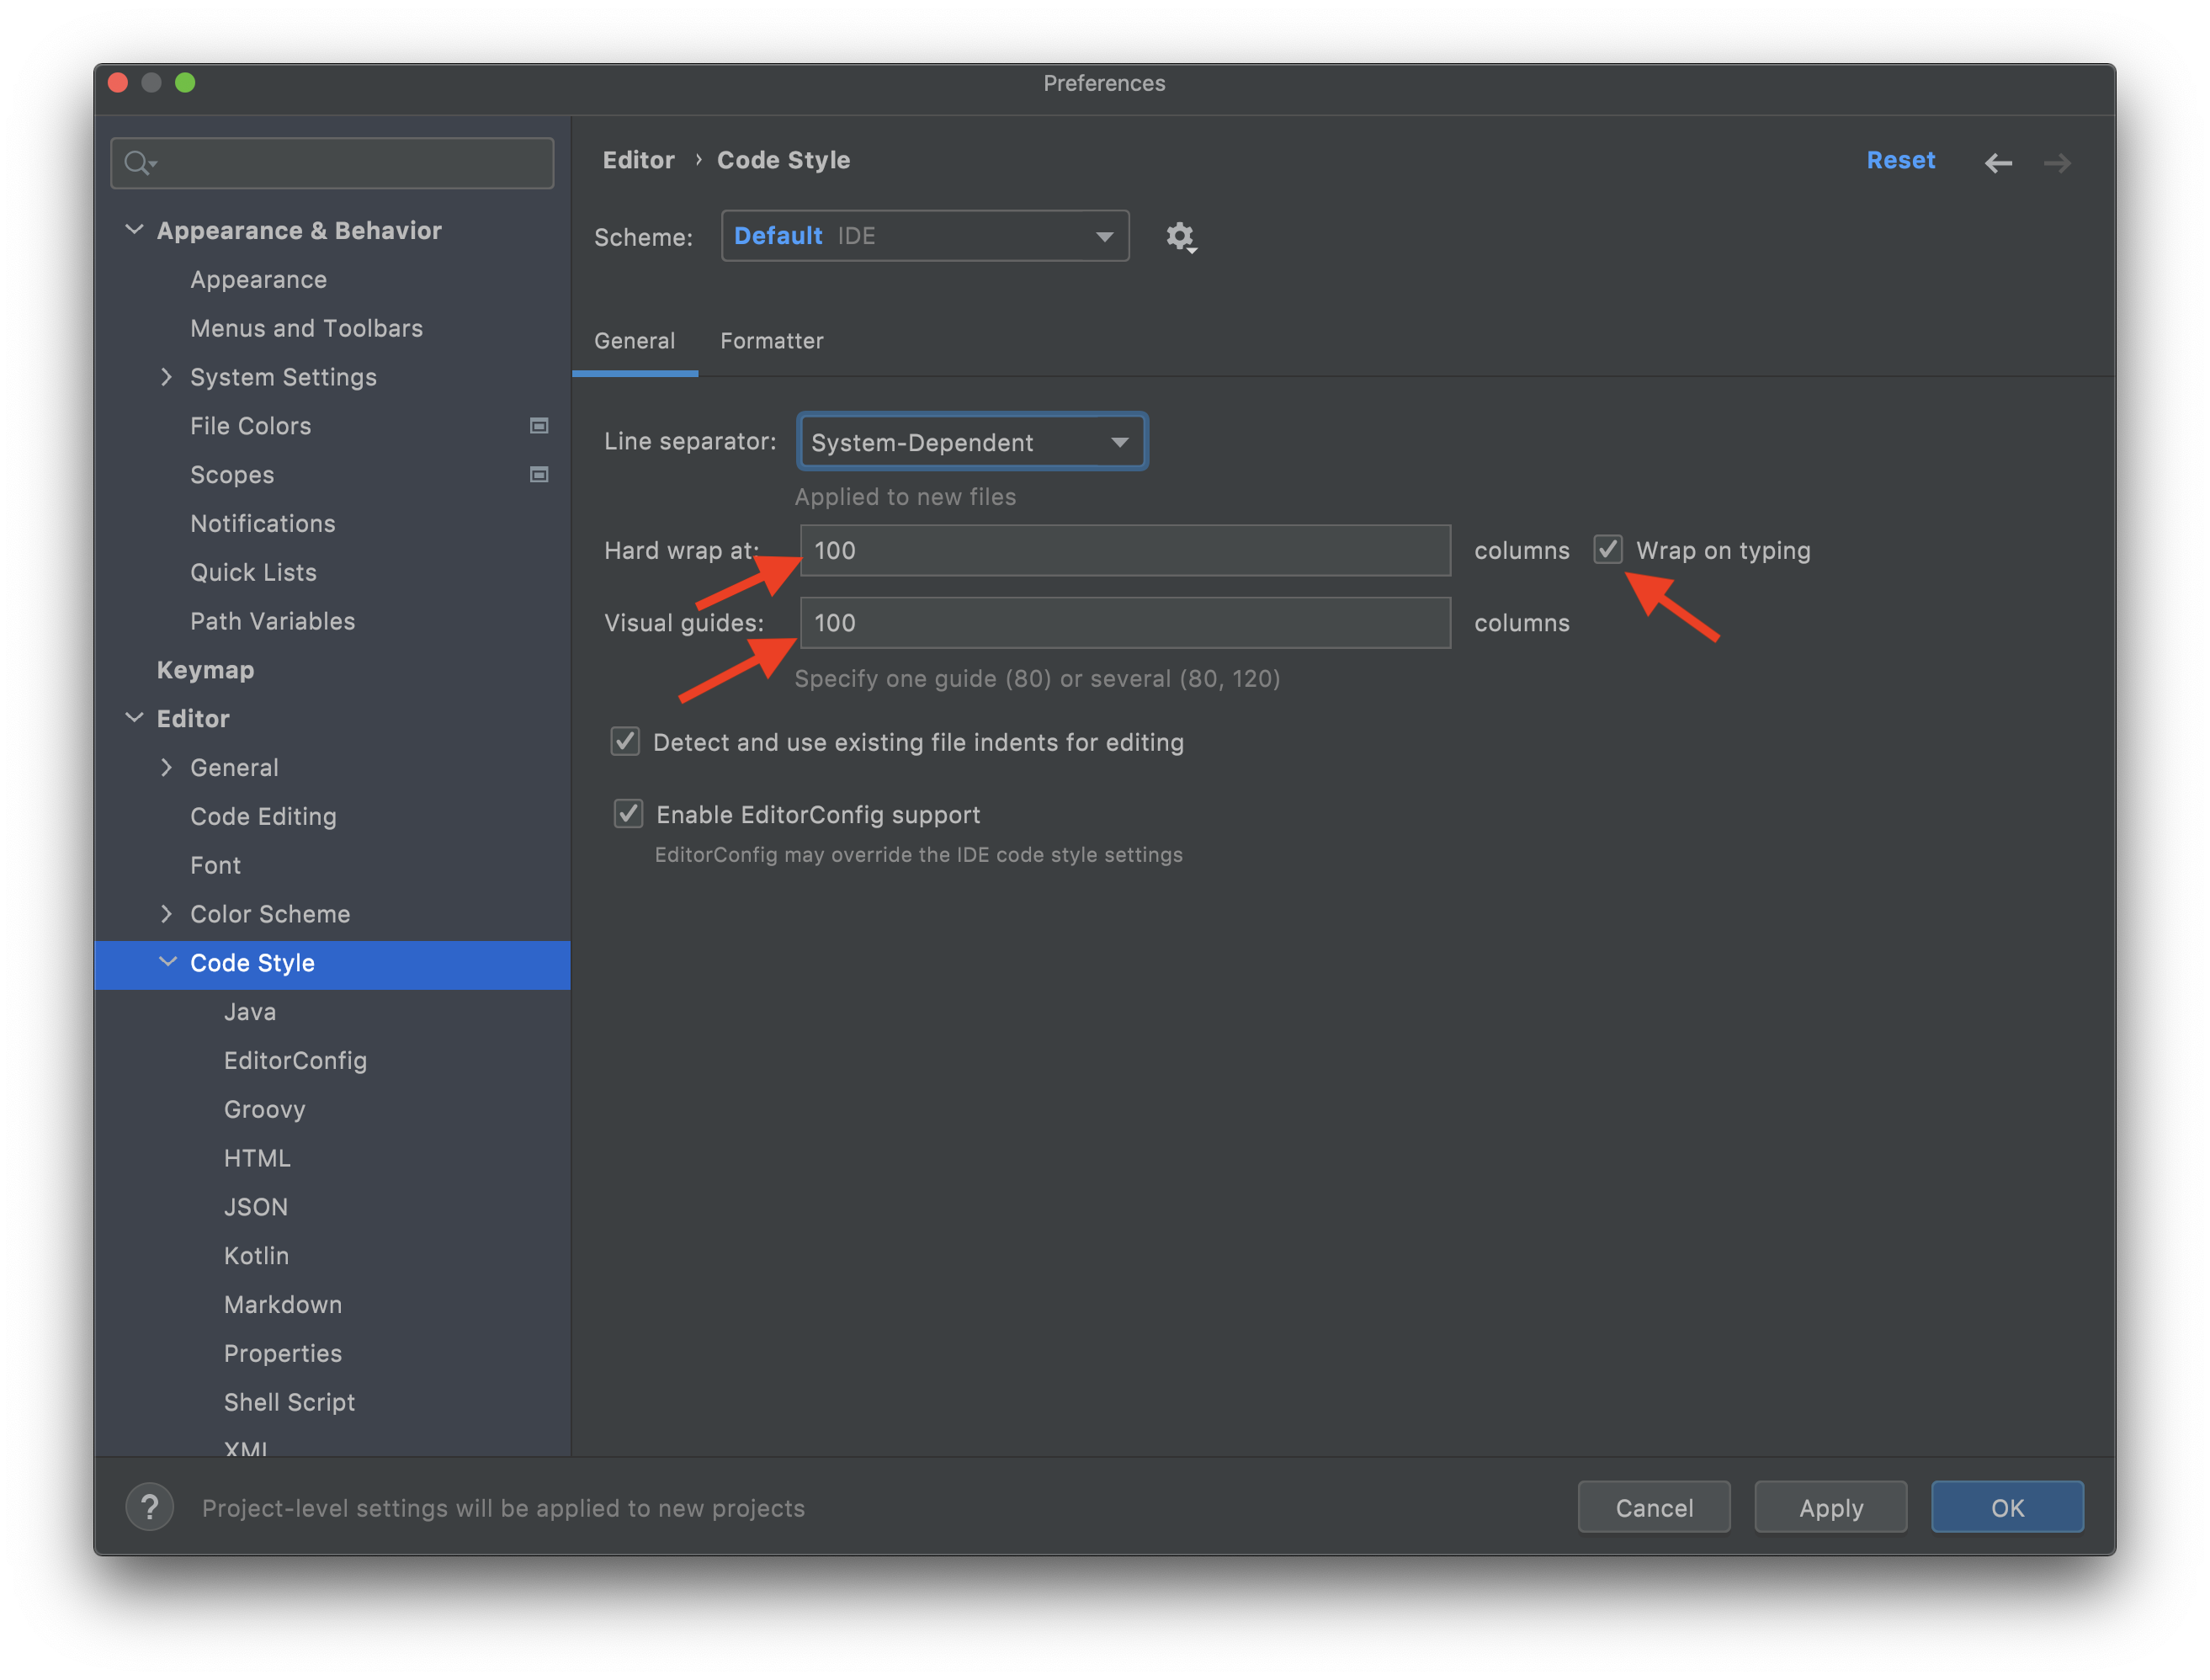
Expand “Editor”, select “Code Style”, and type 100 into the “Hard wrap at” and “Visual guides” box. Make sure “Wrap on typing” is checked.
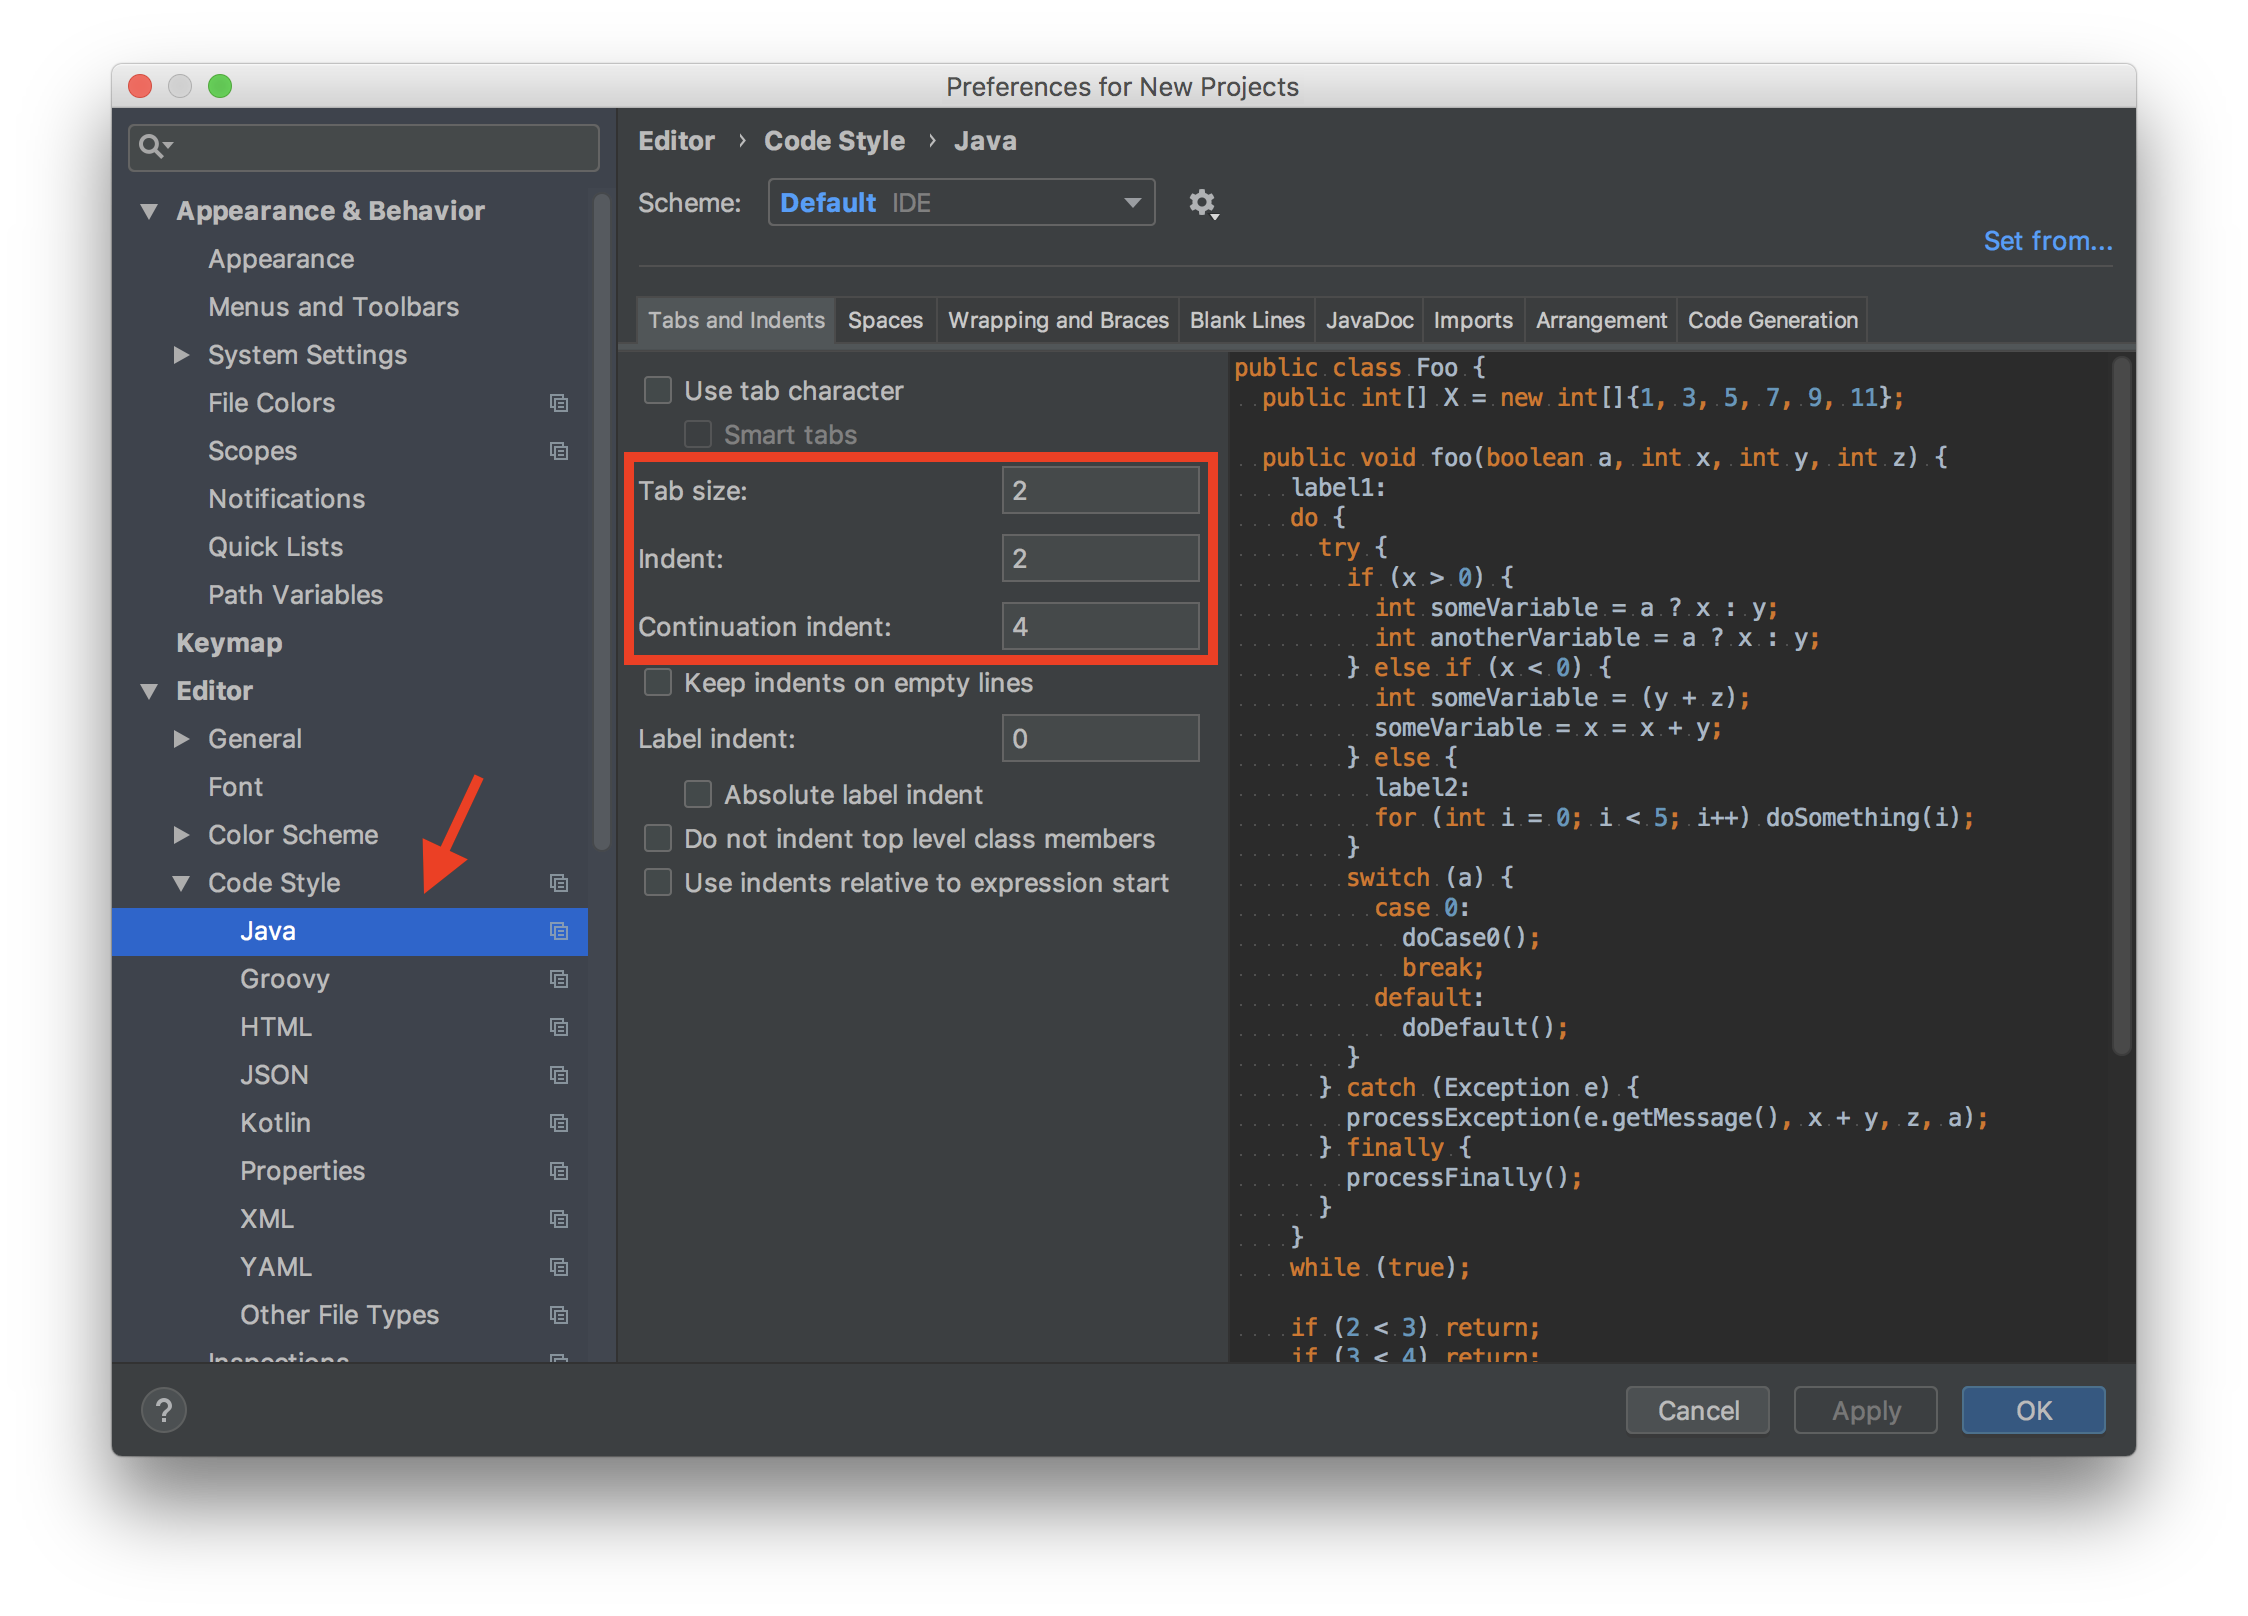
Expand “Code Style”, select “Java”, and change “Tab size” and “Indent” to 2 and “Continuation indent” to 4. Make sure that “Use tab character” is not selected.
Click “OK” at the bottom right.
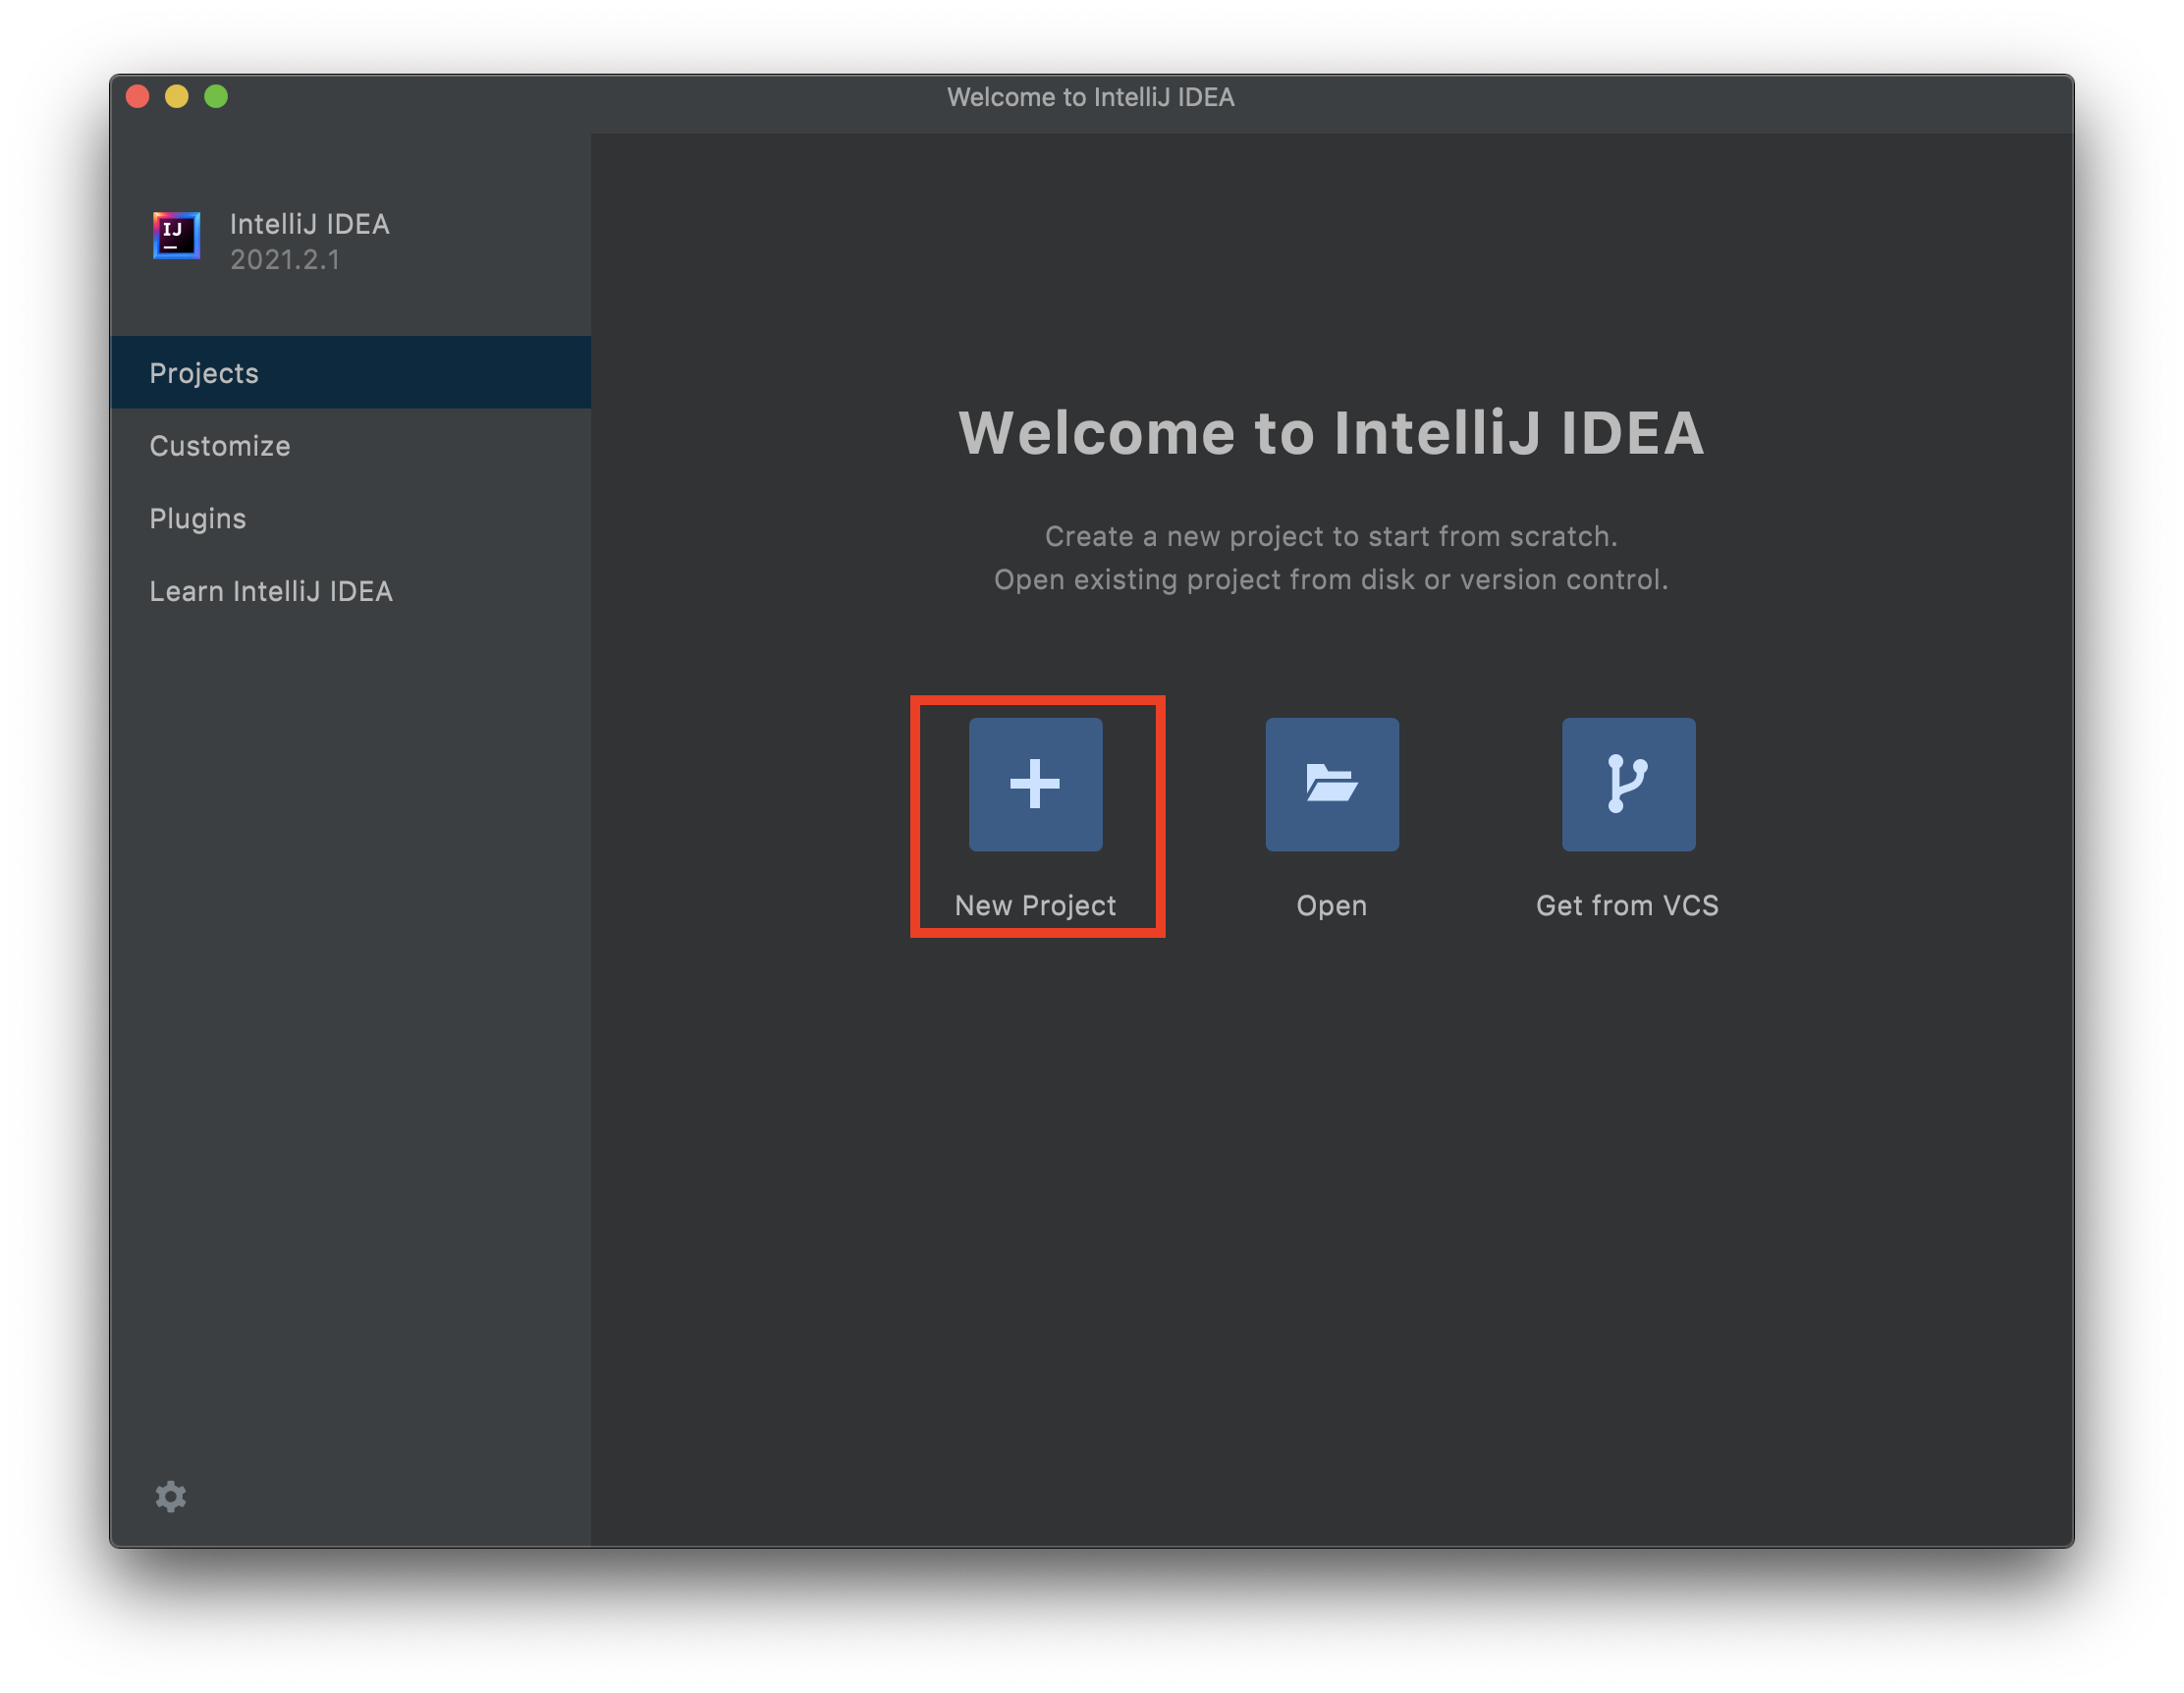
Create an IntelliJ Project
Select “Create New Project”
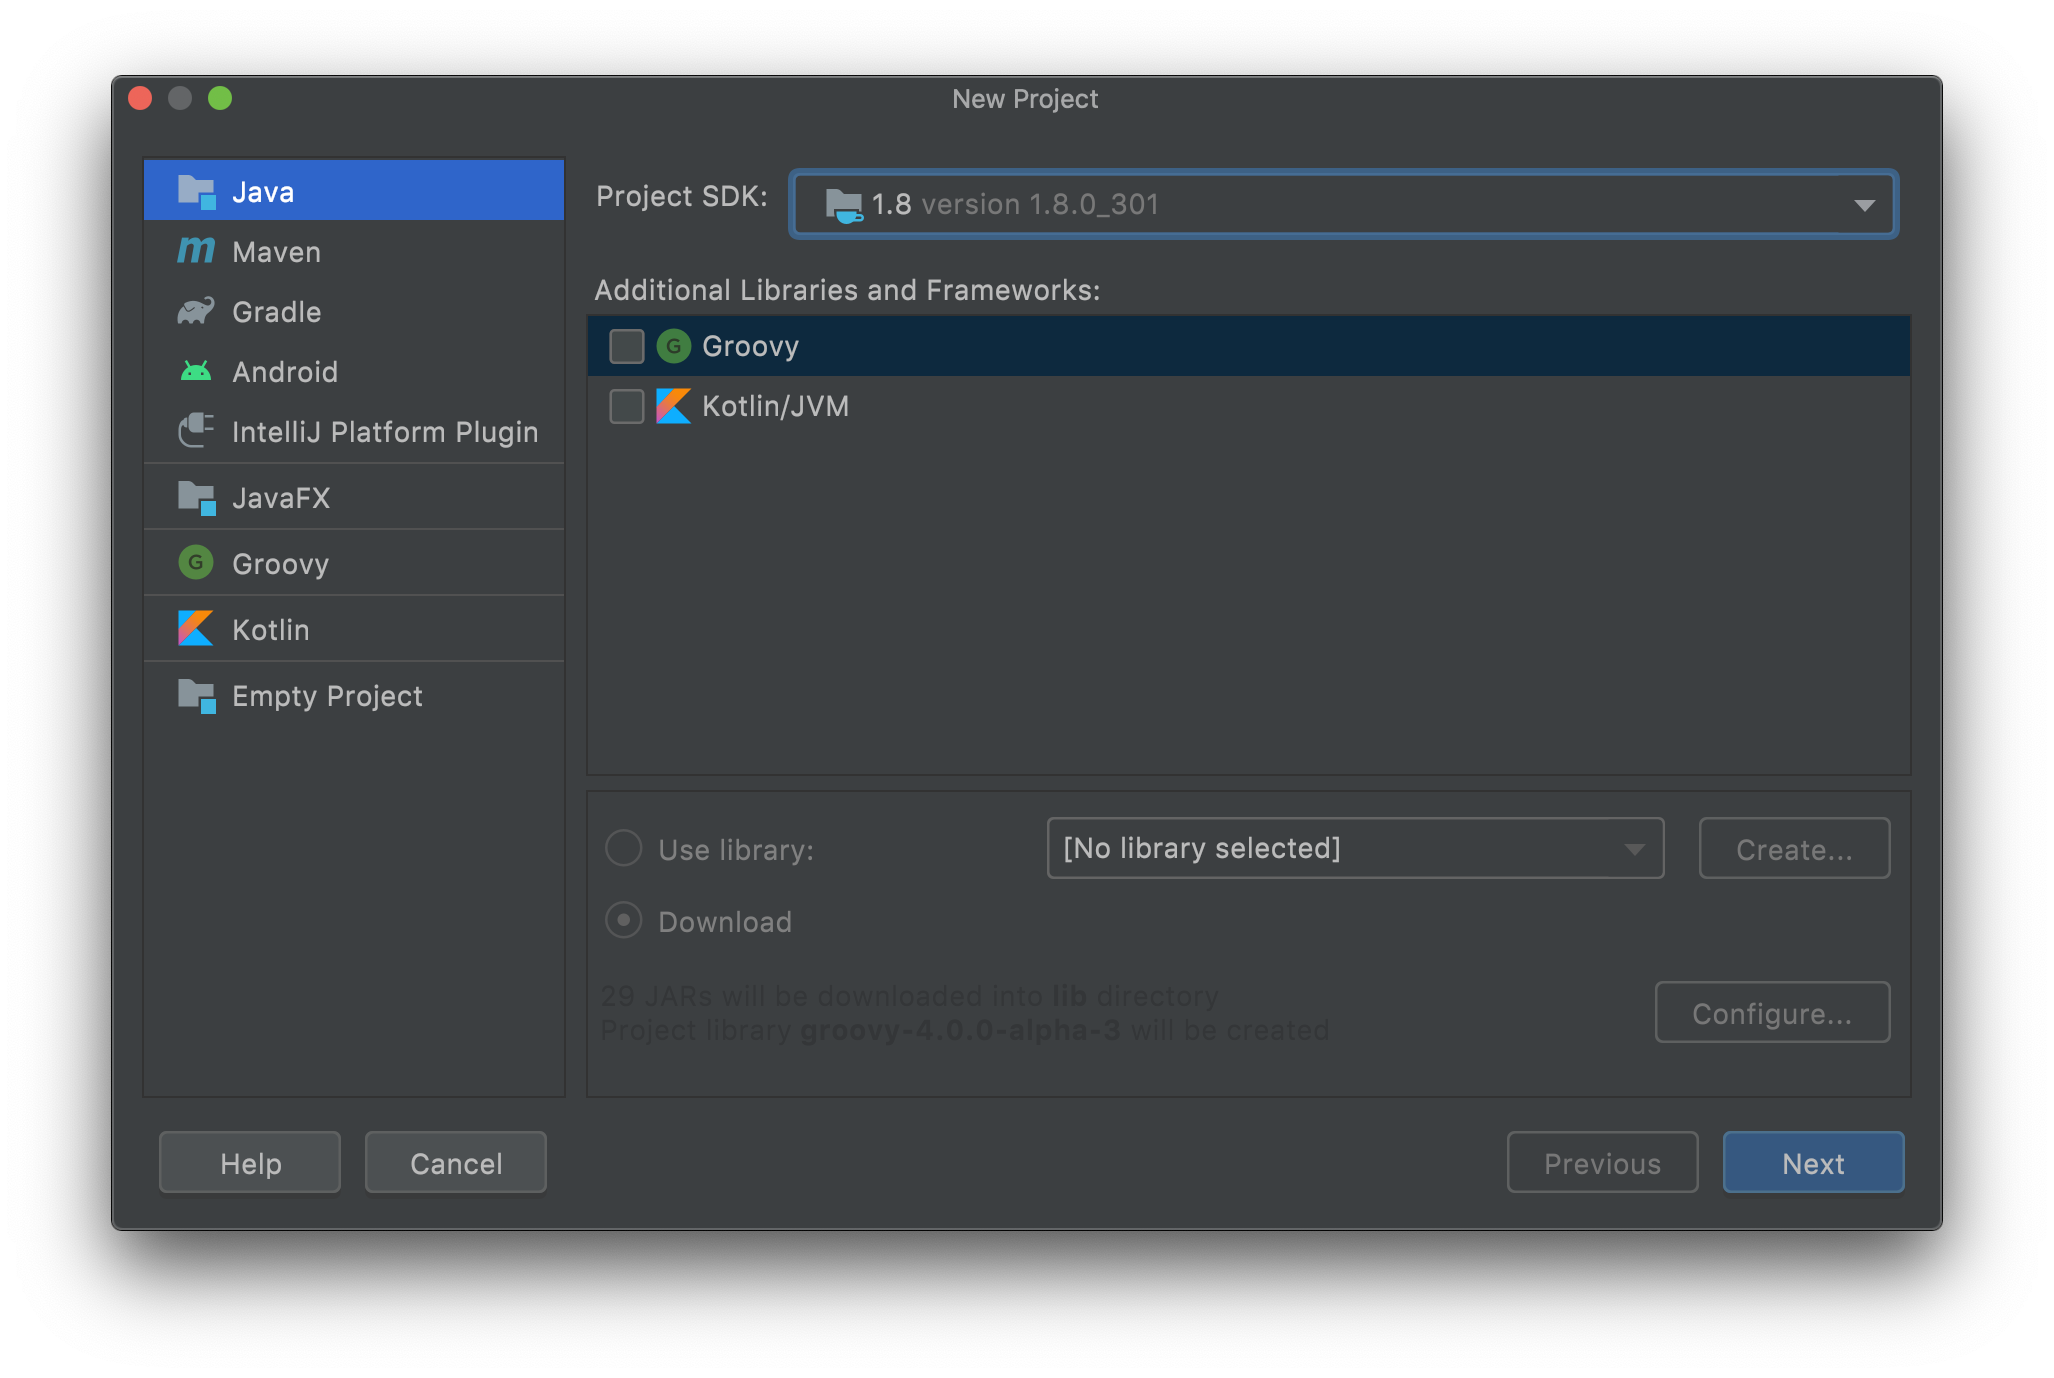
Select next.
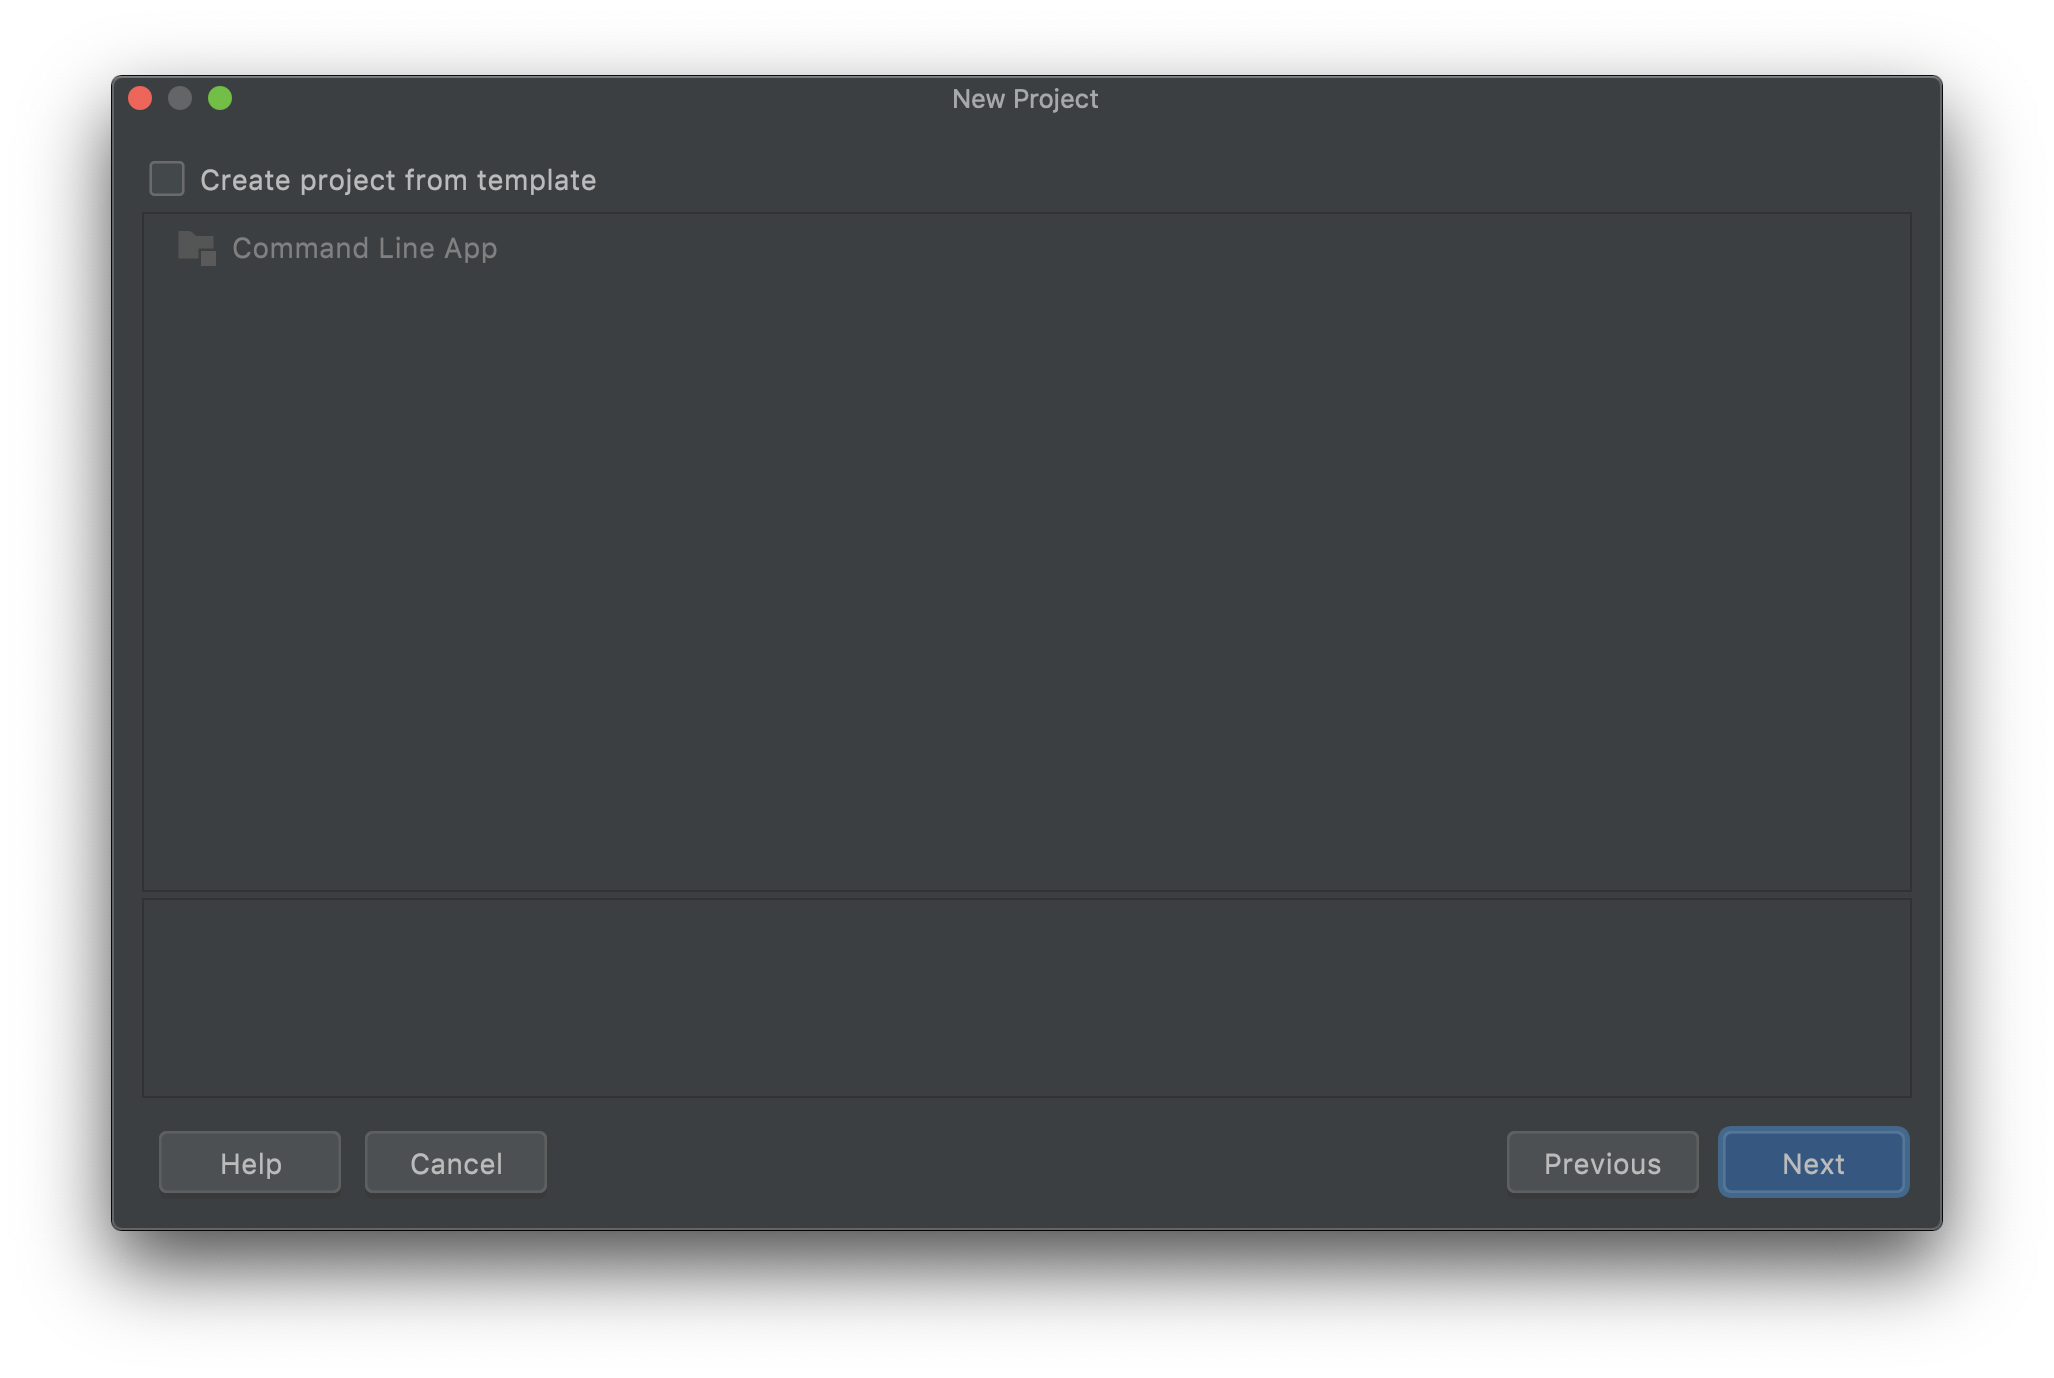
Select next.
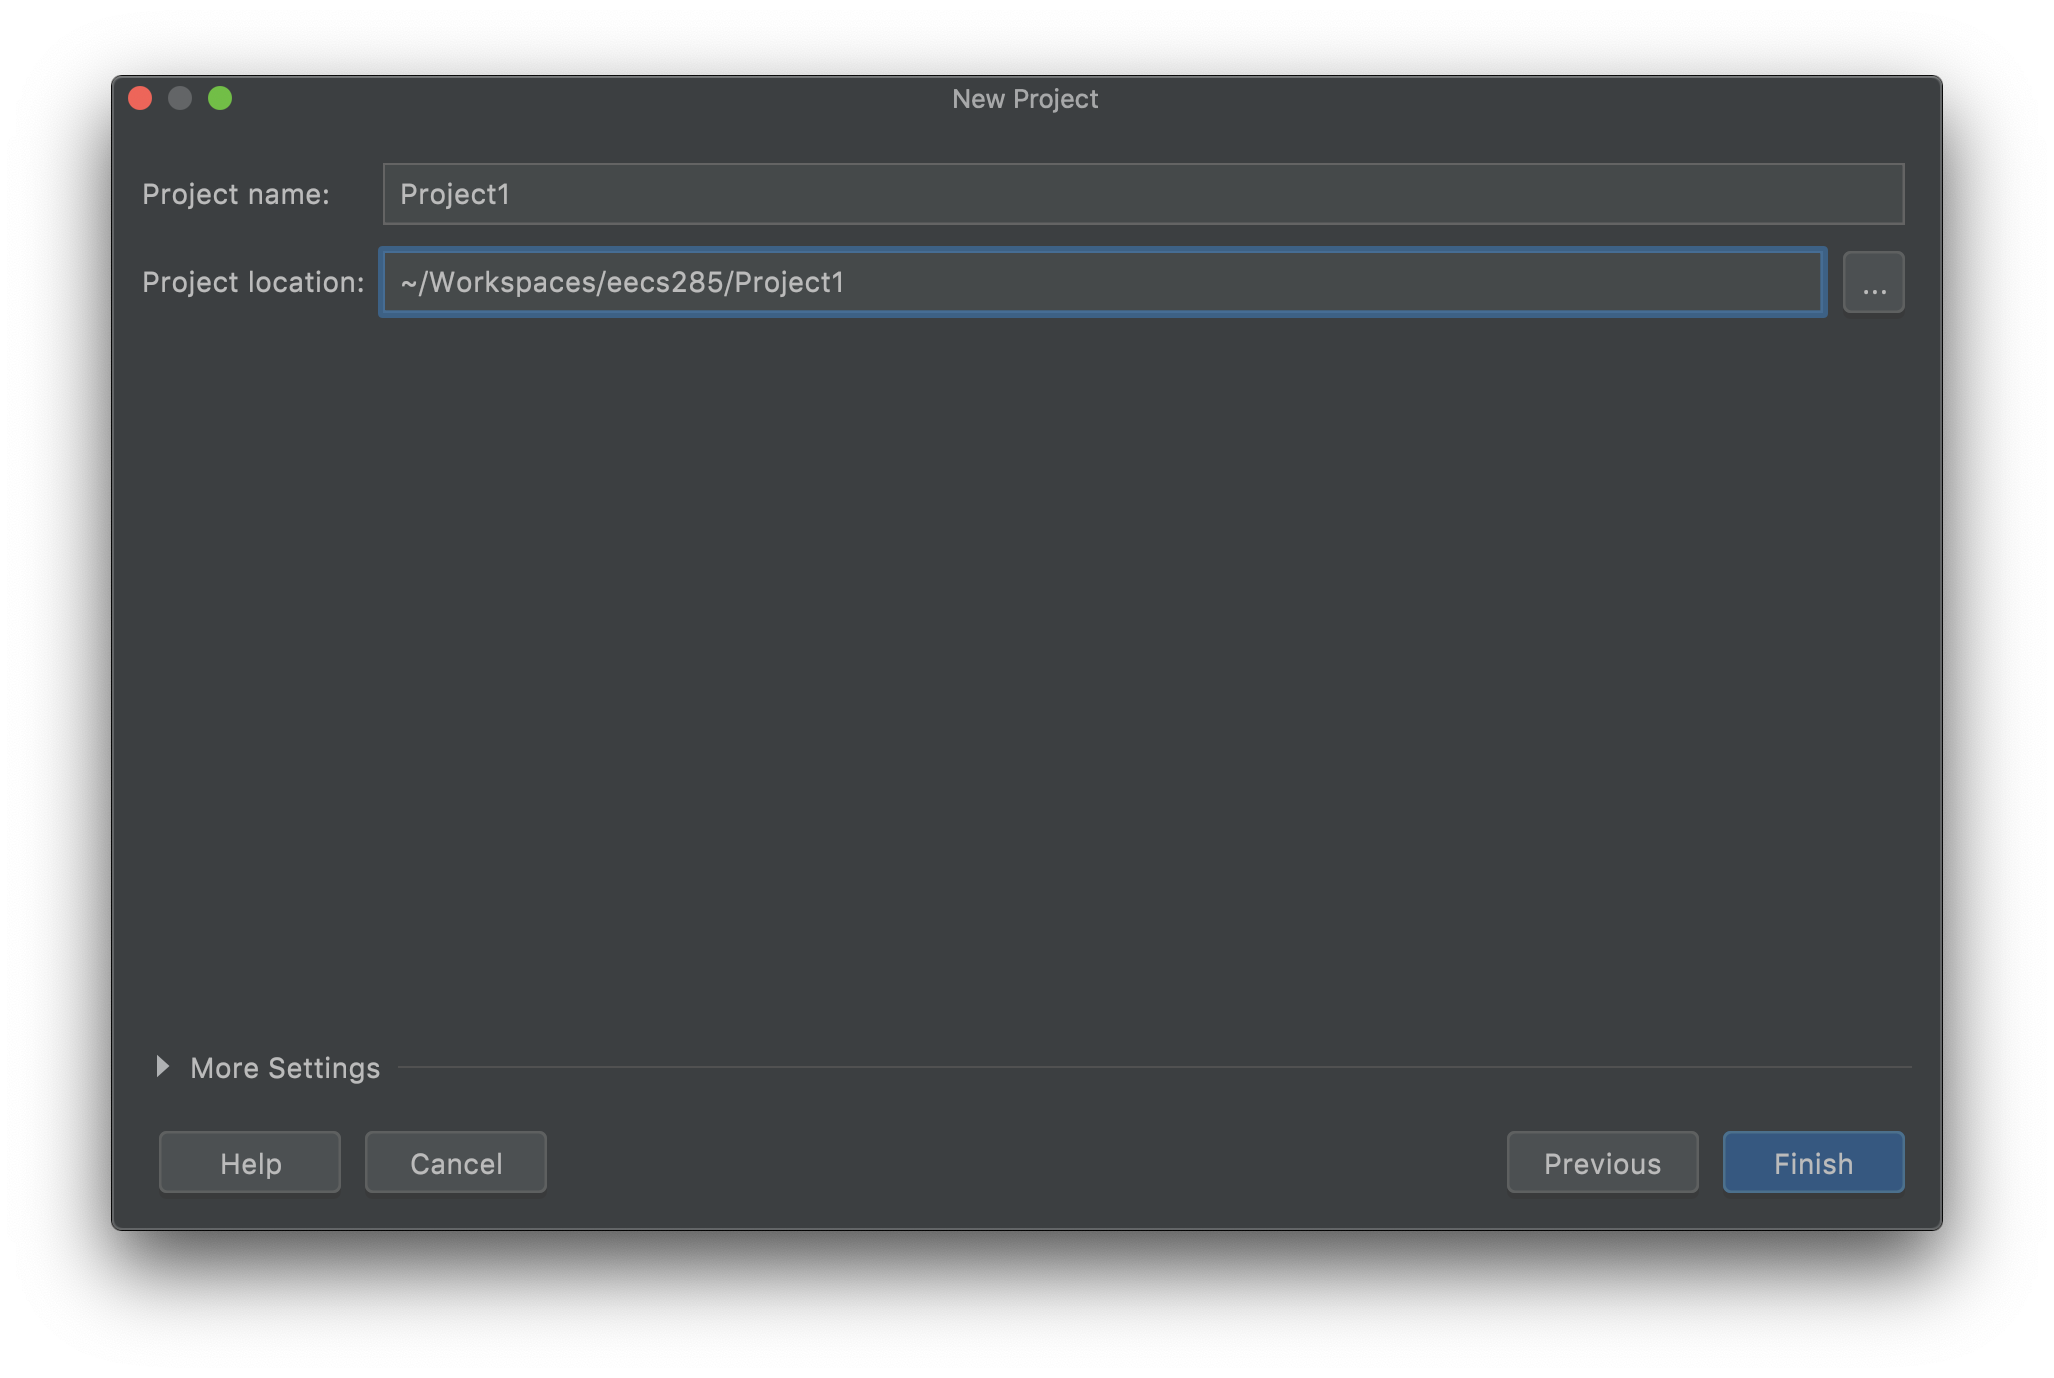
Select the file path that you created in the “Set up your Computer” section. Name the project “Project1”. Select “finish”.
Create a Package
Right click the src folder from the file dropdown on the left side of the screen. You may need to click on the “Project” button on the left to expand the file dropdown.
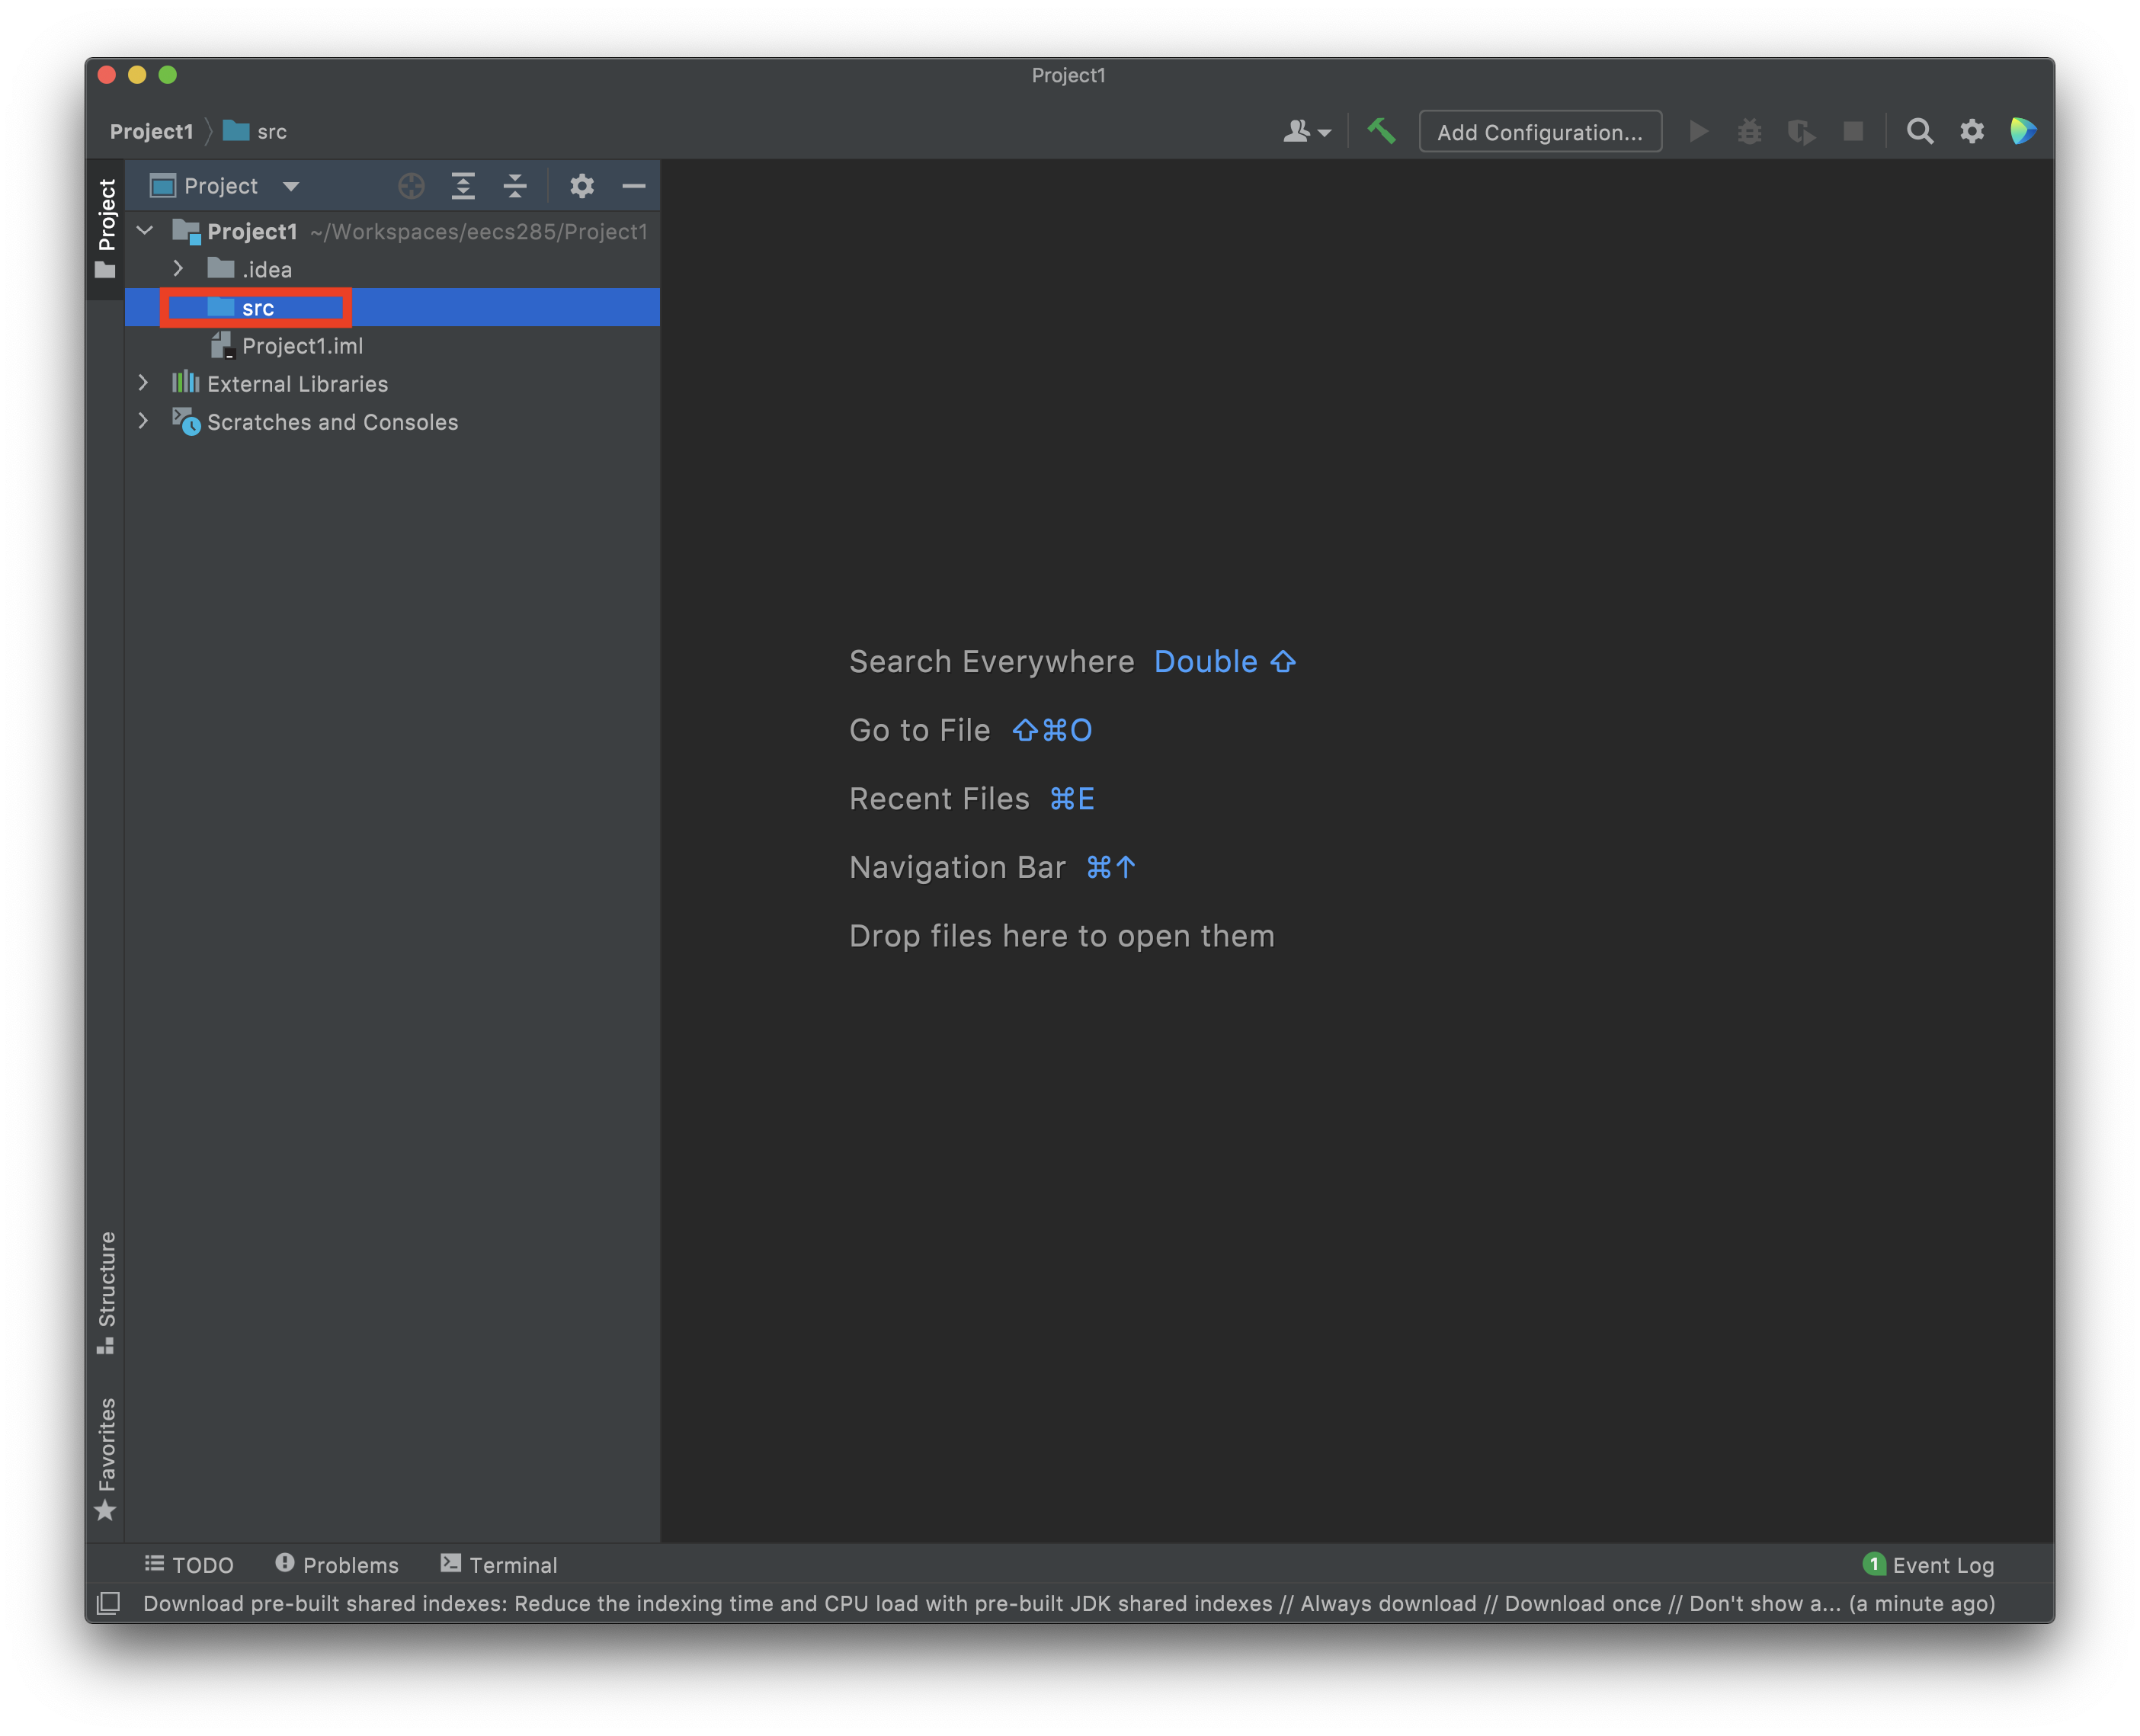
Select “New”->”Package” from the dropdown menu.
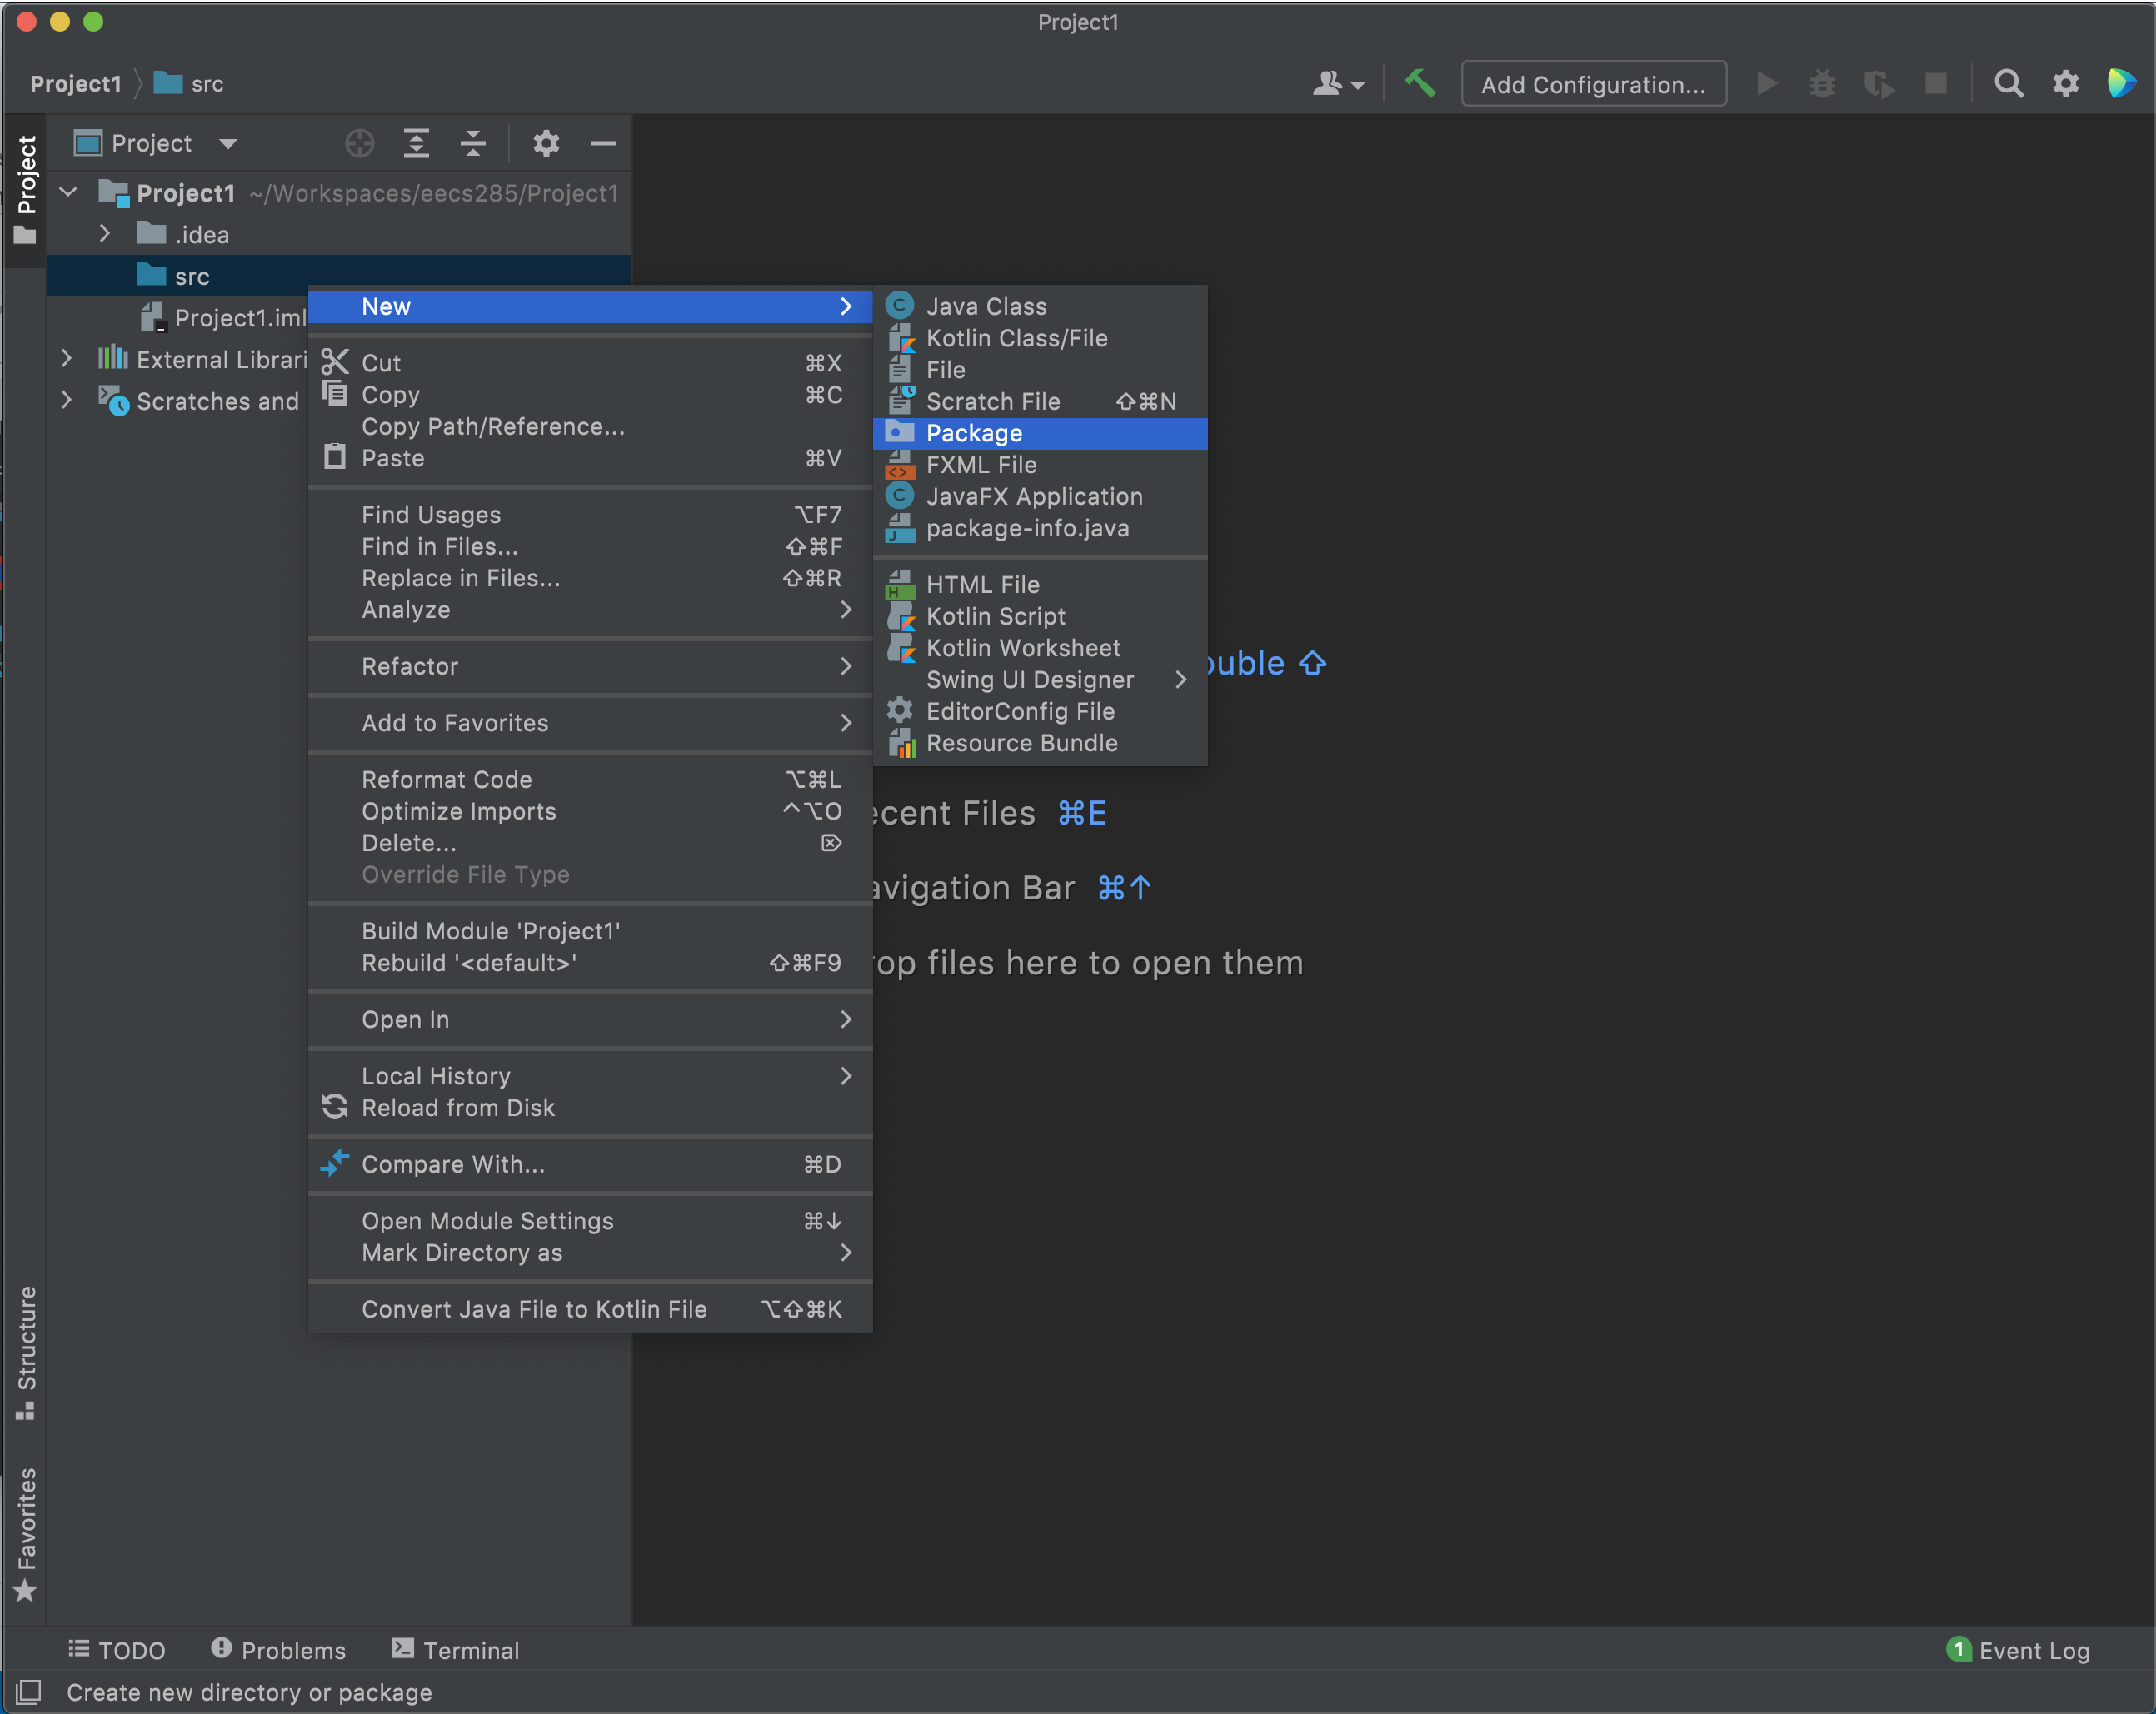
Name the package eecs285.proj1.<uniqname> replacing “<uniqname>” with your own uniqname. It is important that the package is named exactly right!

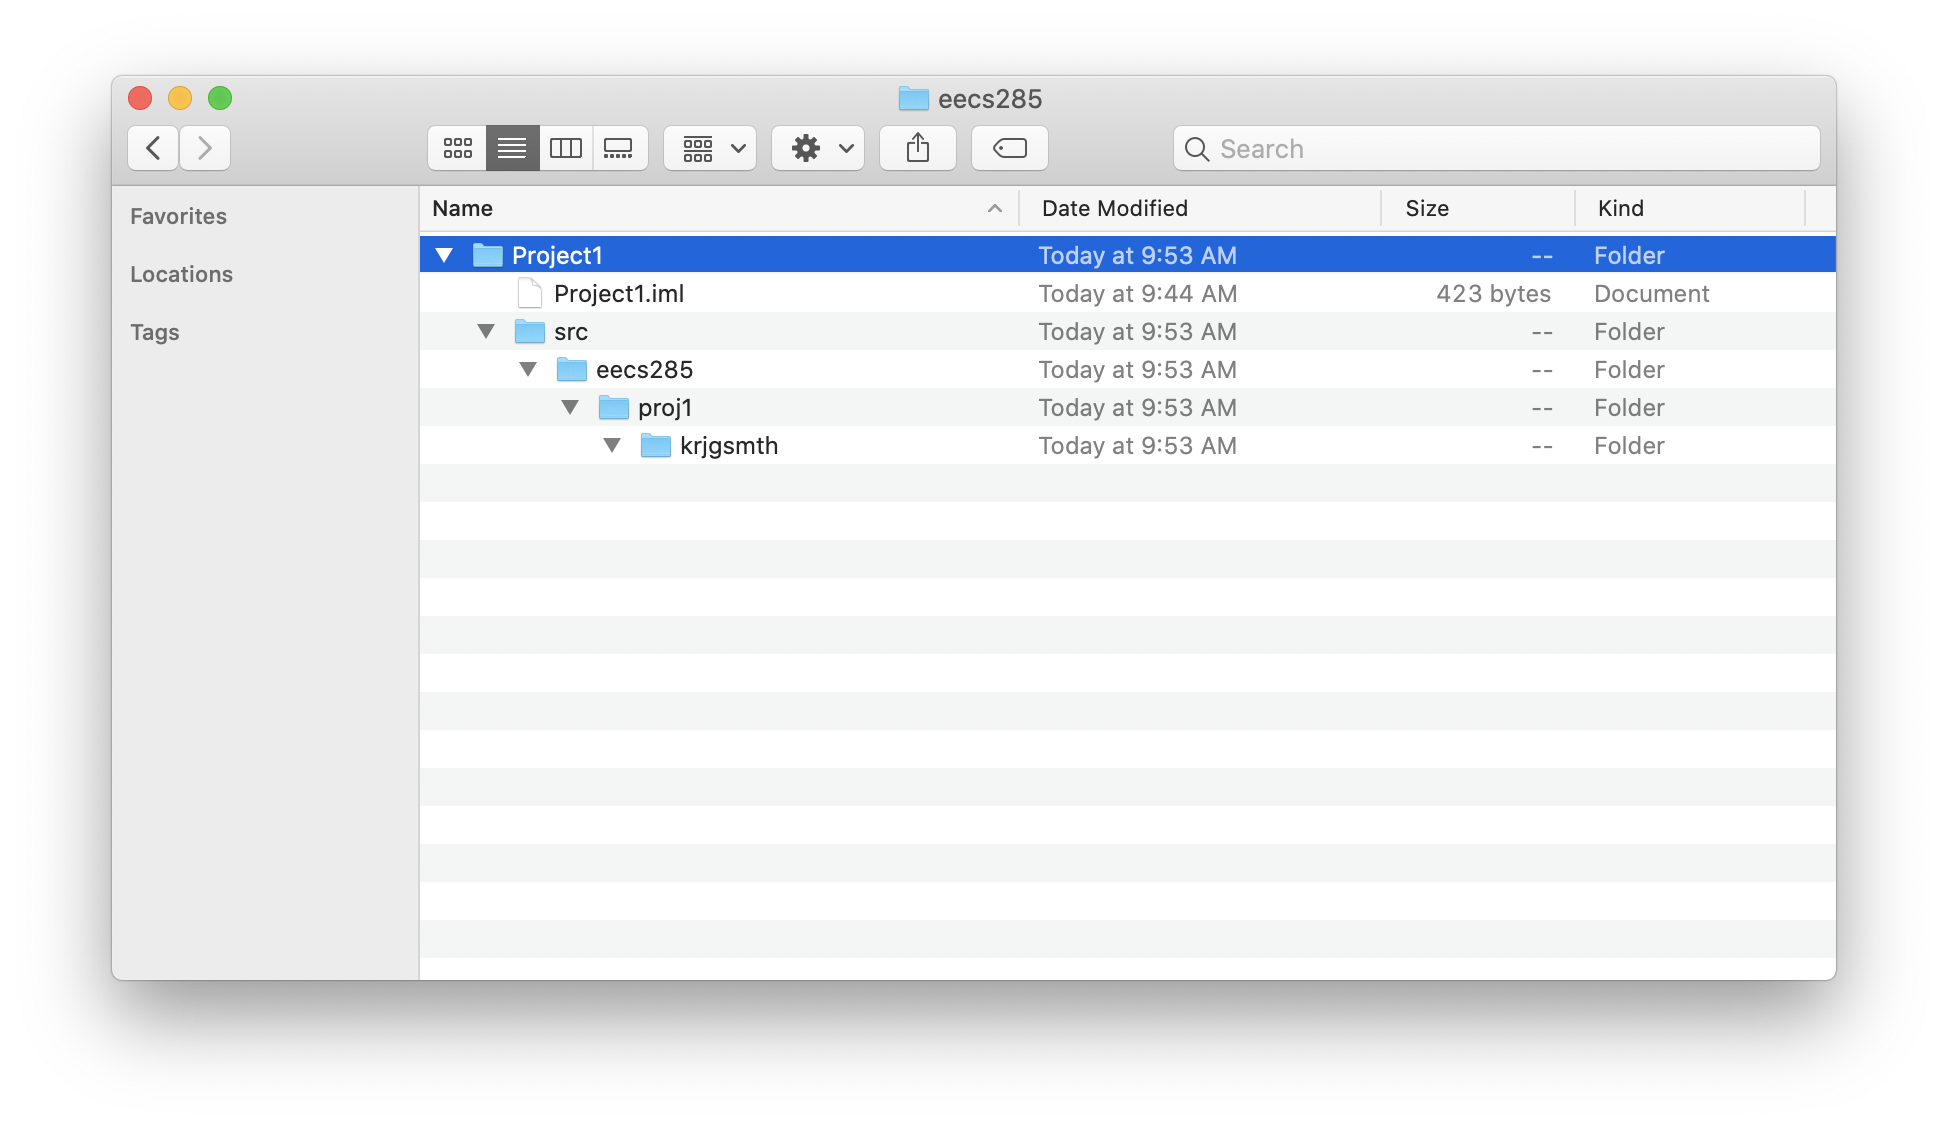
Your computer’s file system should now look like this.
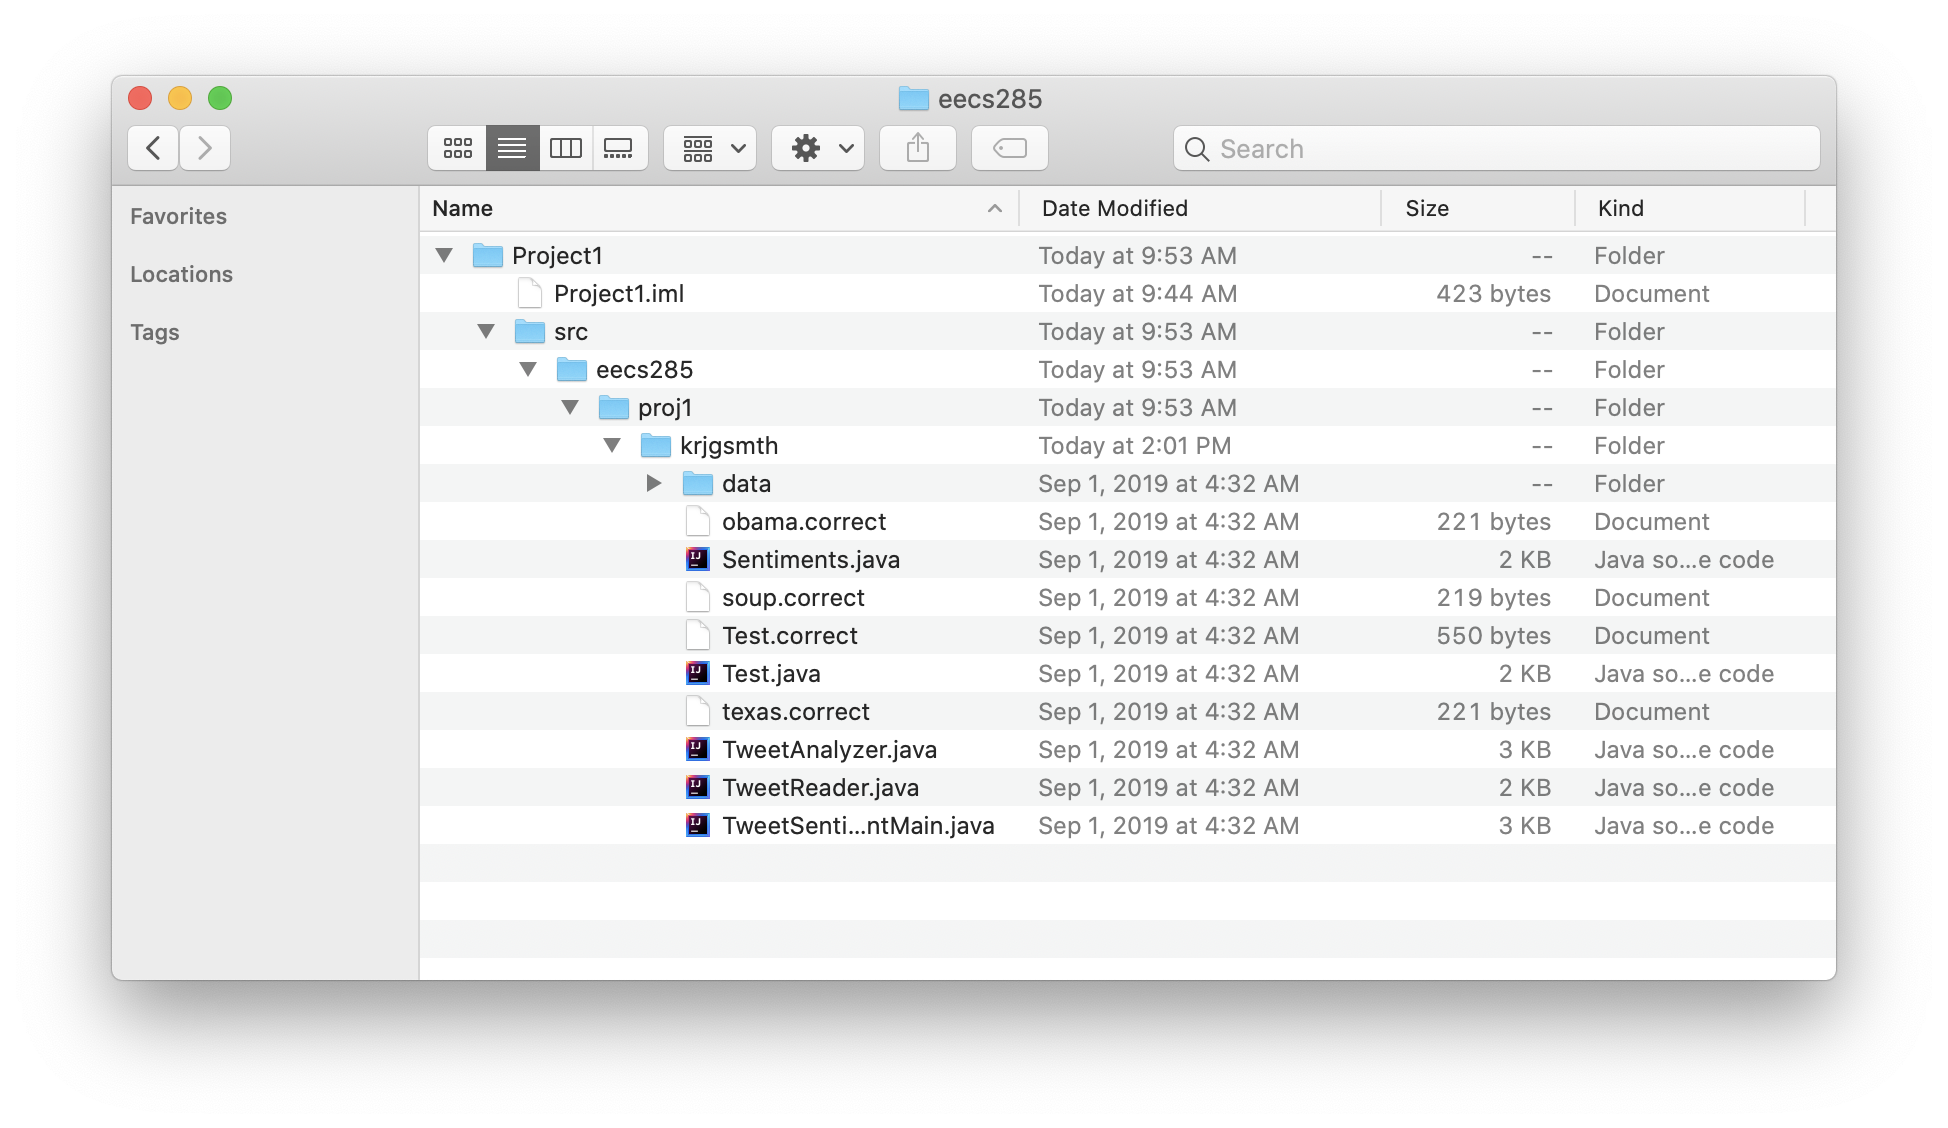
Move in Starter Files
Move the starter files for Project 1 into src->eecs285->proj1->uniqname. You can do so directly in your operating system’s file explorer. Alternatively, you can select all the starter files in your operating system’s file explorer, including the data folder, and drag them to eecs285.proj1.<uniqname> in the IntelliJ file dropdown. Select “OK” to confirm the move.
Your computer’s file system should now look like this.
Your IntelliJ project window should automatically update and look like this. You may need to click on the triangles to expand the hierarchy.

This is a good time to put the following package directive at the top of each .java file:
package eecs285.proj1.<uniqname>;
Dont forget to change <uniqname> to your actual uniqname! Double click on a source file to open it.
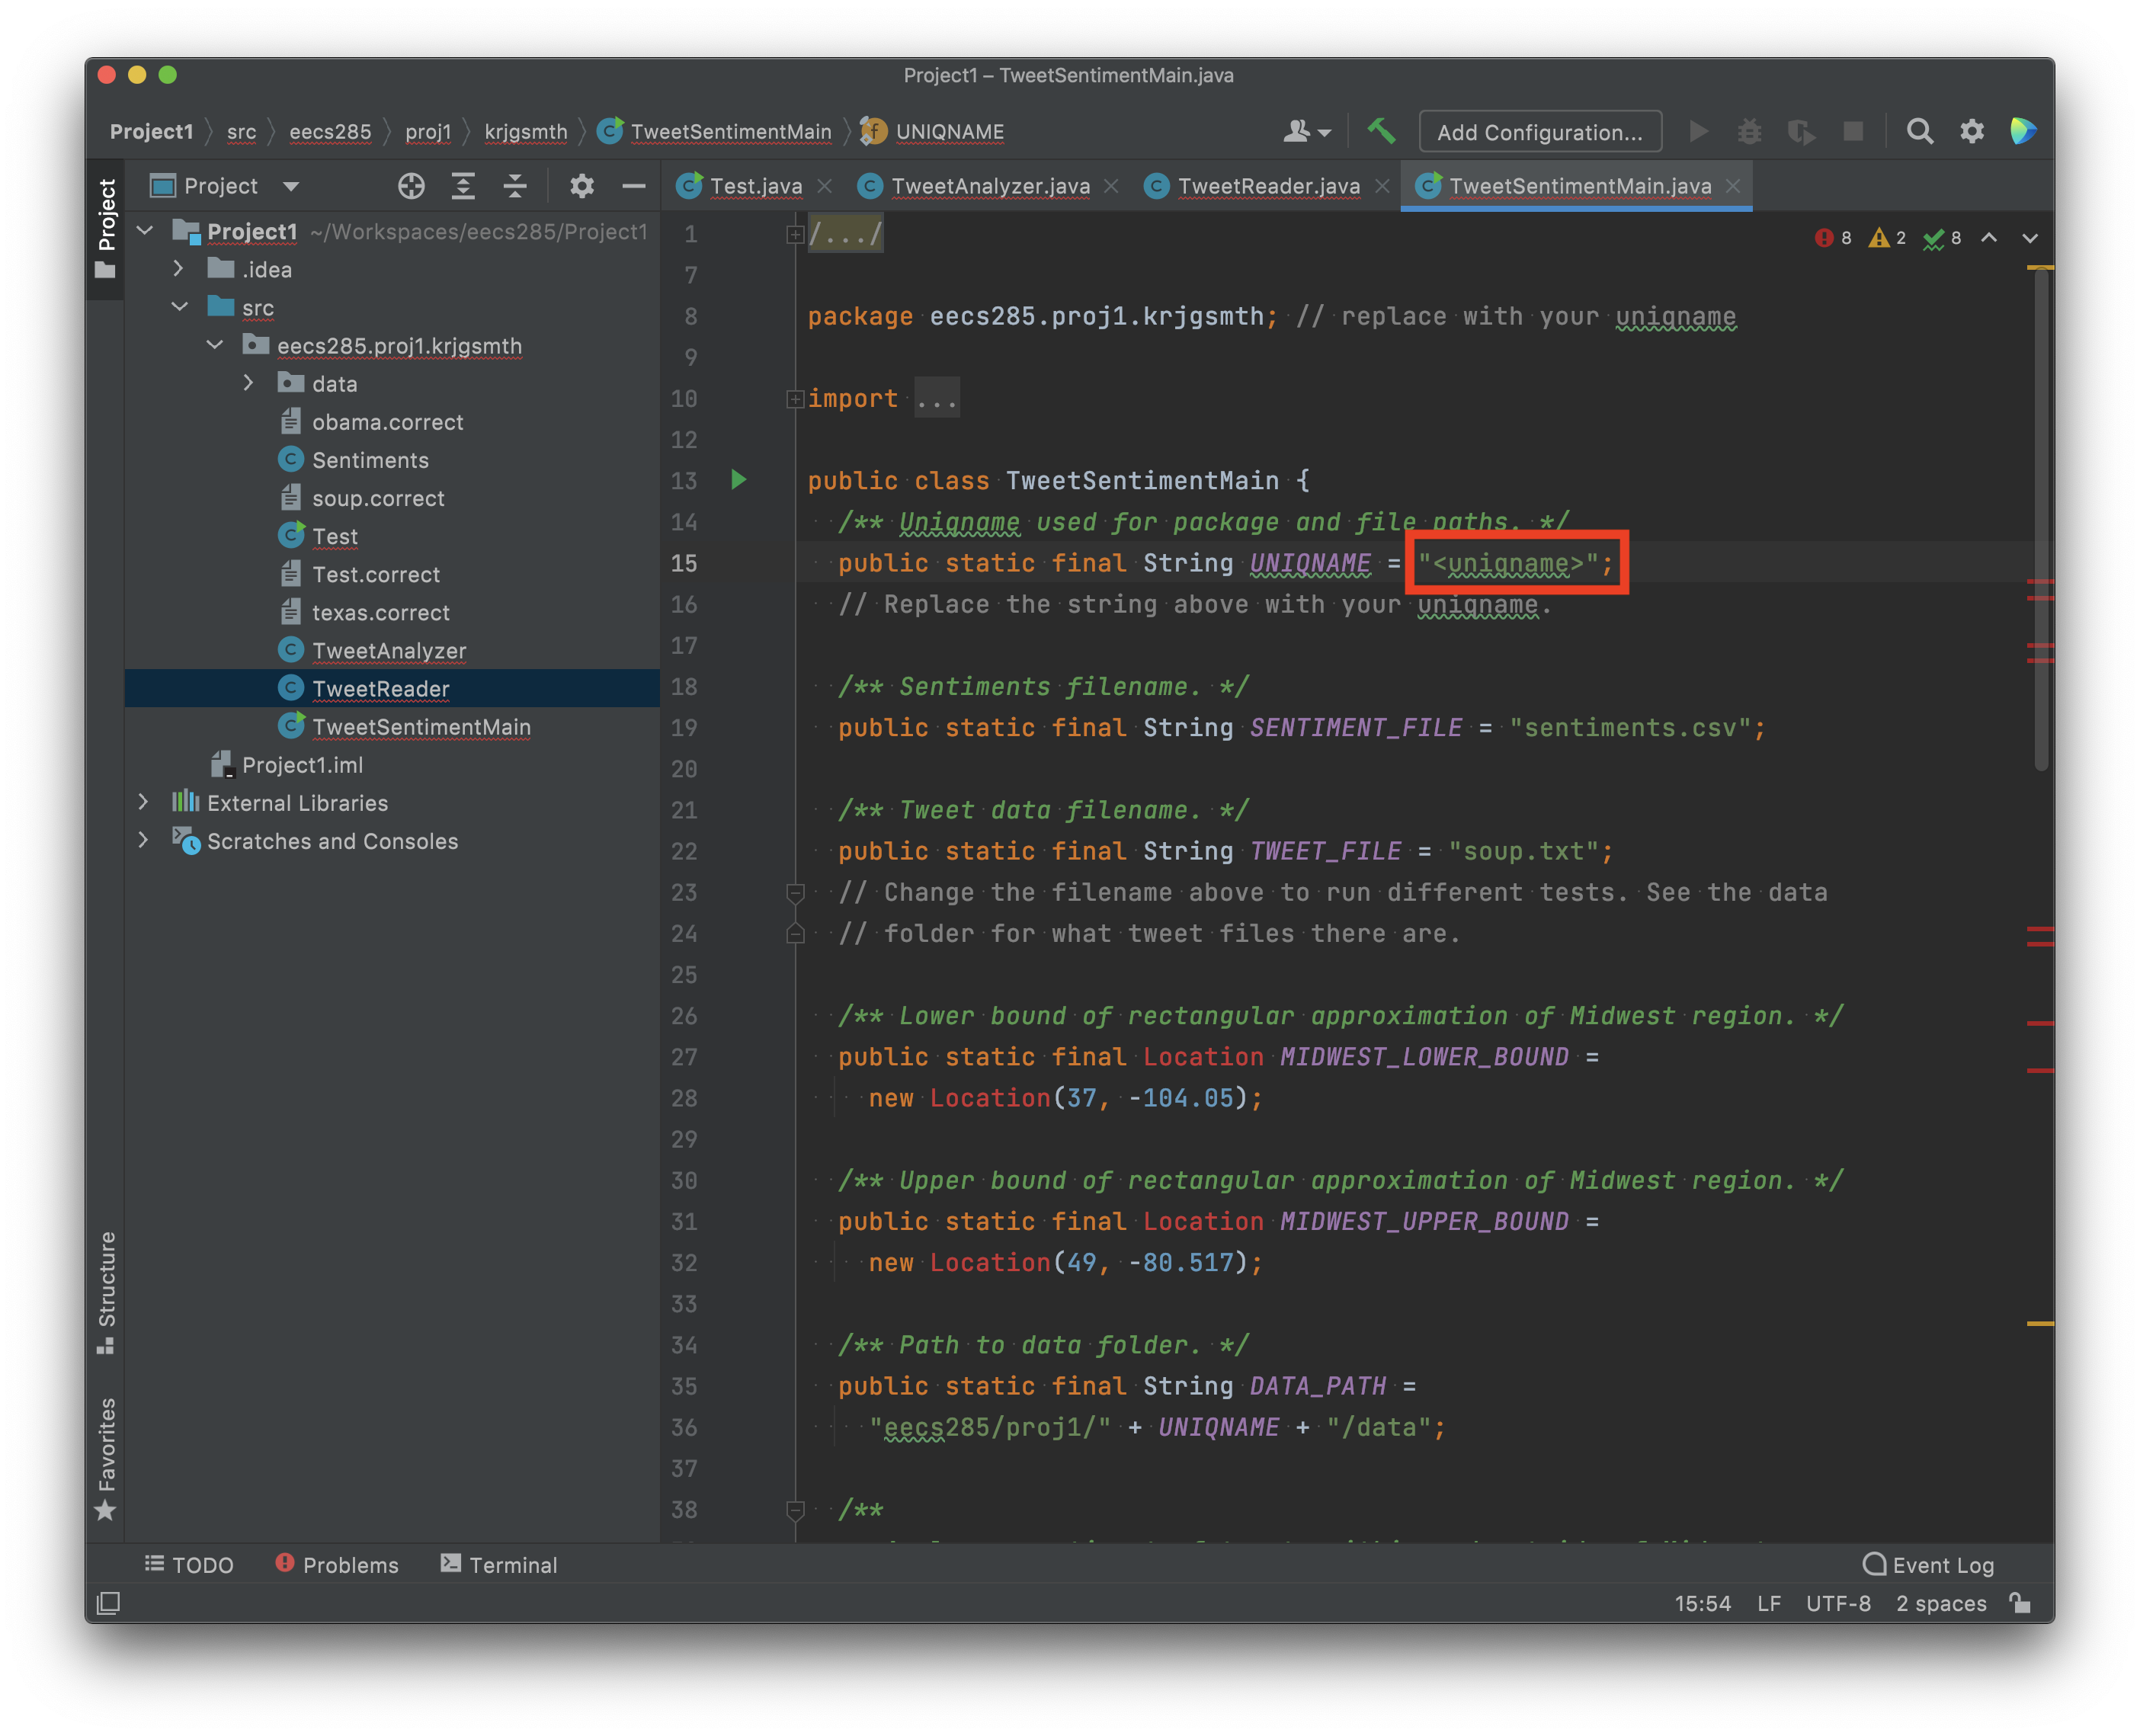
Also replace <uniqname> in the definition of the UNIQNAME constant in TweetSentimentMain with your unqiname.
Create New Java Classes
As mentioned in the Project 1 spec, you will need to add the classes Location and Twitter.
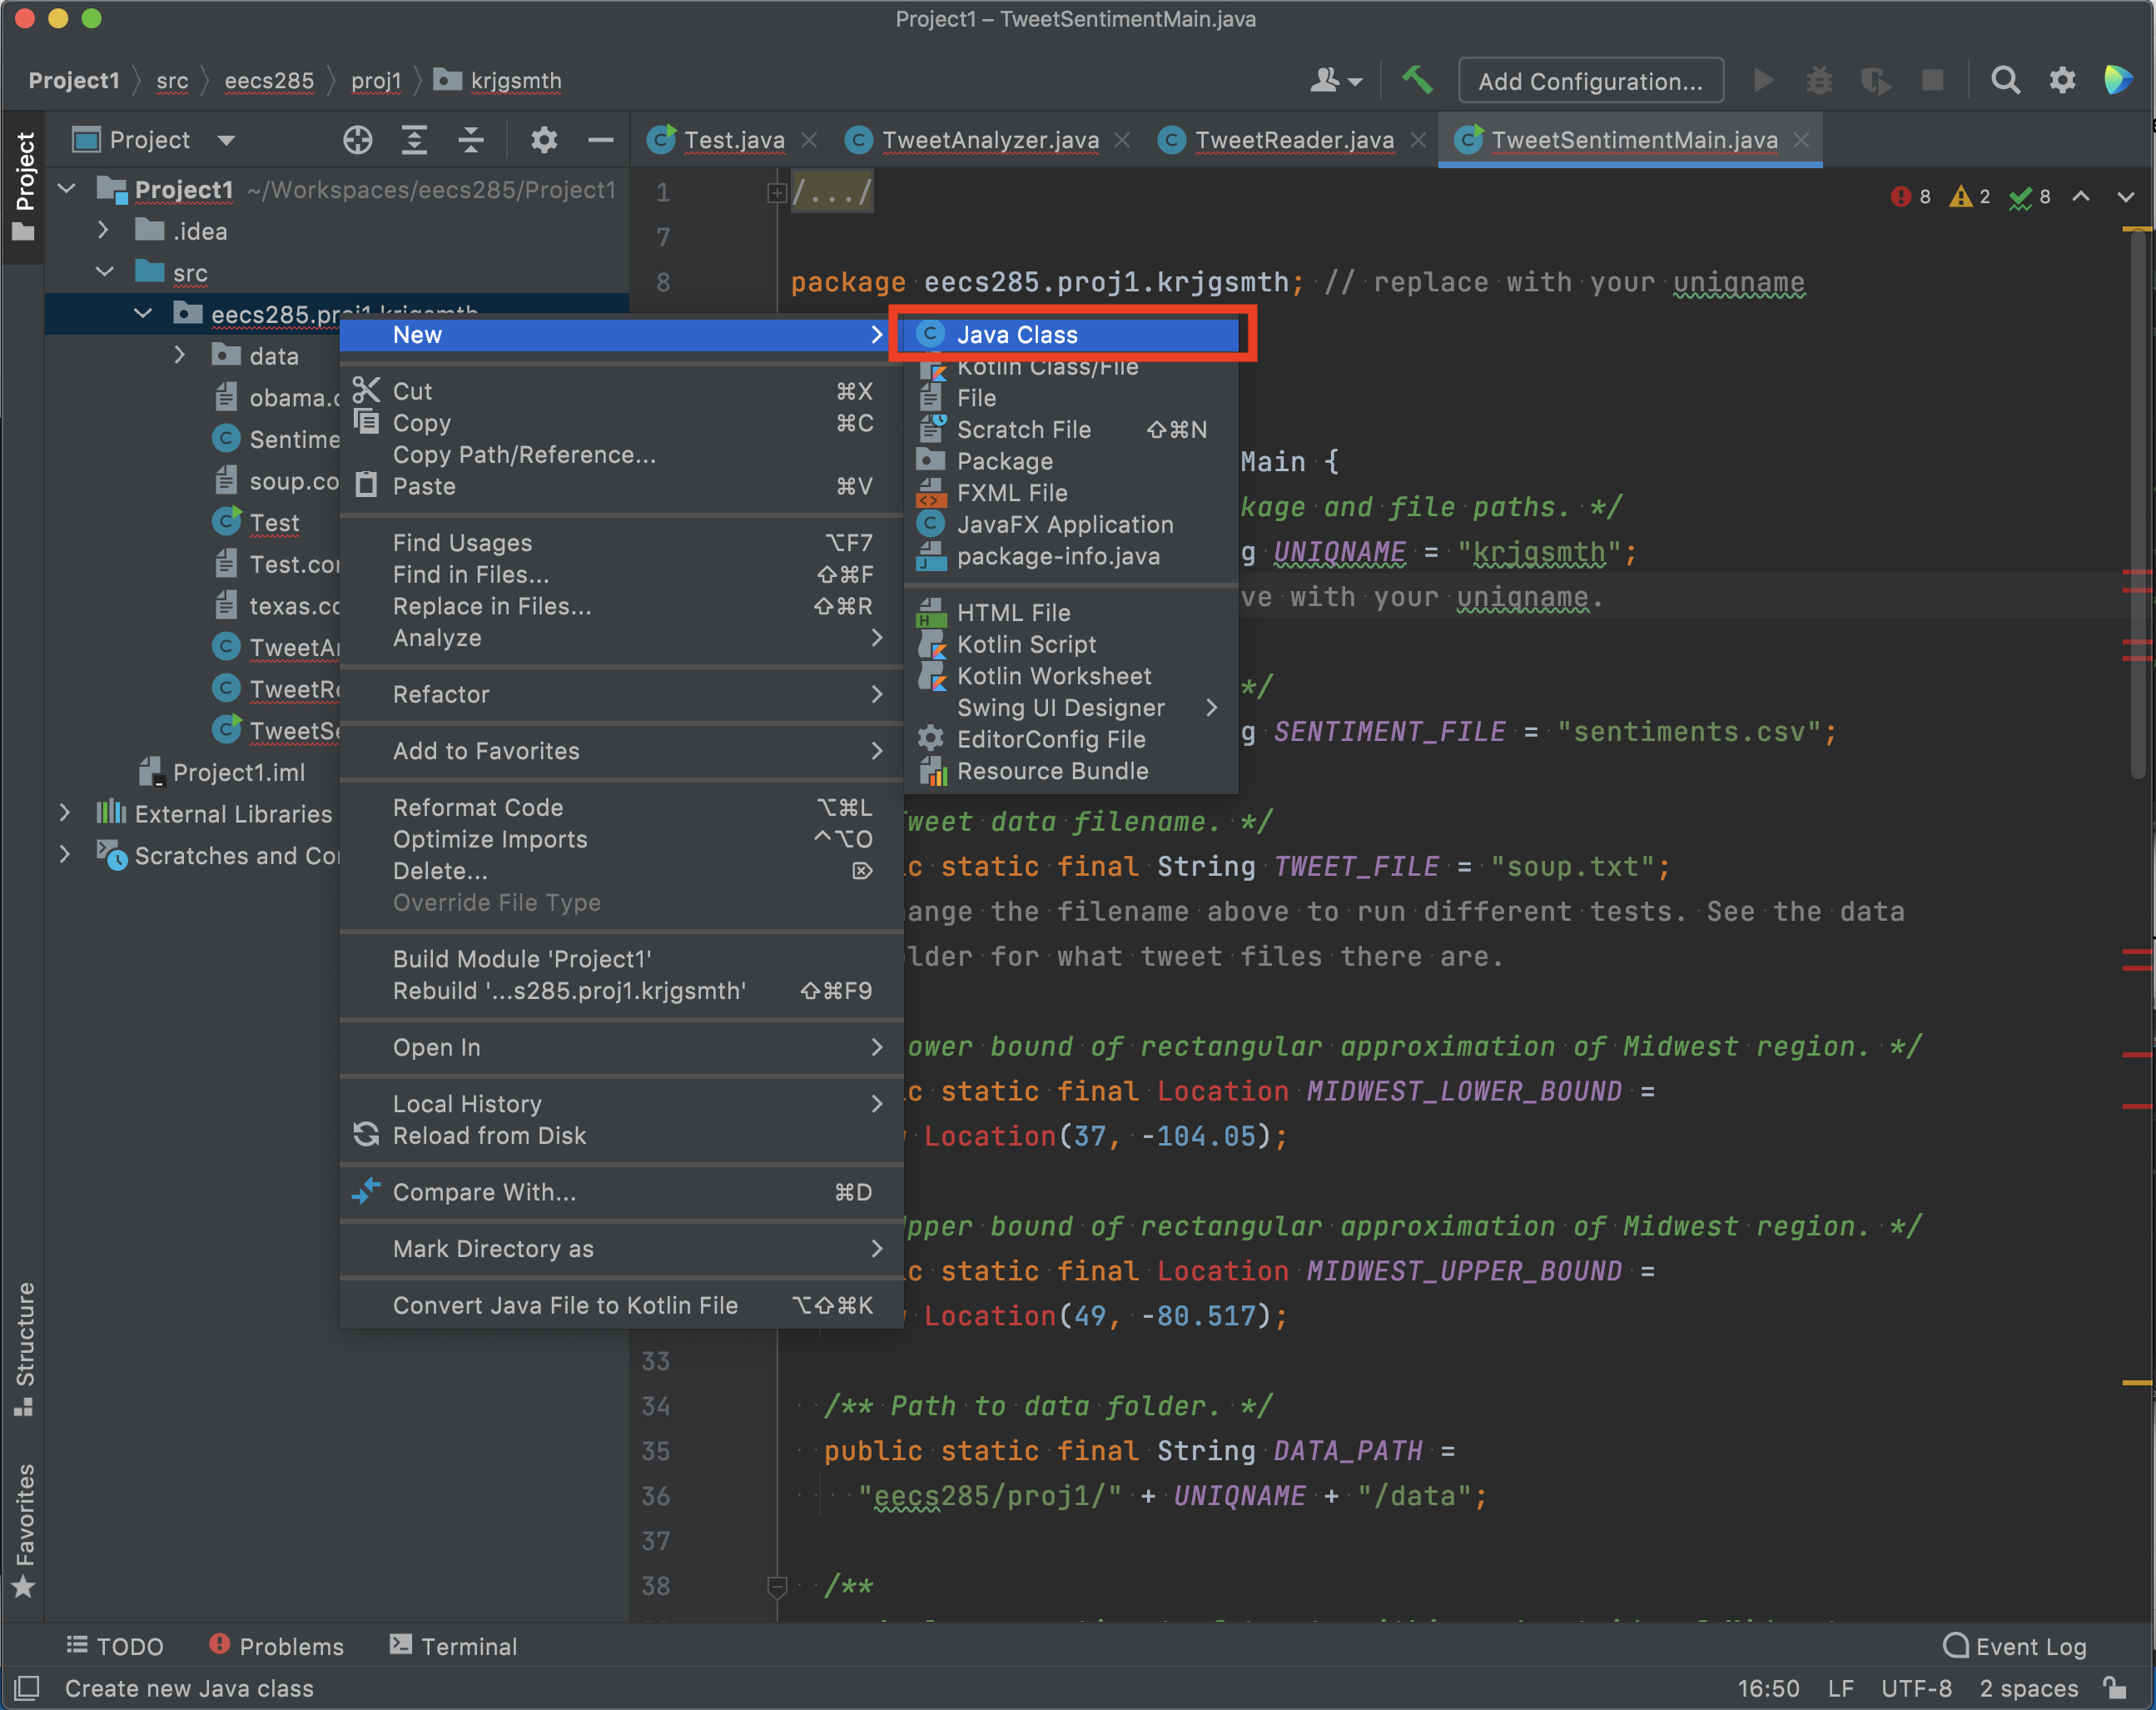
Right click the eecs285.proj1.schatzju package on the file dropdown on the left side of the screen.

Select “New”->”Java Class” from the dropdown menu.
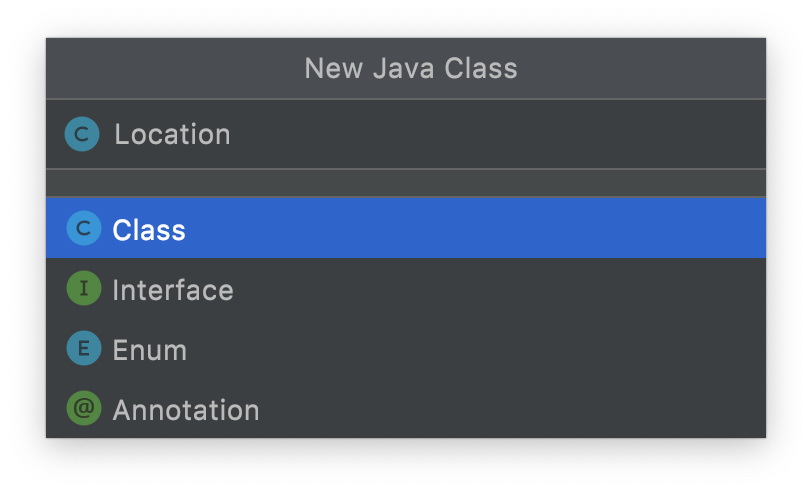
Name the new class.
Follow the instructions in the Project 1 spec to add stubs to the two new classes.
-
LocationClass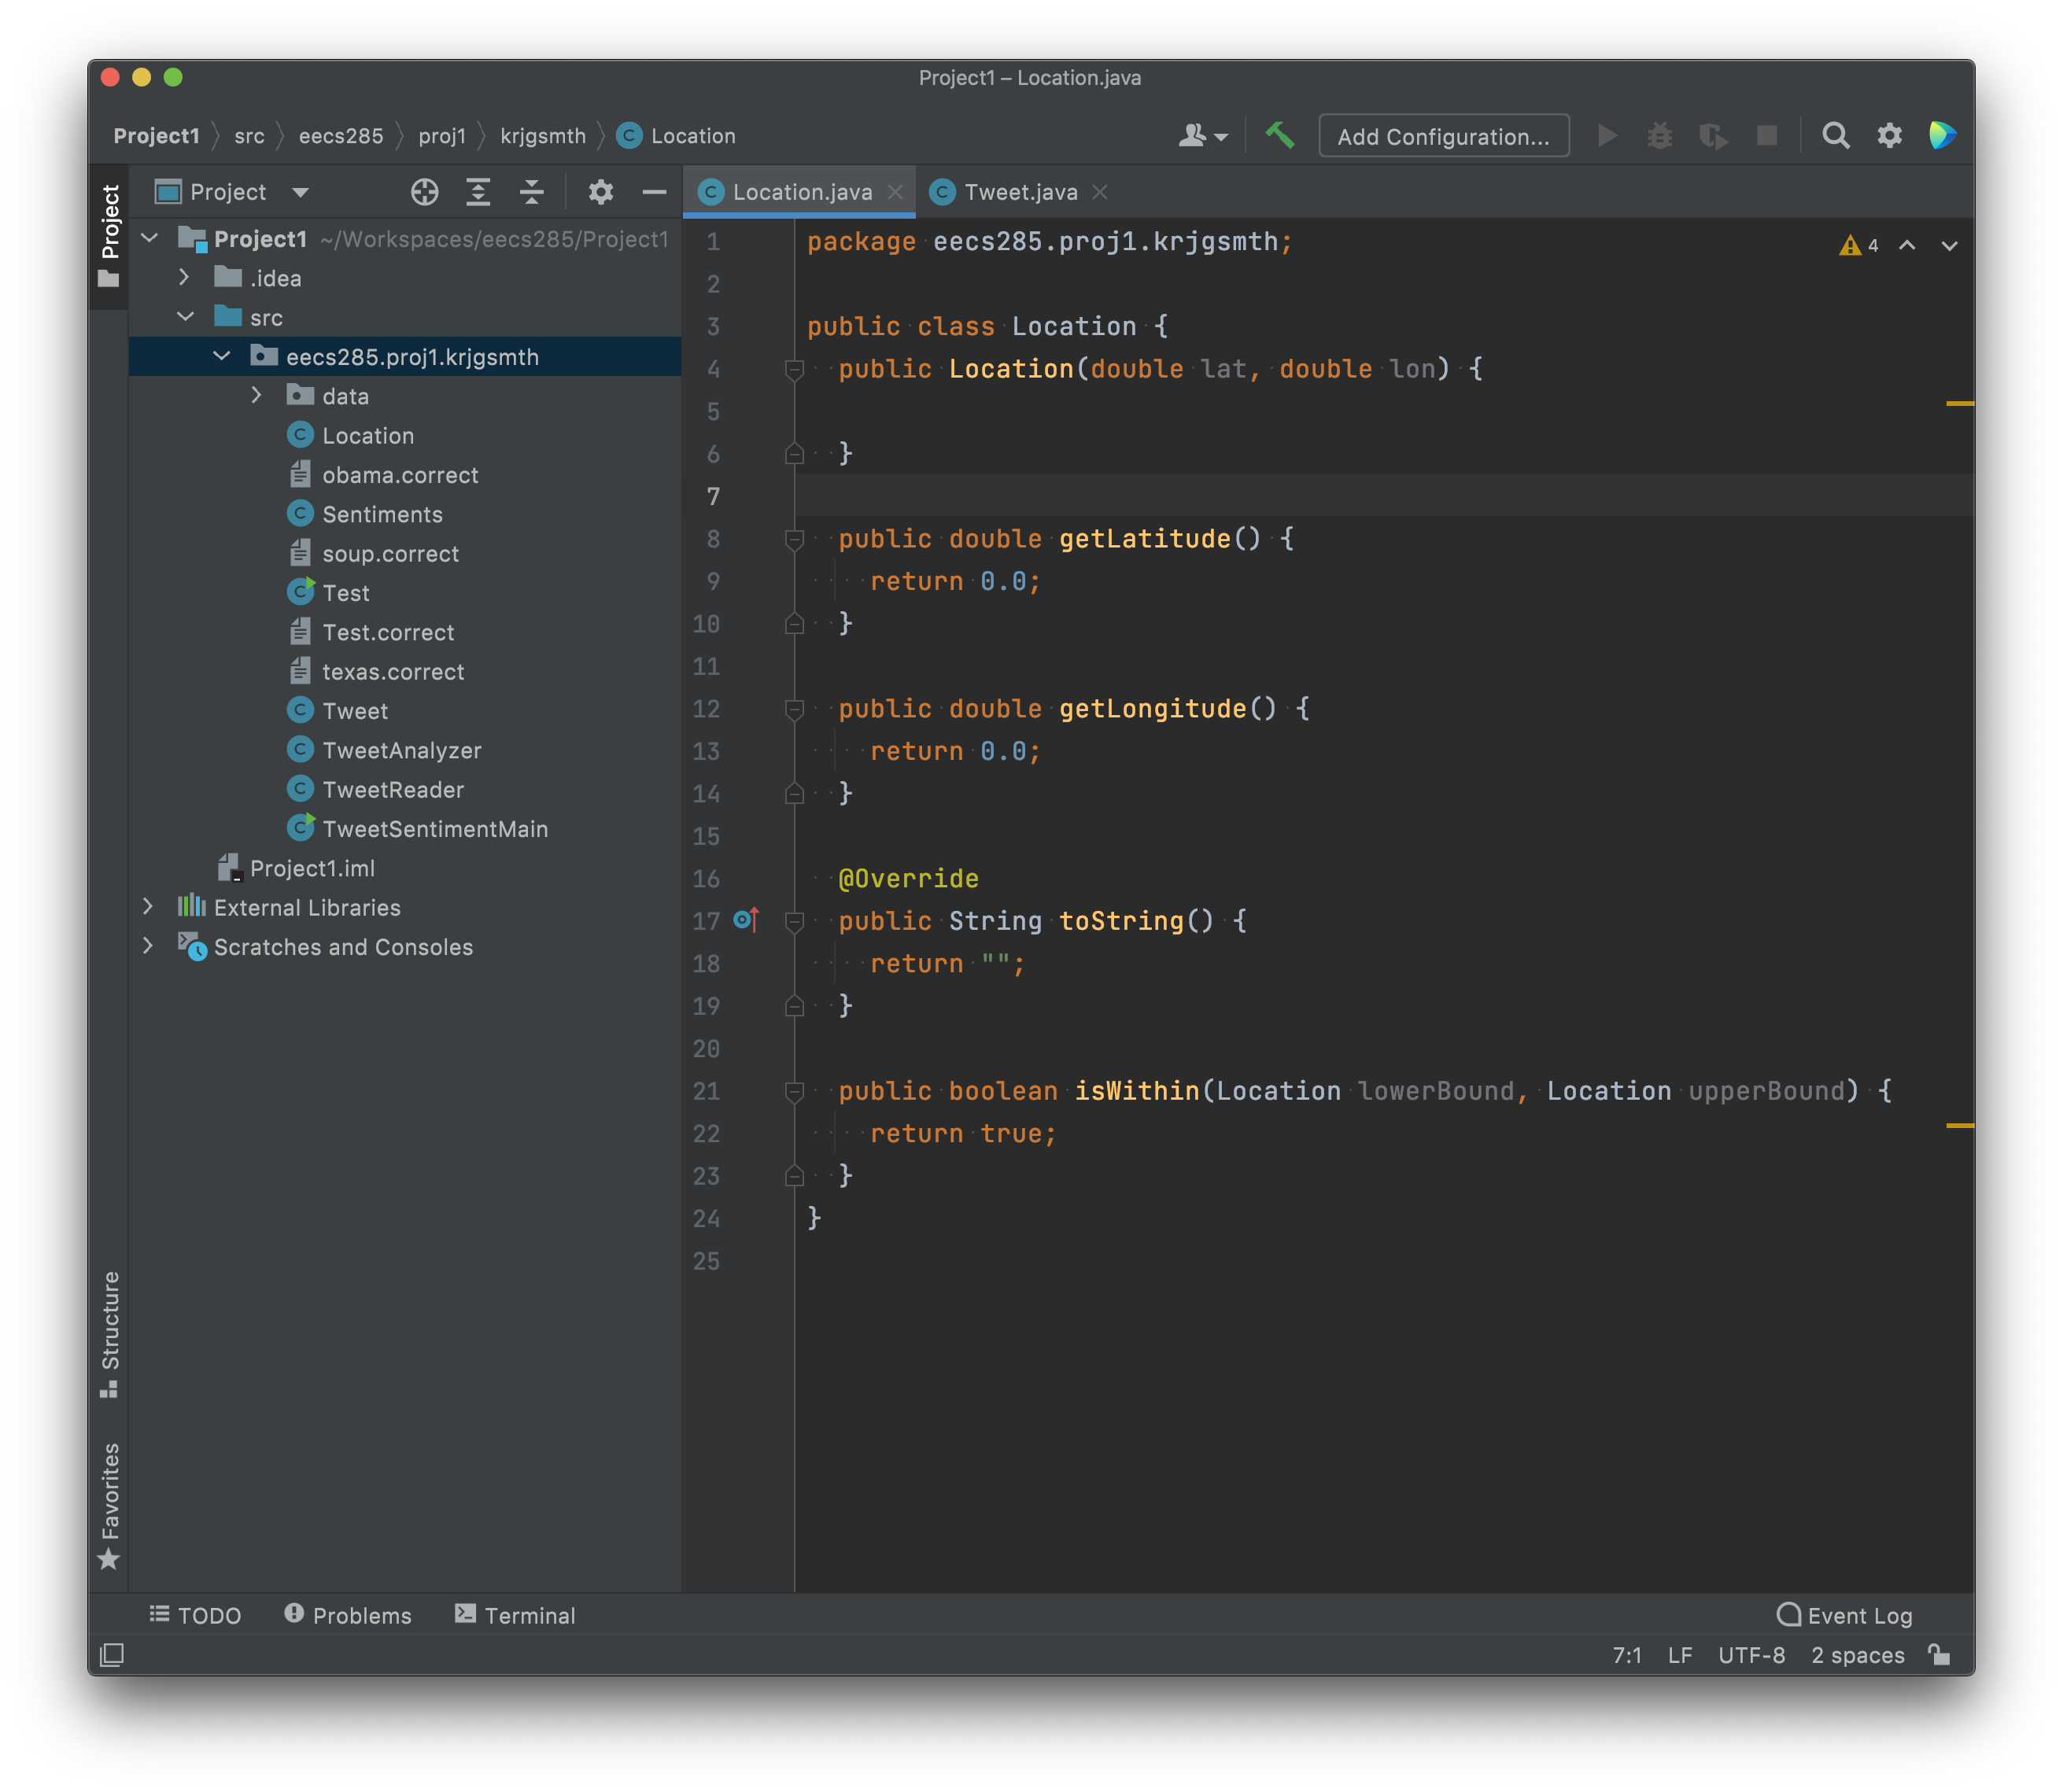
-
TweetClass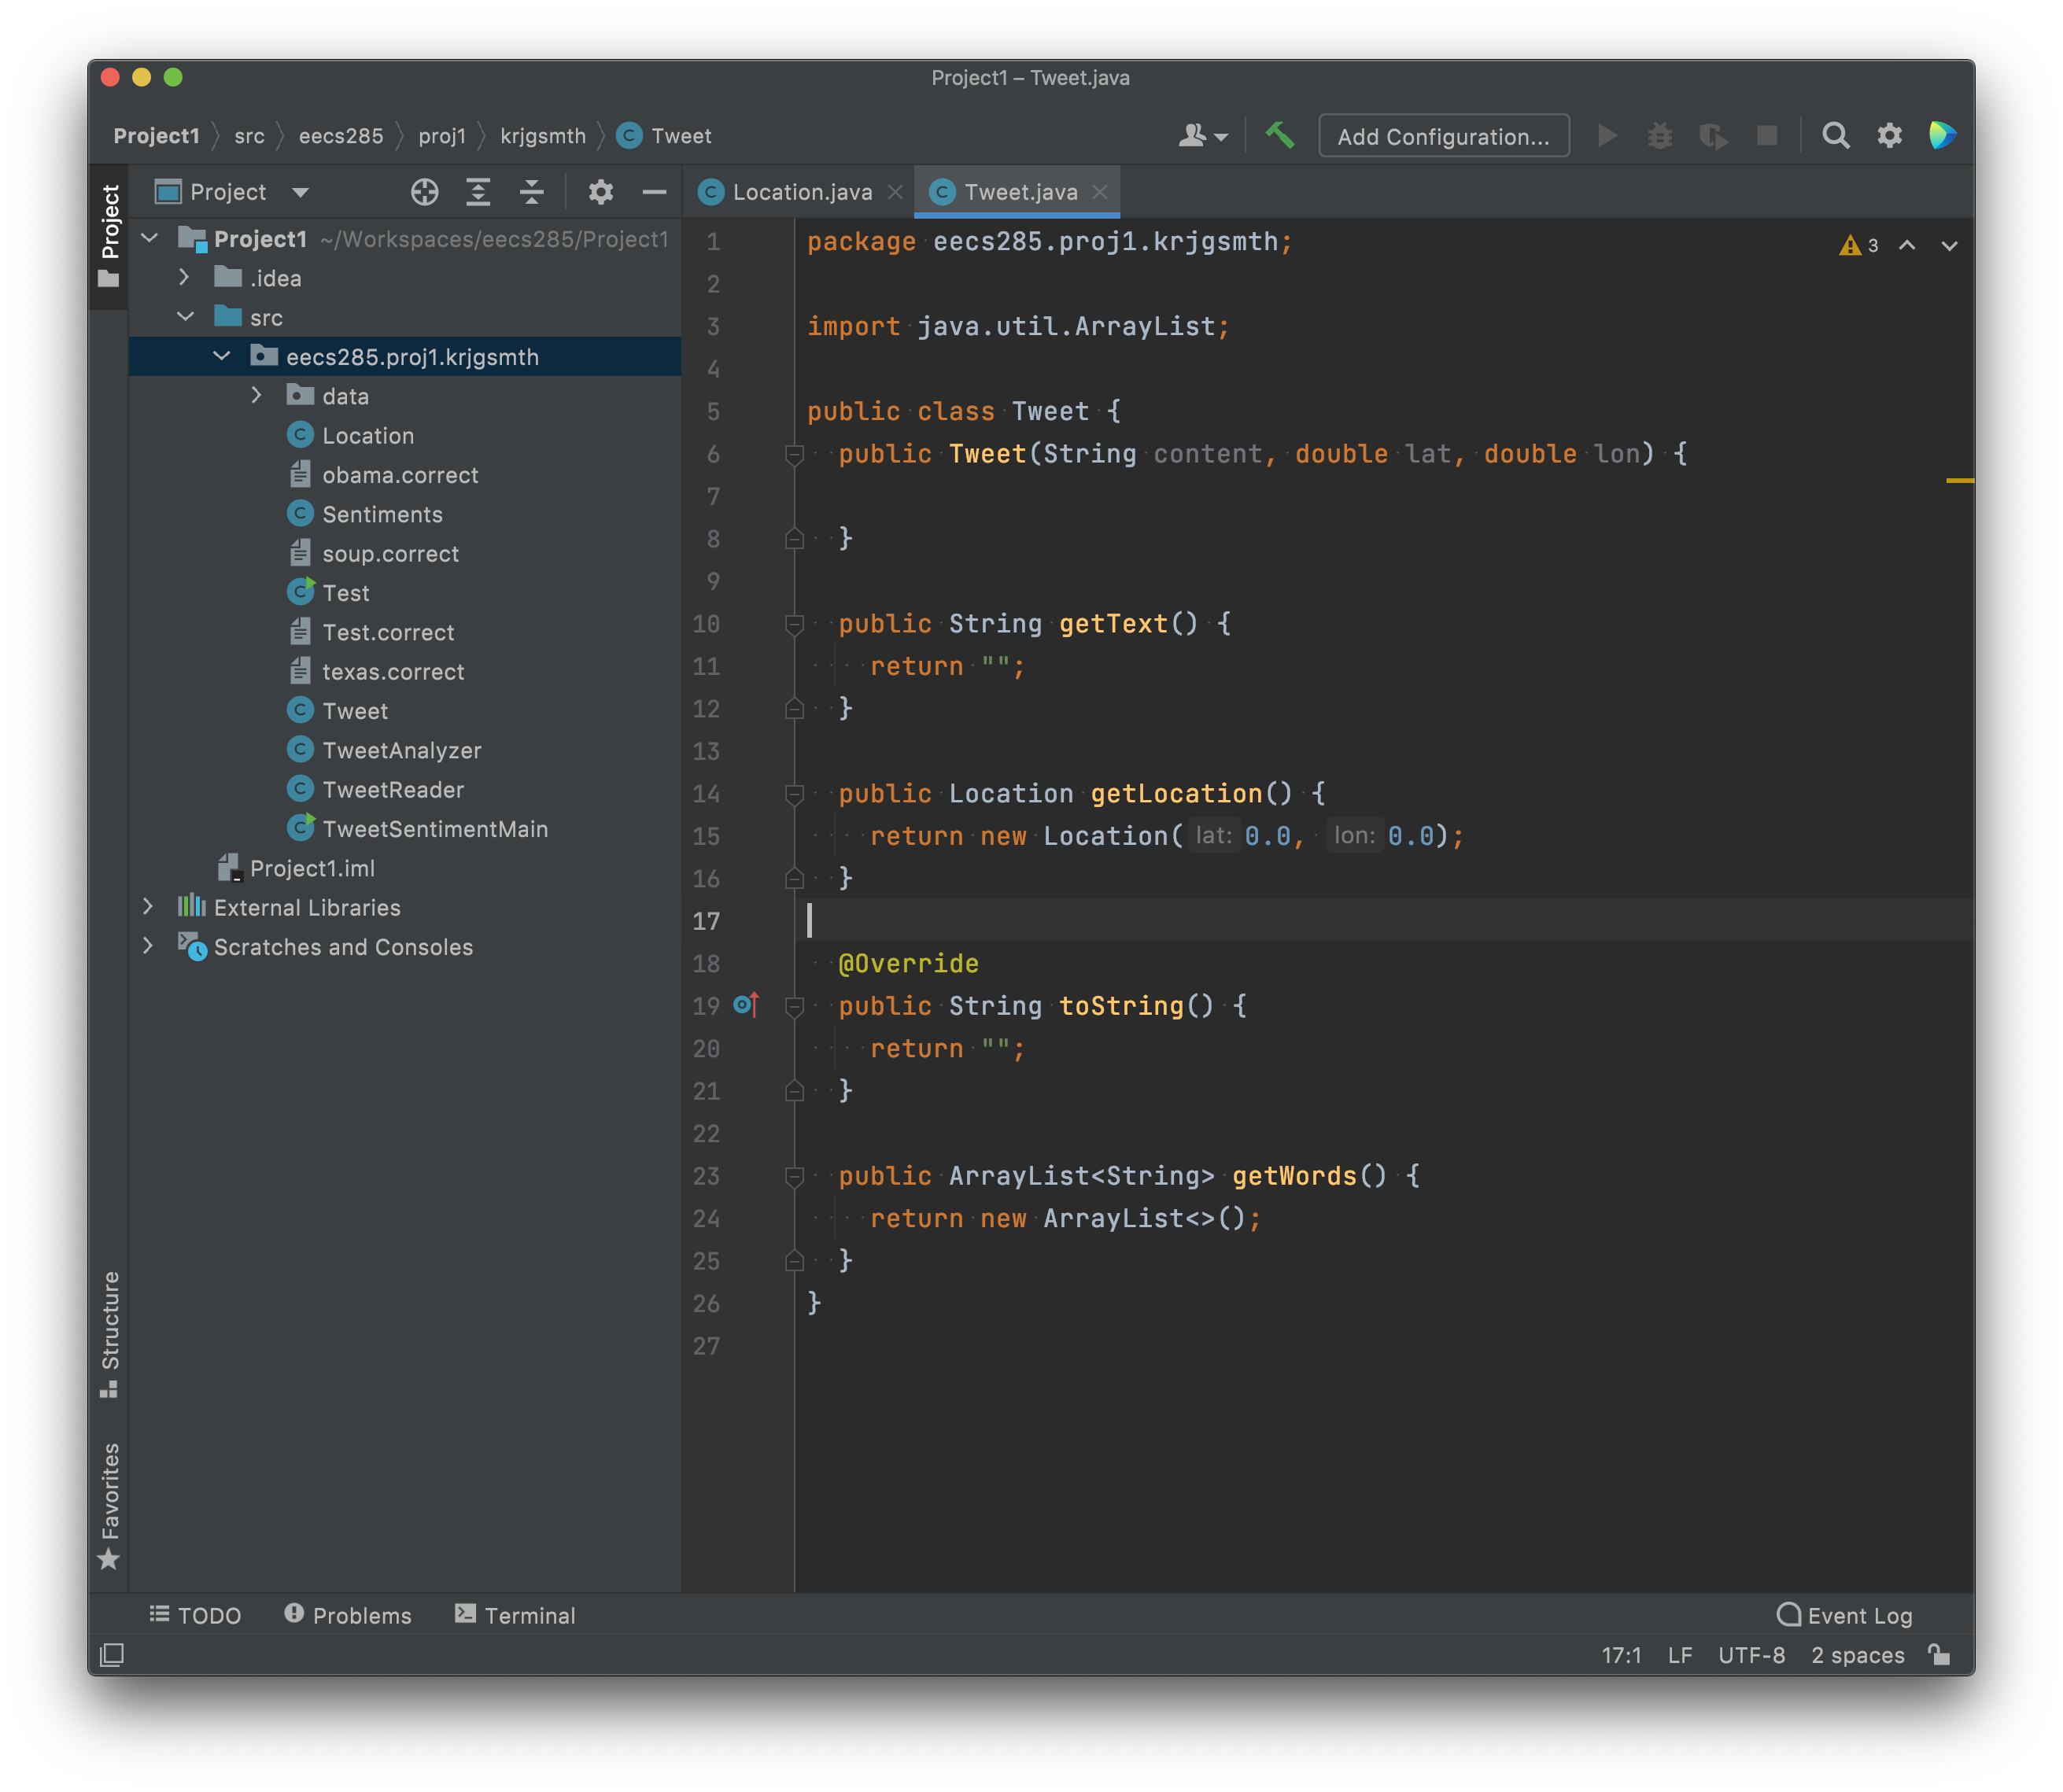
Build and Run Project
The project should now be able to be built and run without errors. The Java program will run using a method called main. For this project, there are two classes that contain a main method, TweetSentimentMain and Test. You can build and run the project from either of these classes.
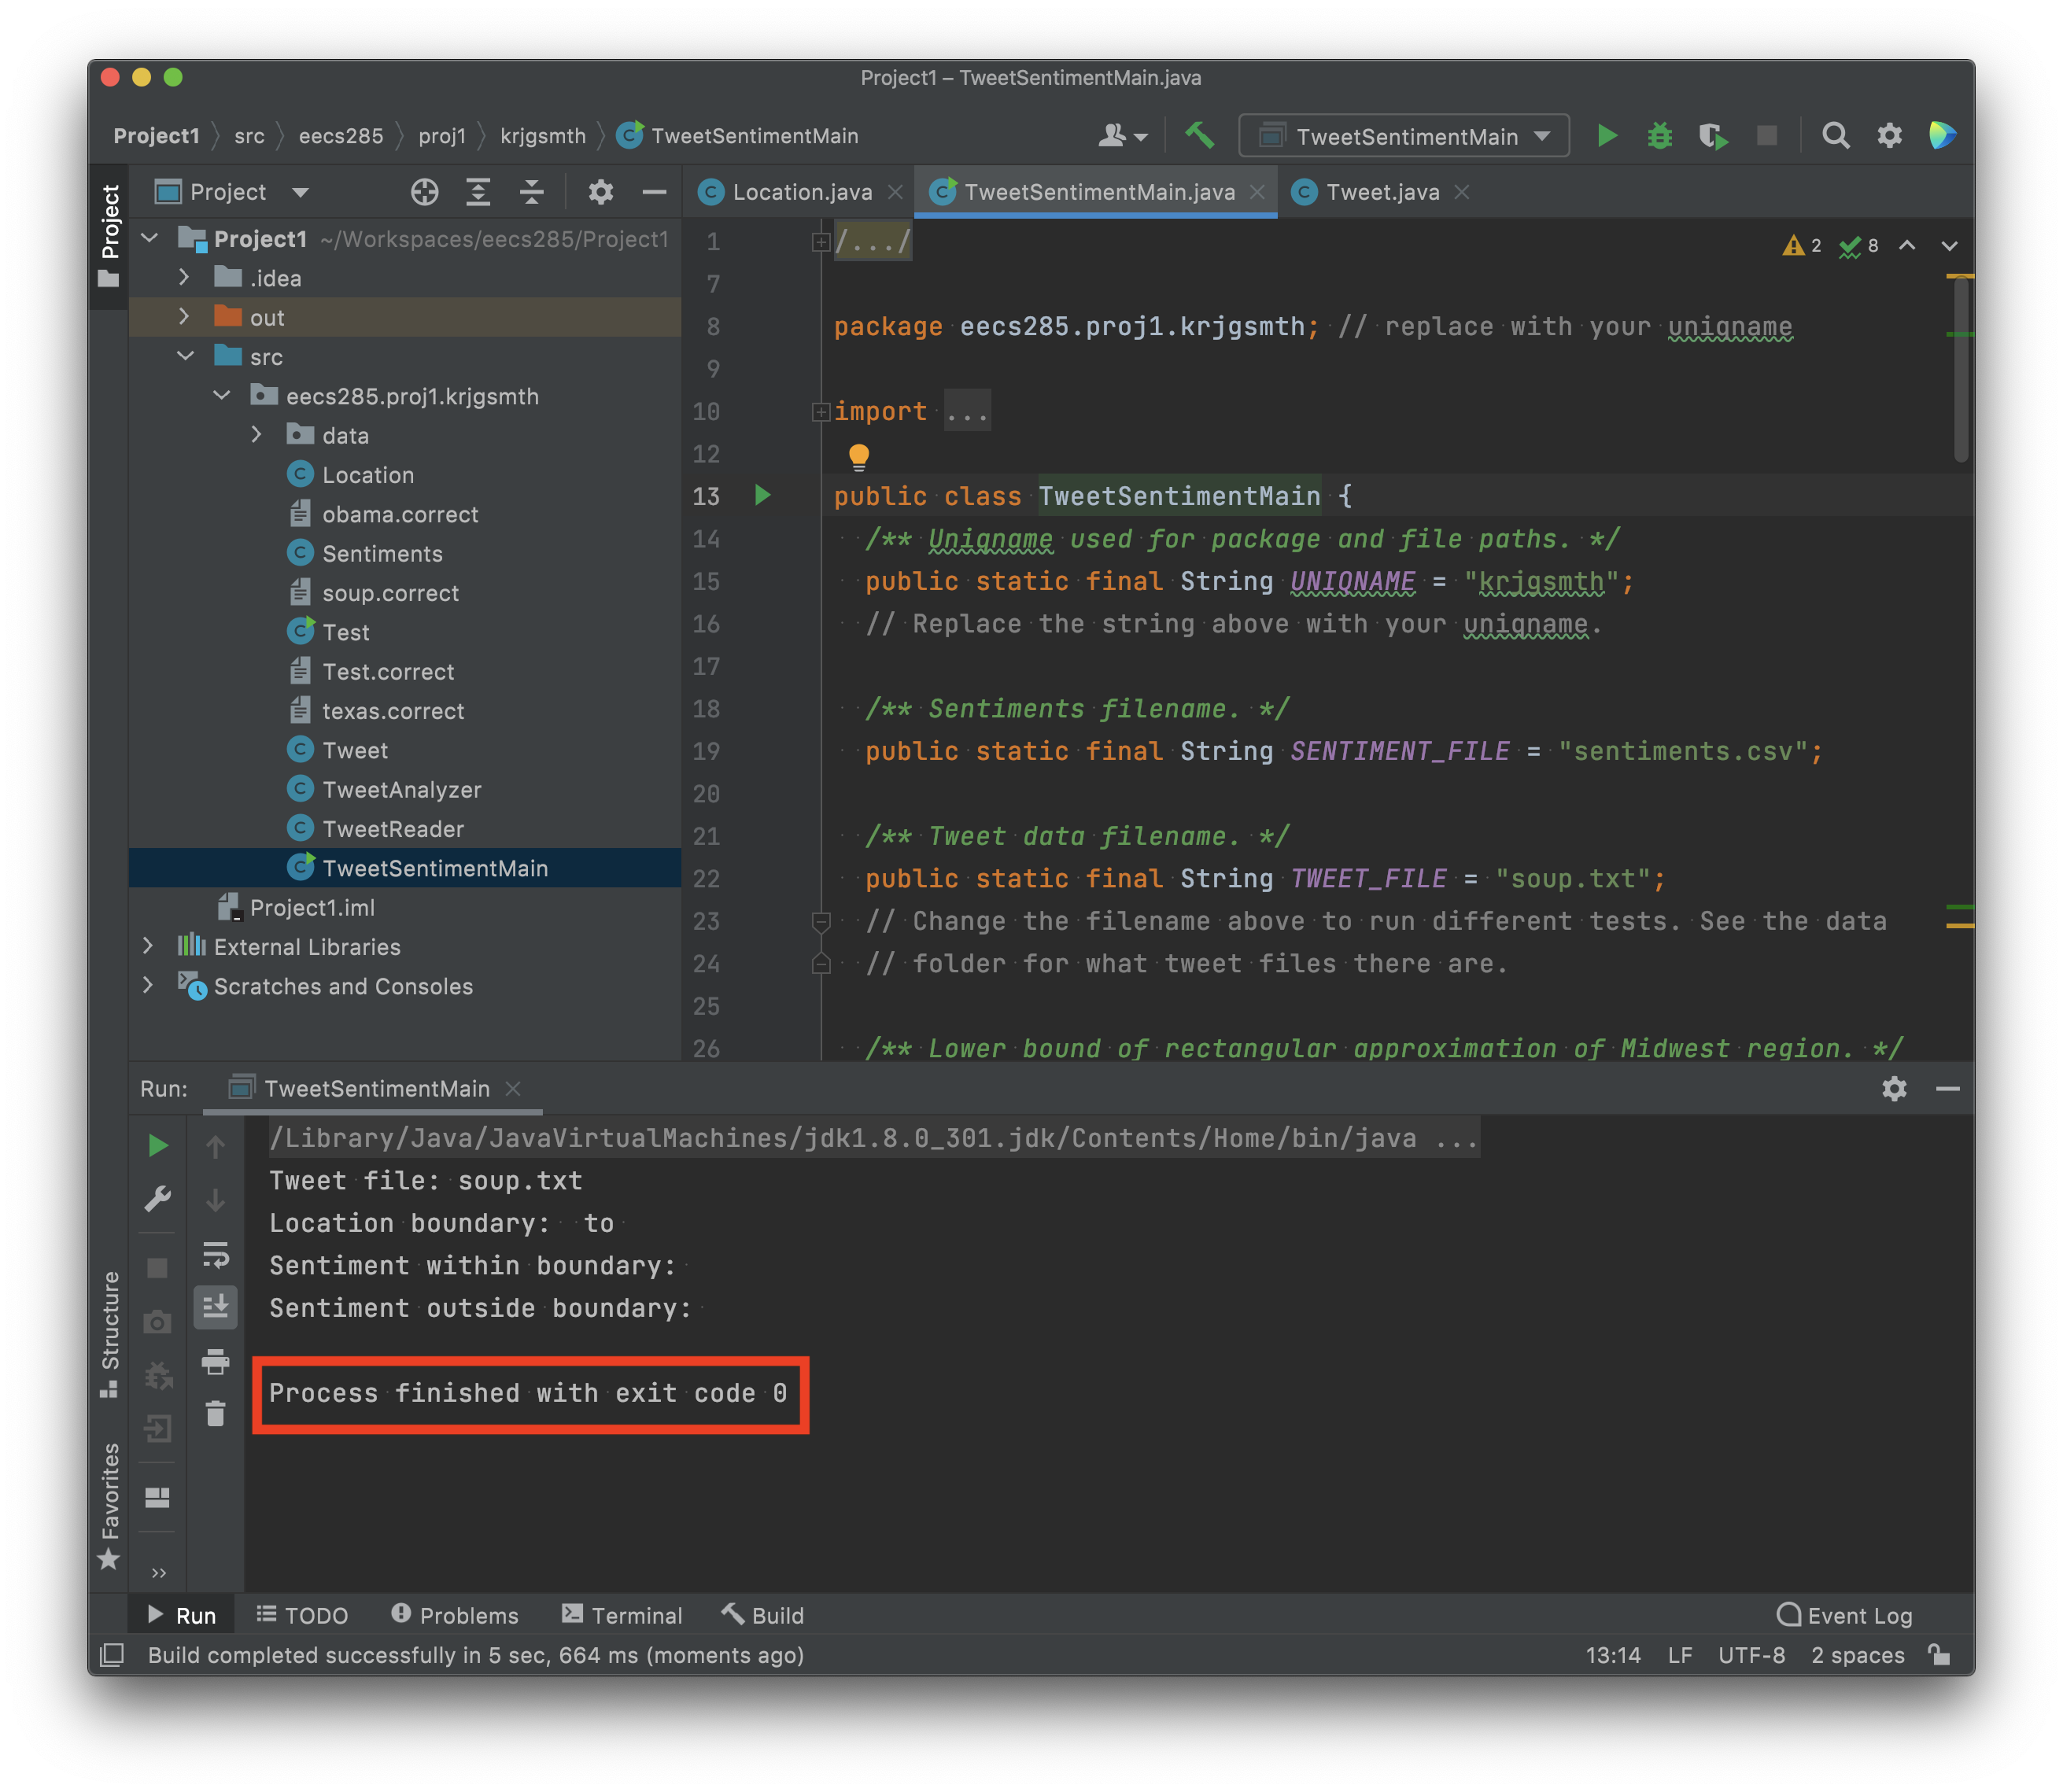
To run the main in the TweetSentimentMain class, open TweetSentimentMain and right click the green arrow next to either the class name or the main method. Select “Run ‘TweetSentiment….main()’ “.
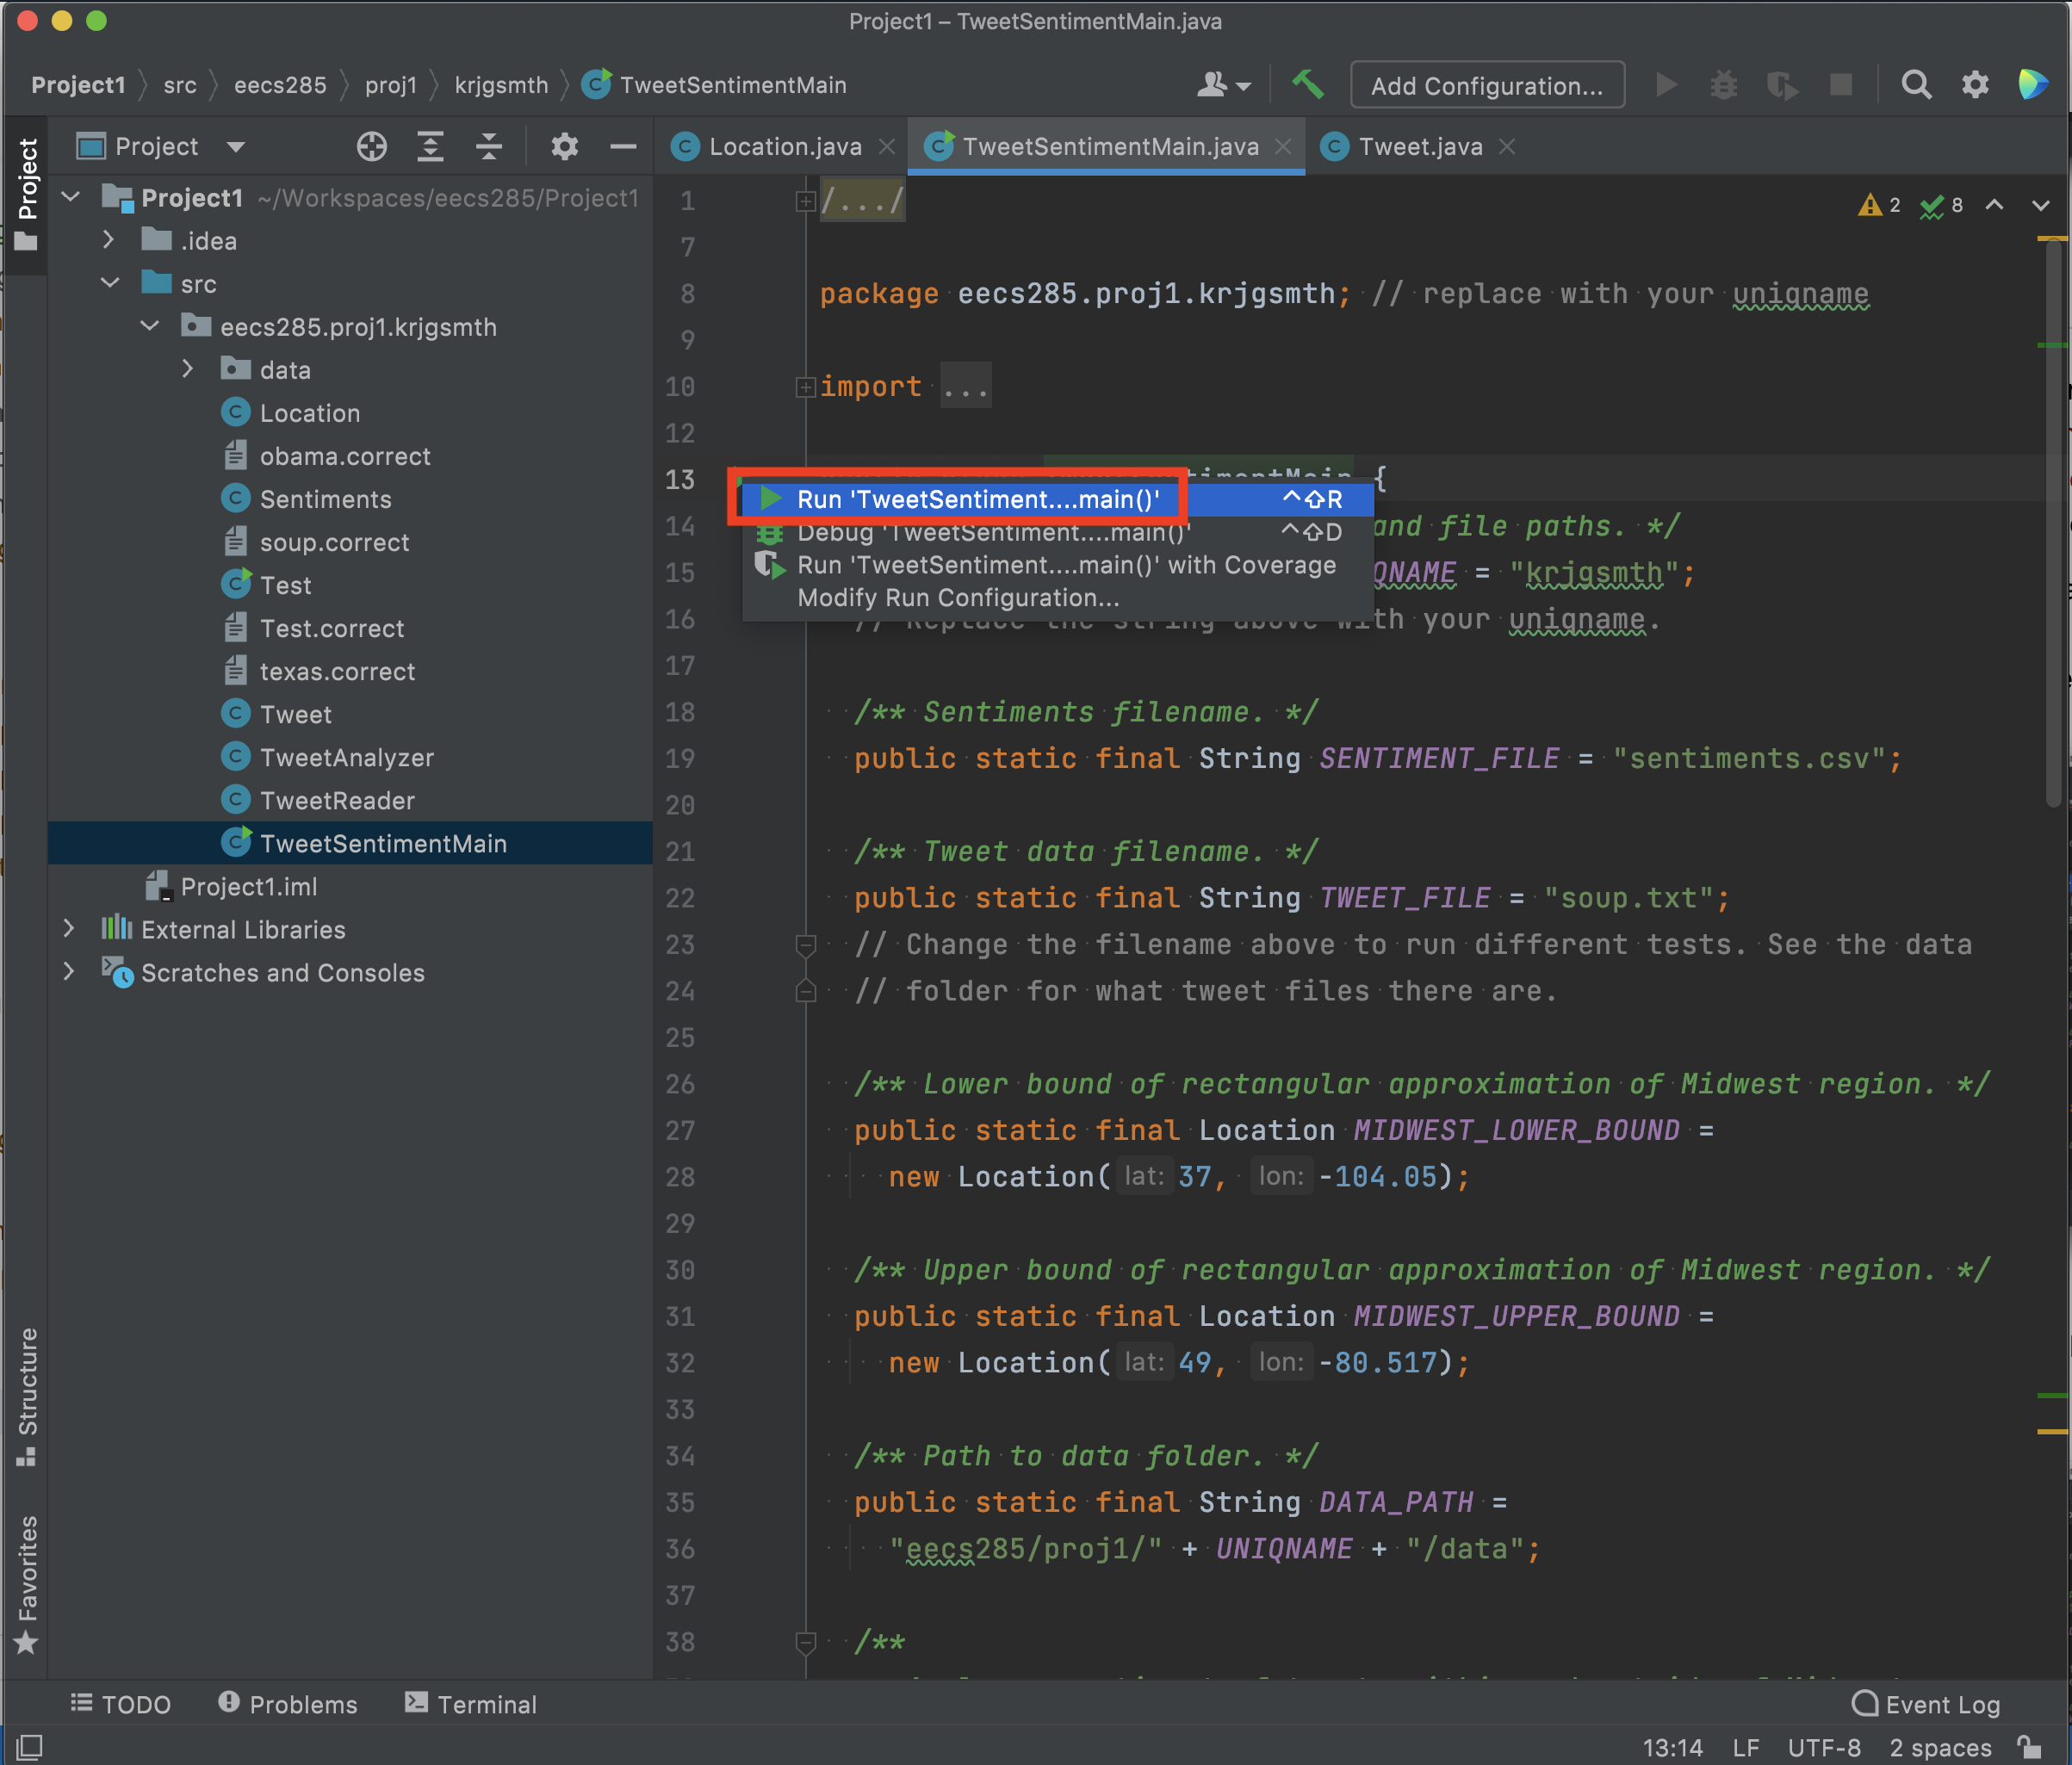
If it built and ran sucessfully it should print at the bottom of the screen “Process finished with exit code 0”
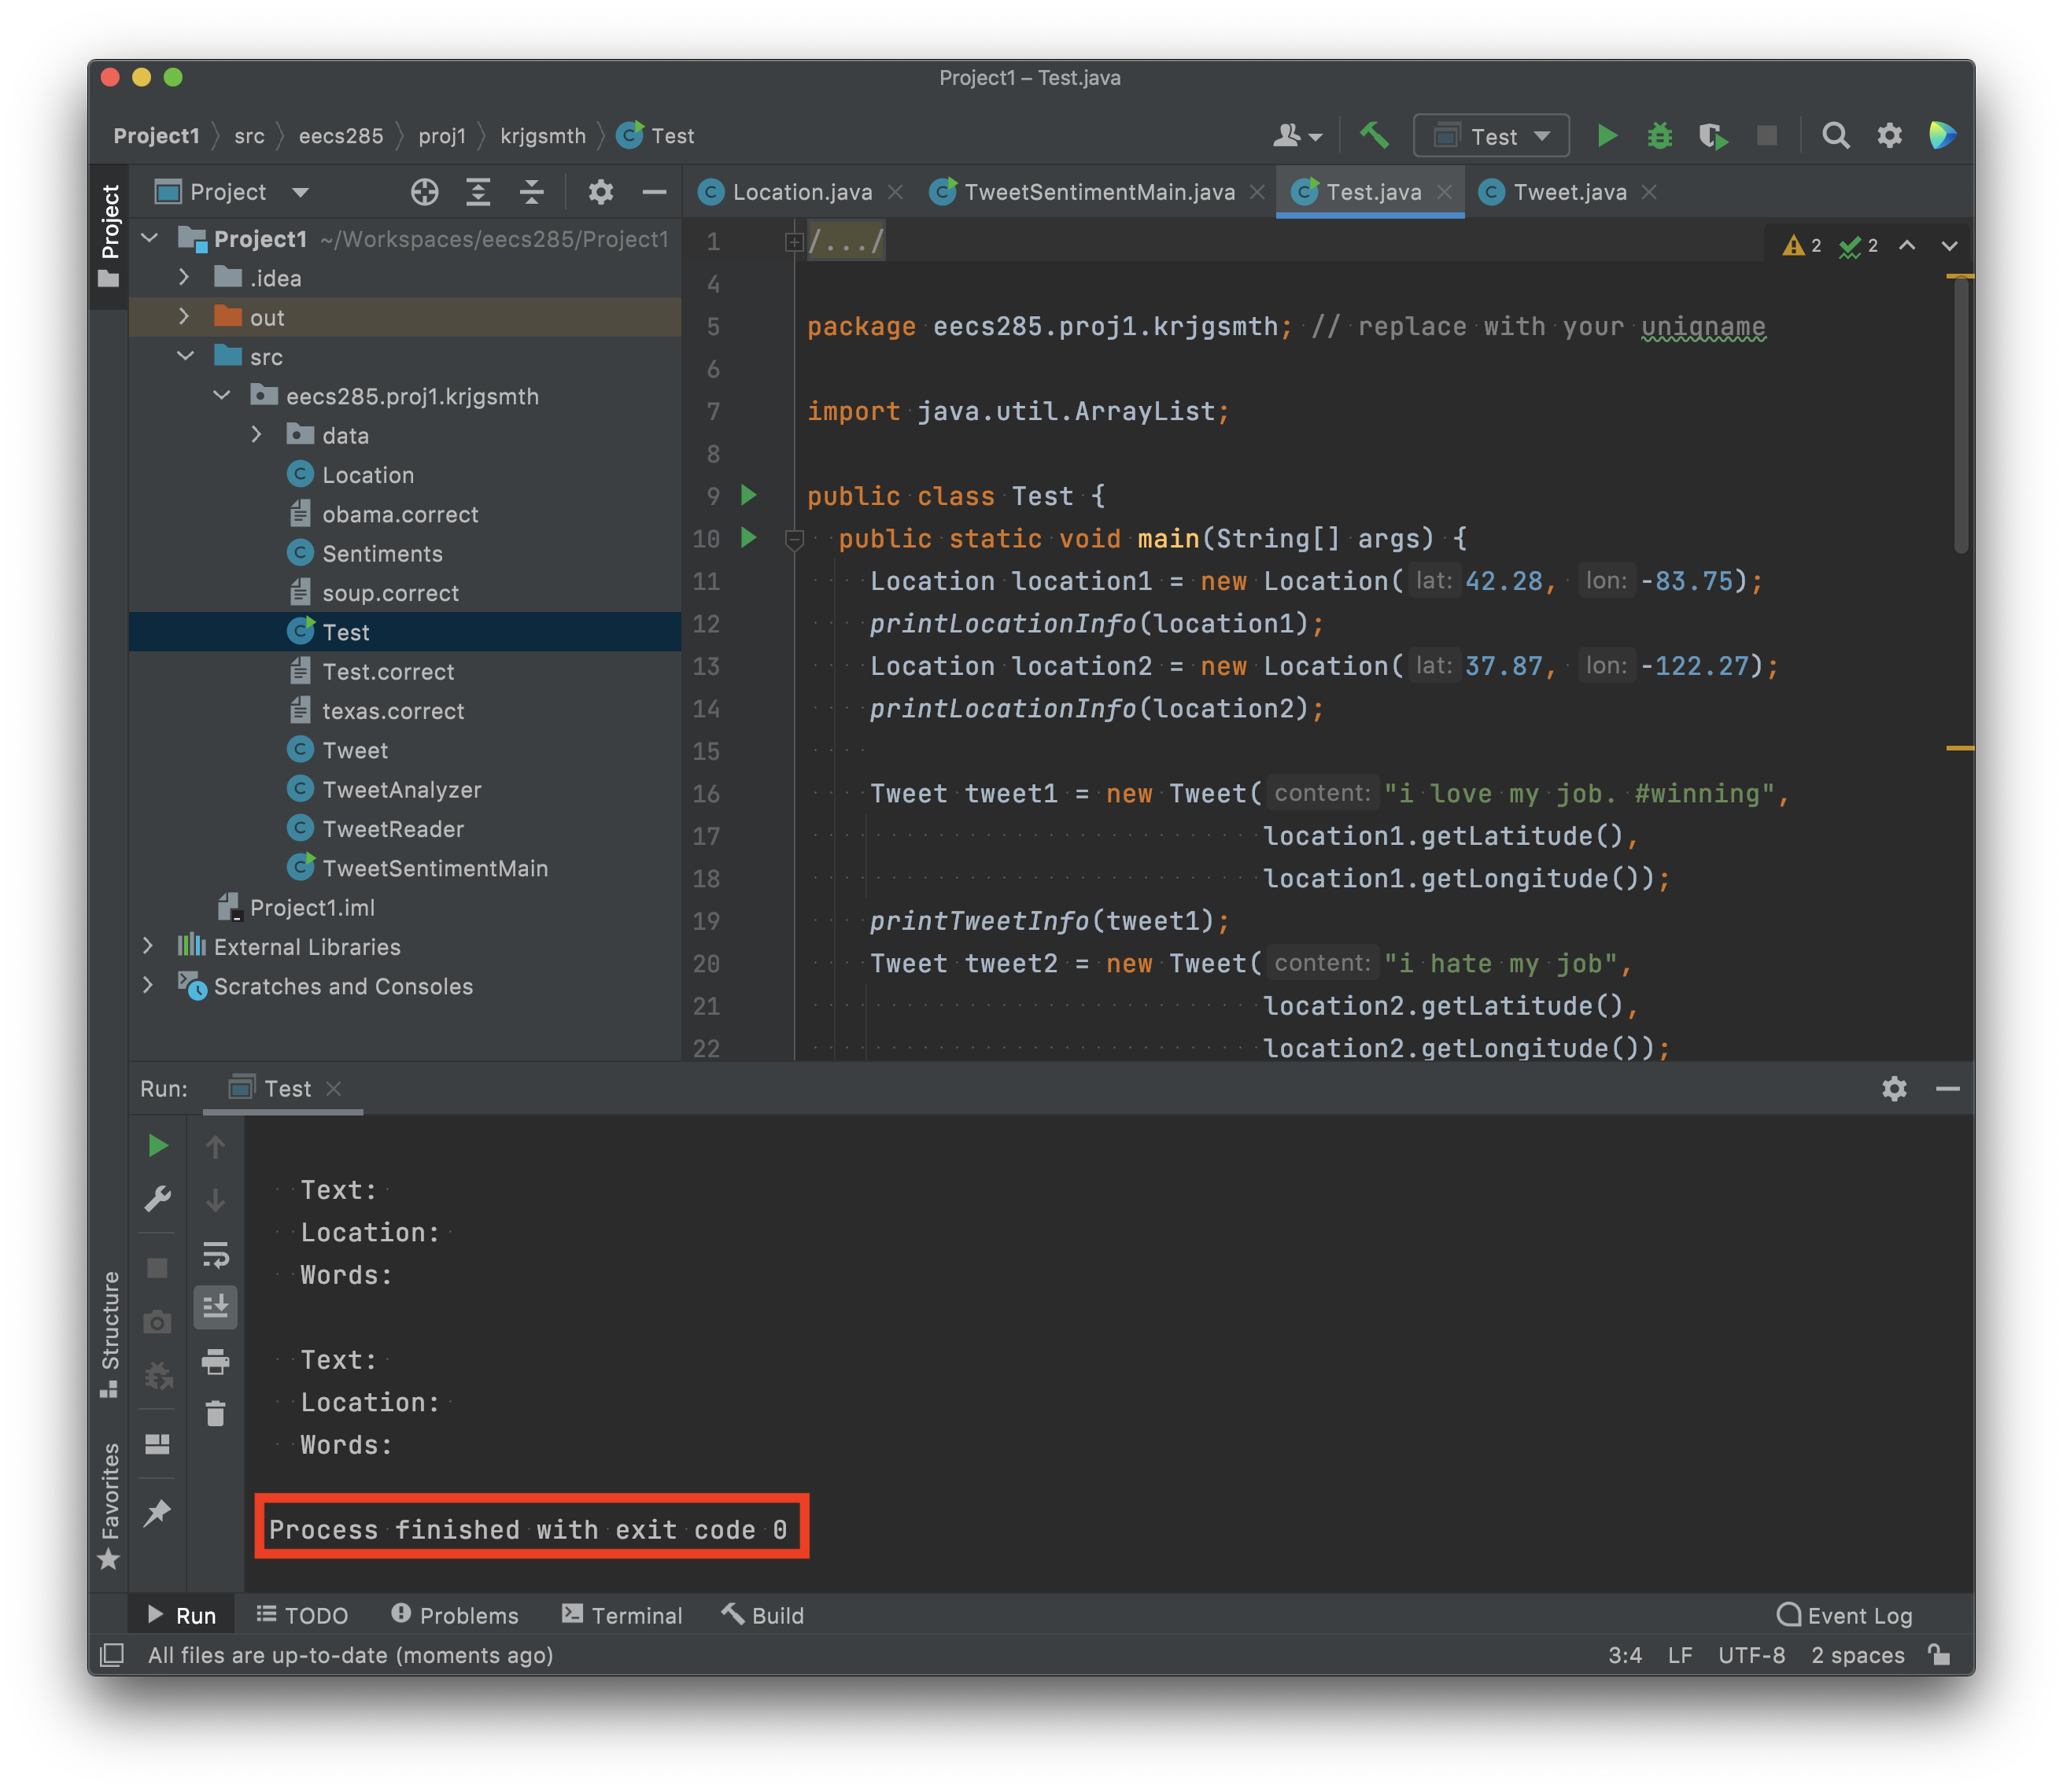
You can do a similar thing to run Test.java
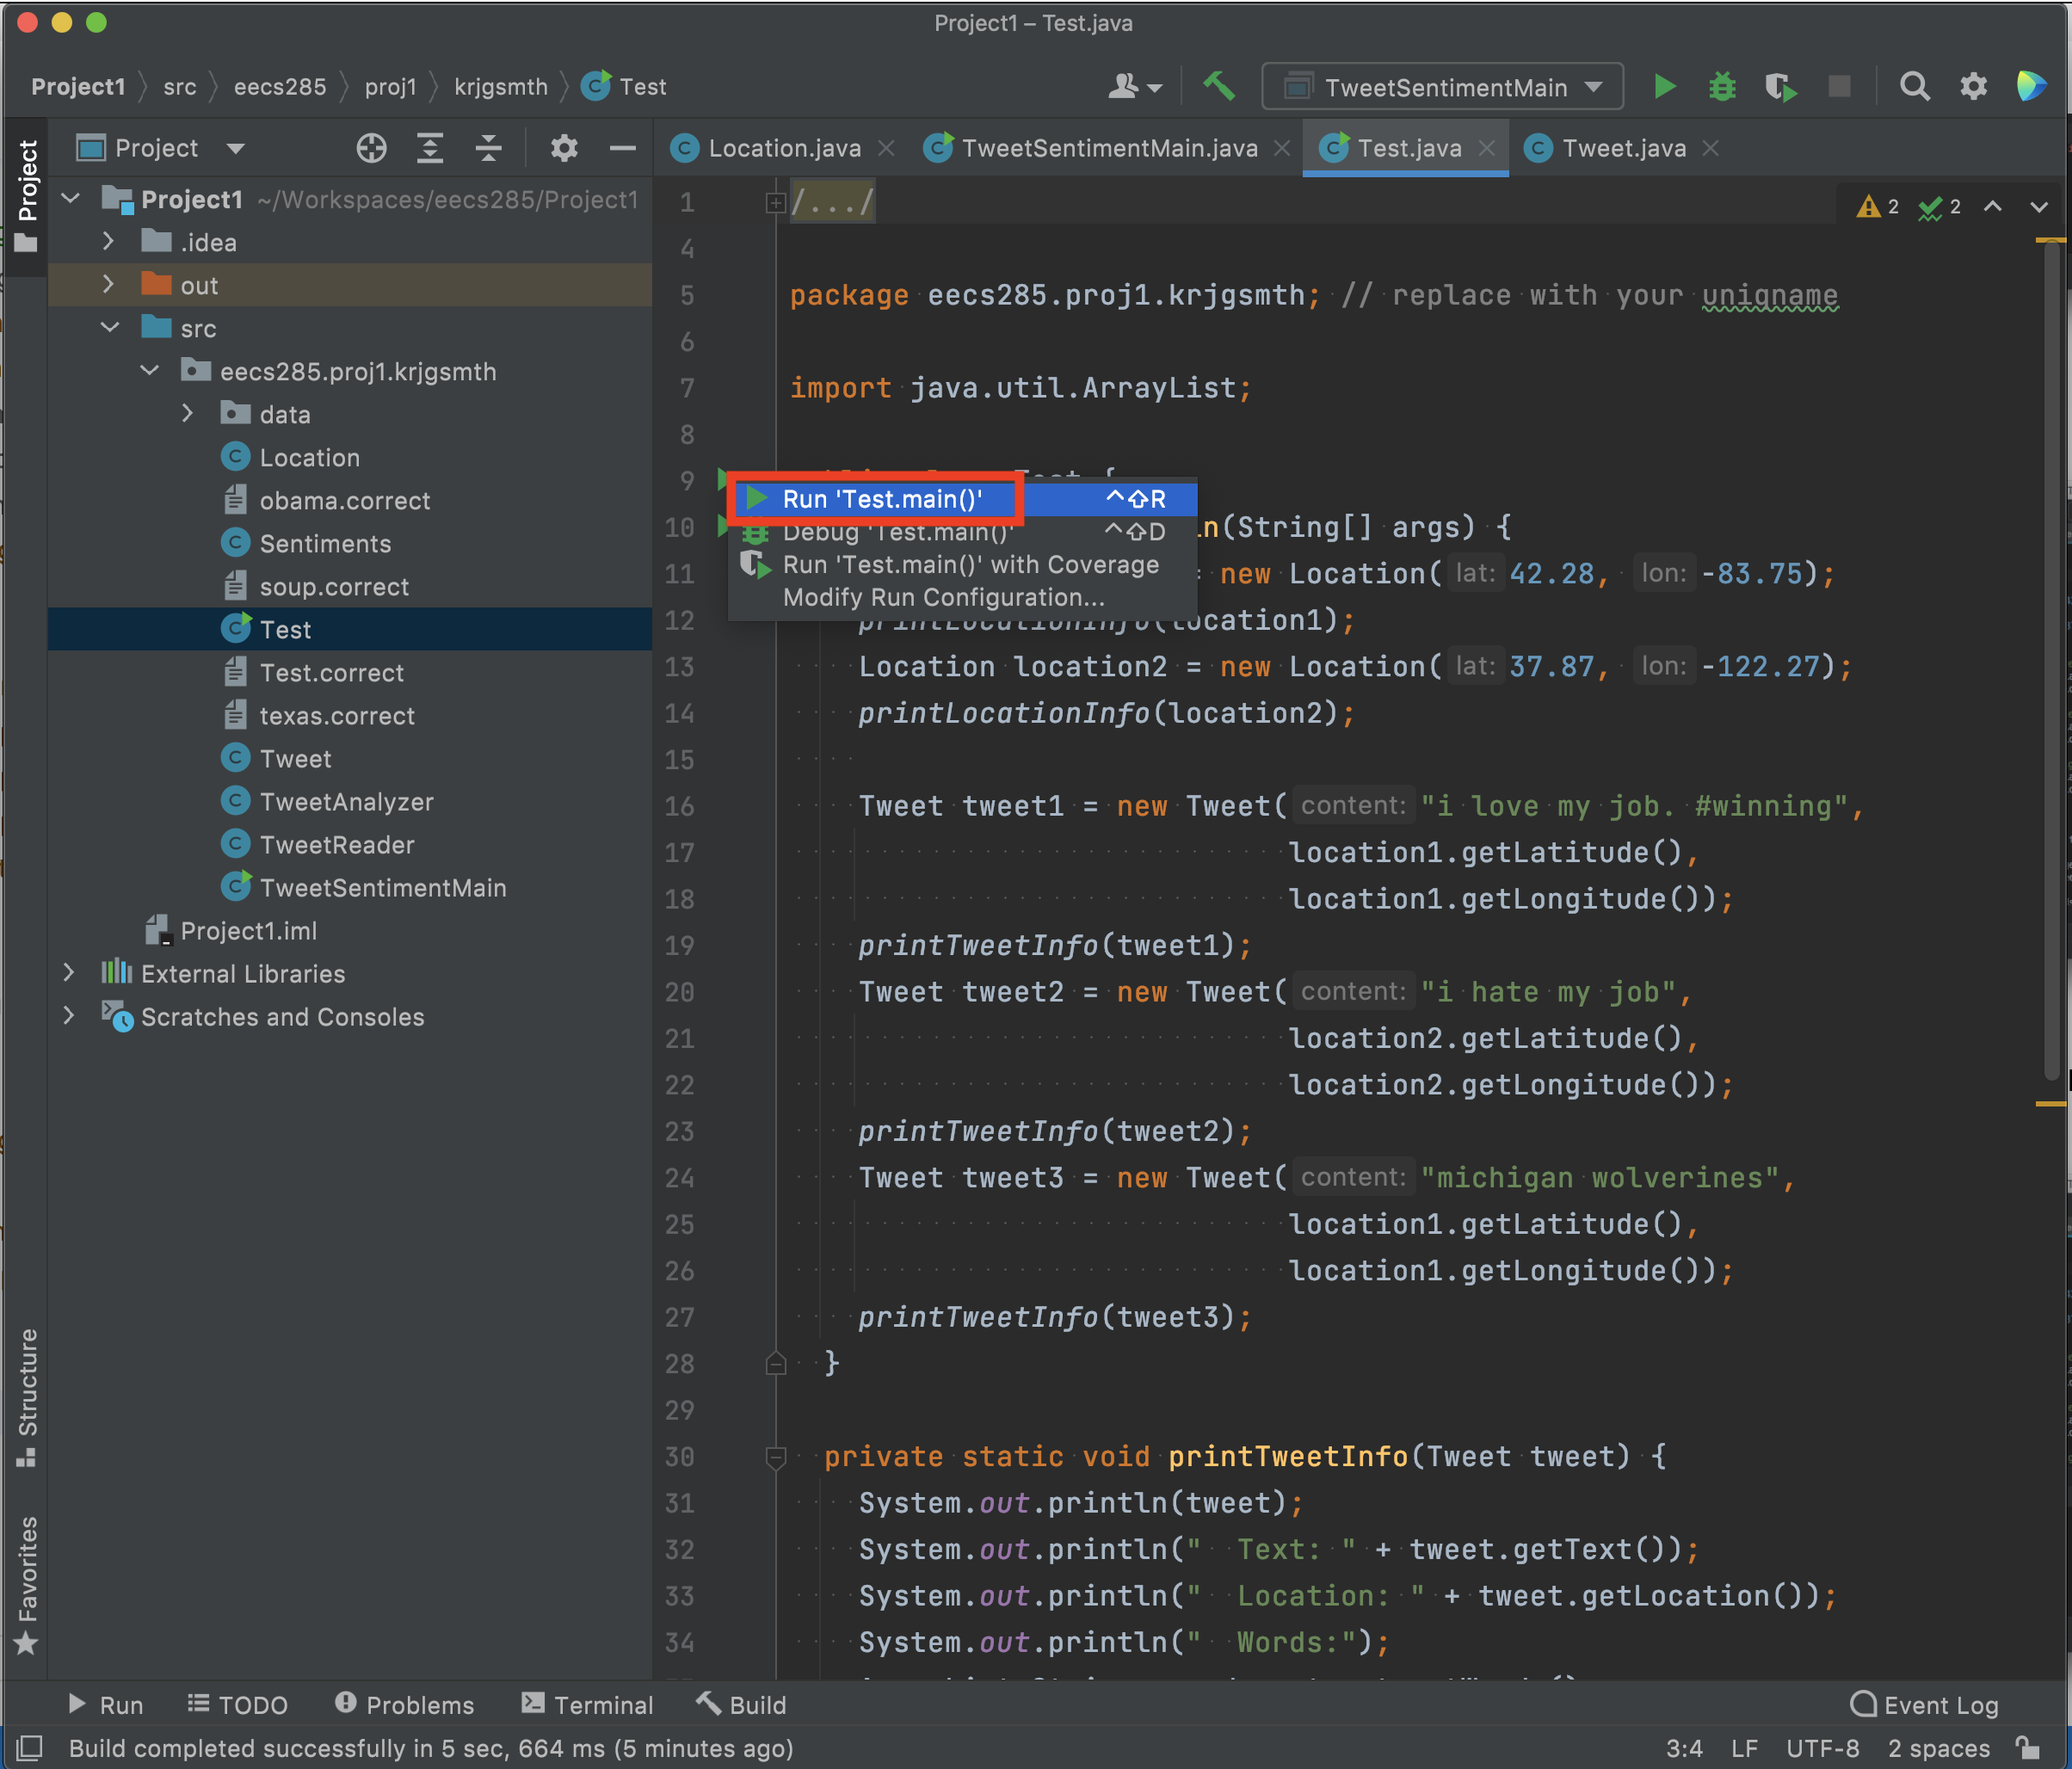
If it built and ran sucessfully it should print at the bottom of the screen “Process finished with exit code 0”
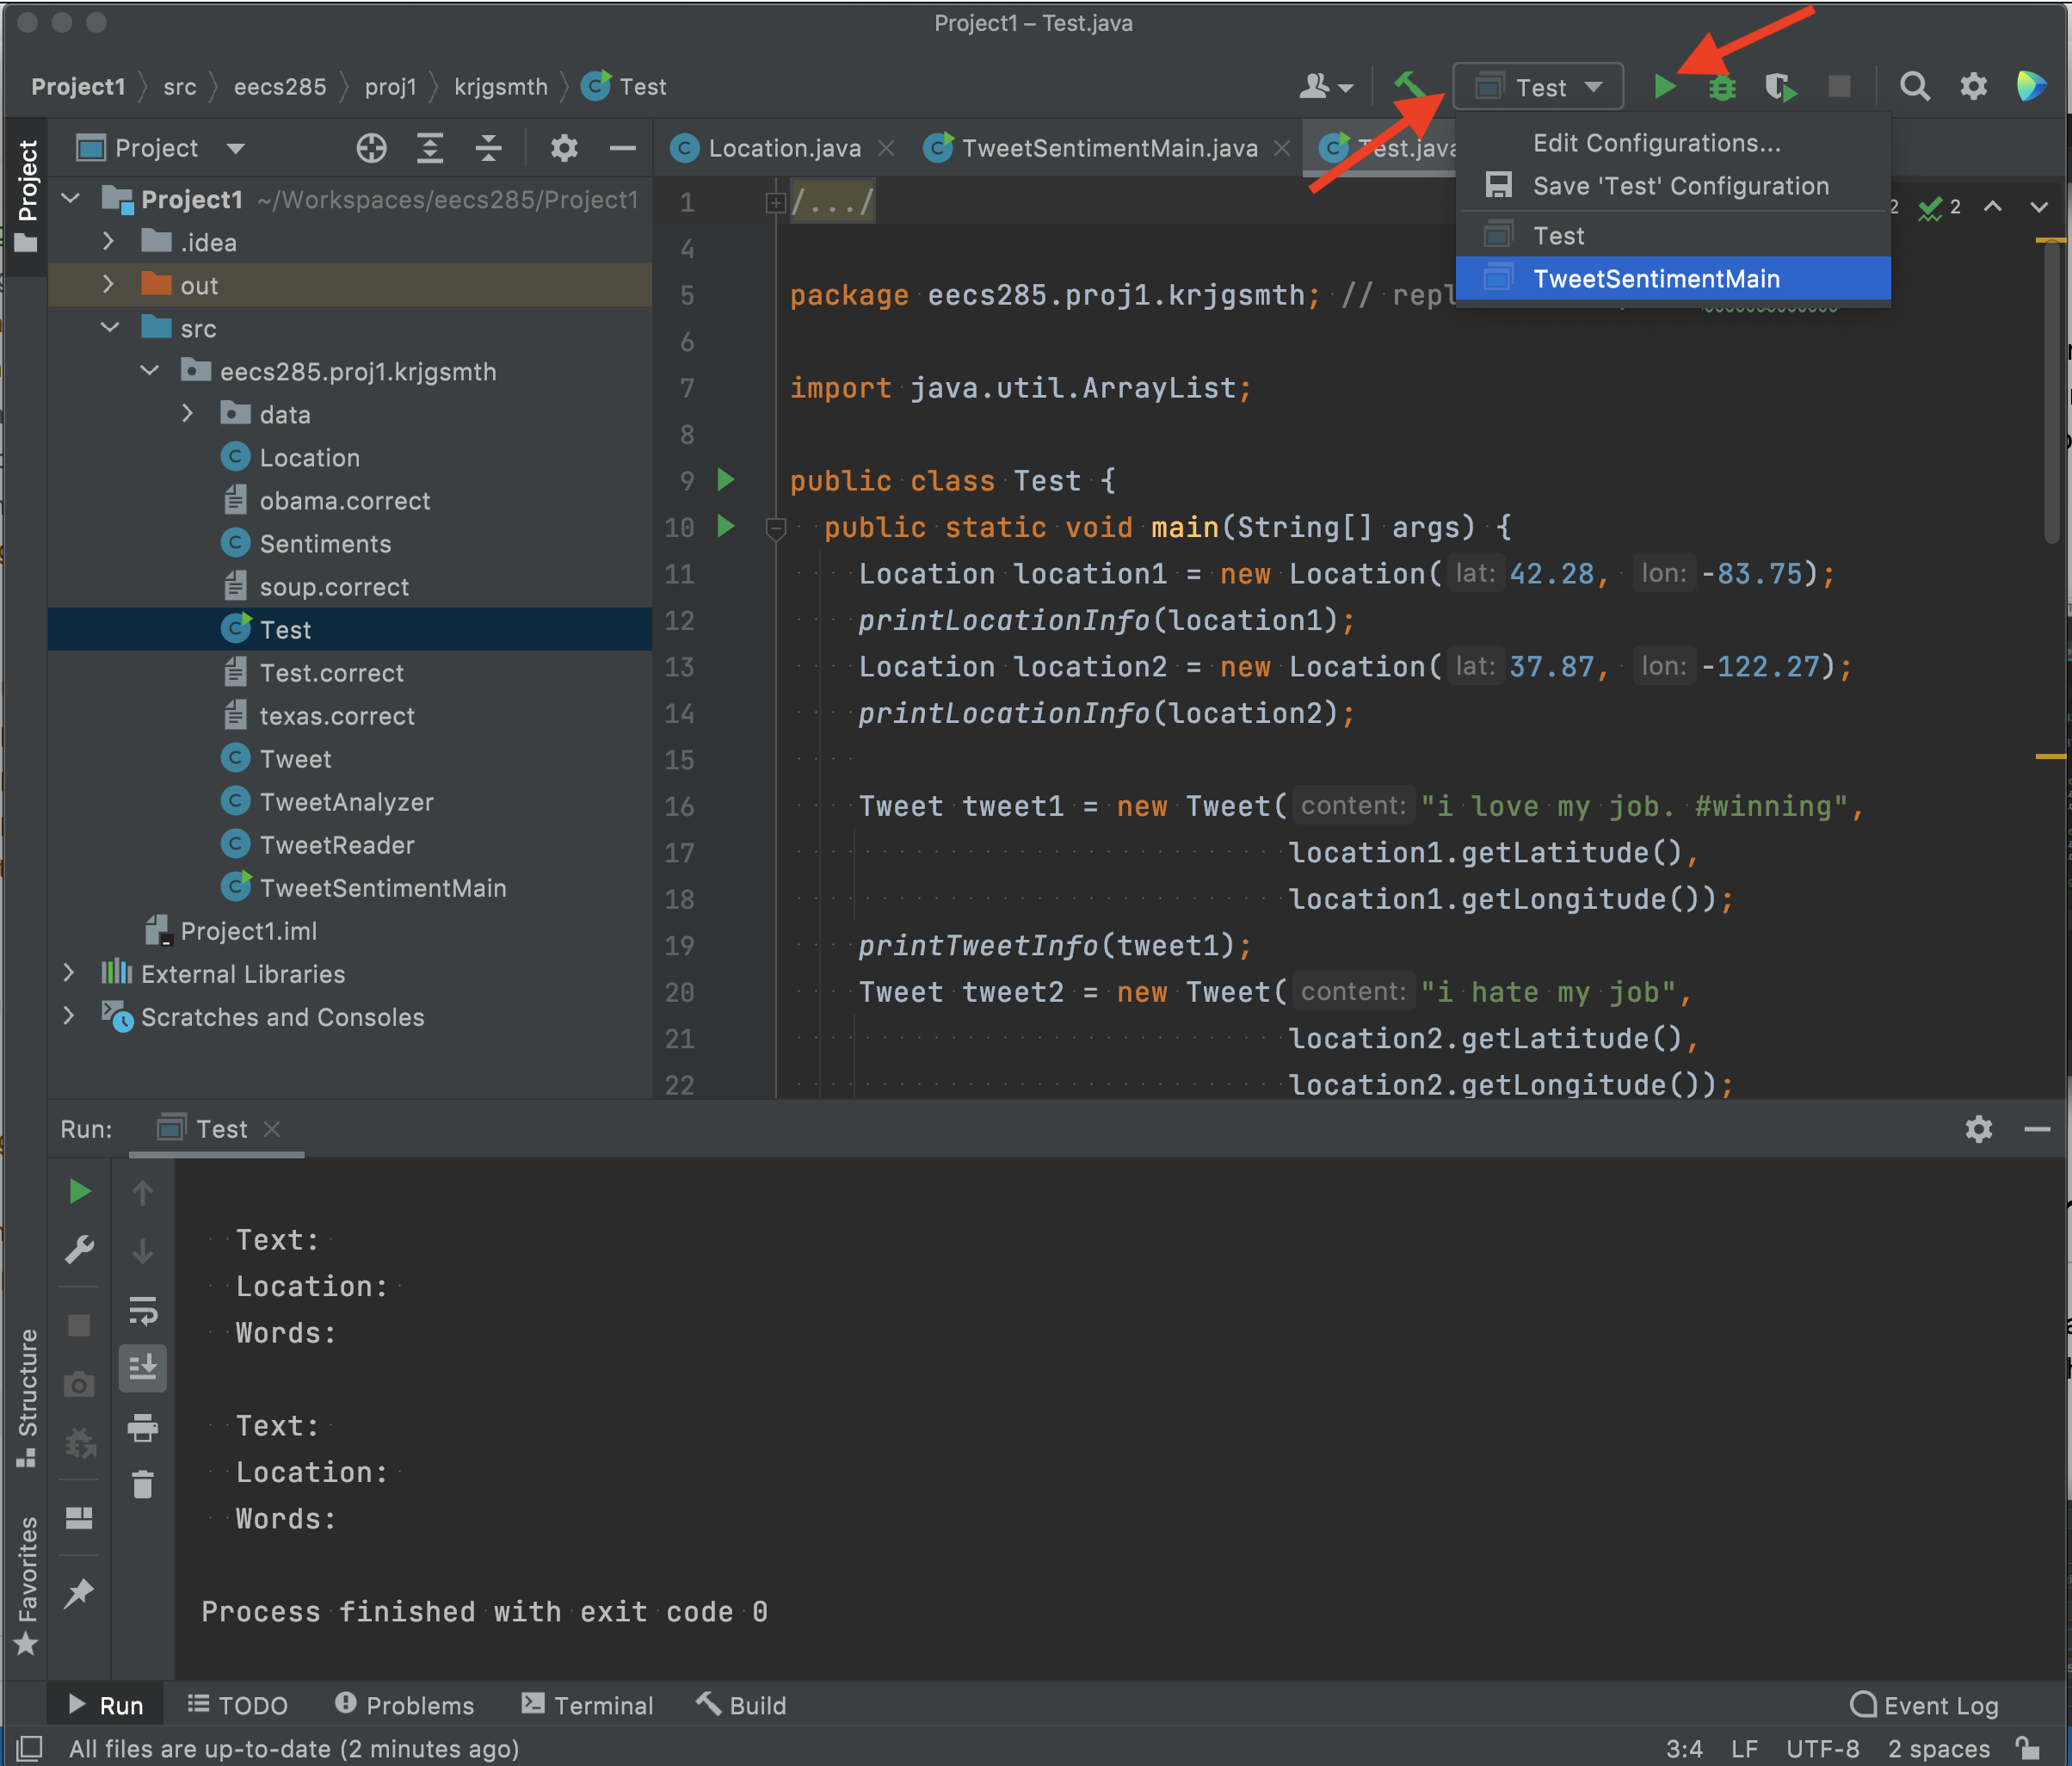
After doing the above steps, IntelliJ automatically creates configurations that make running the main methods again easier. In the upper-right corner, you can select which main you want to run from the dropdown menu. After you have selected a configuration, you can press the green triangle next to the dropdown to run it again. This can be done no matter what file you are currently looking at!
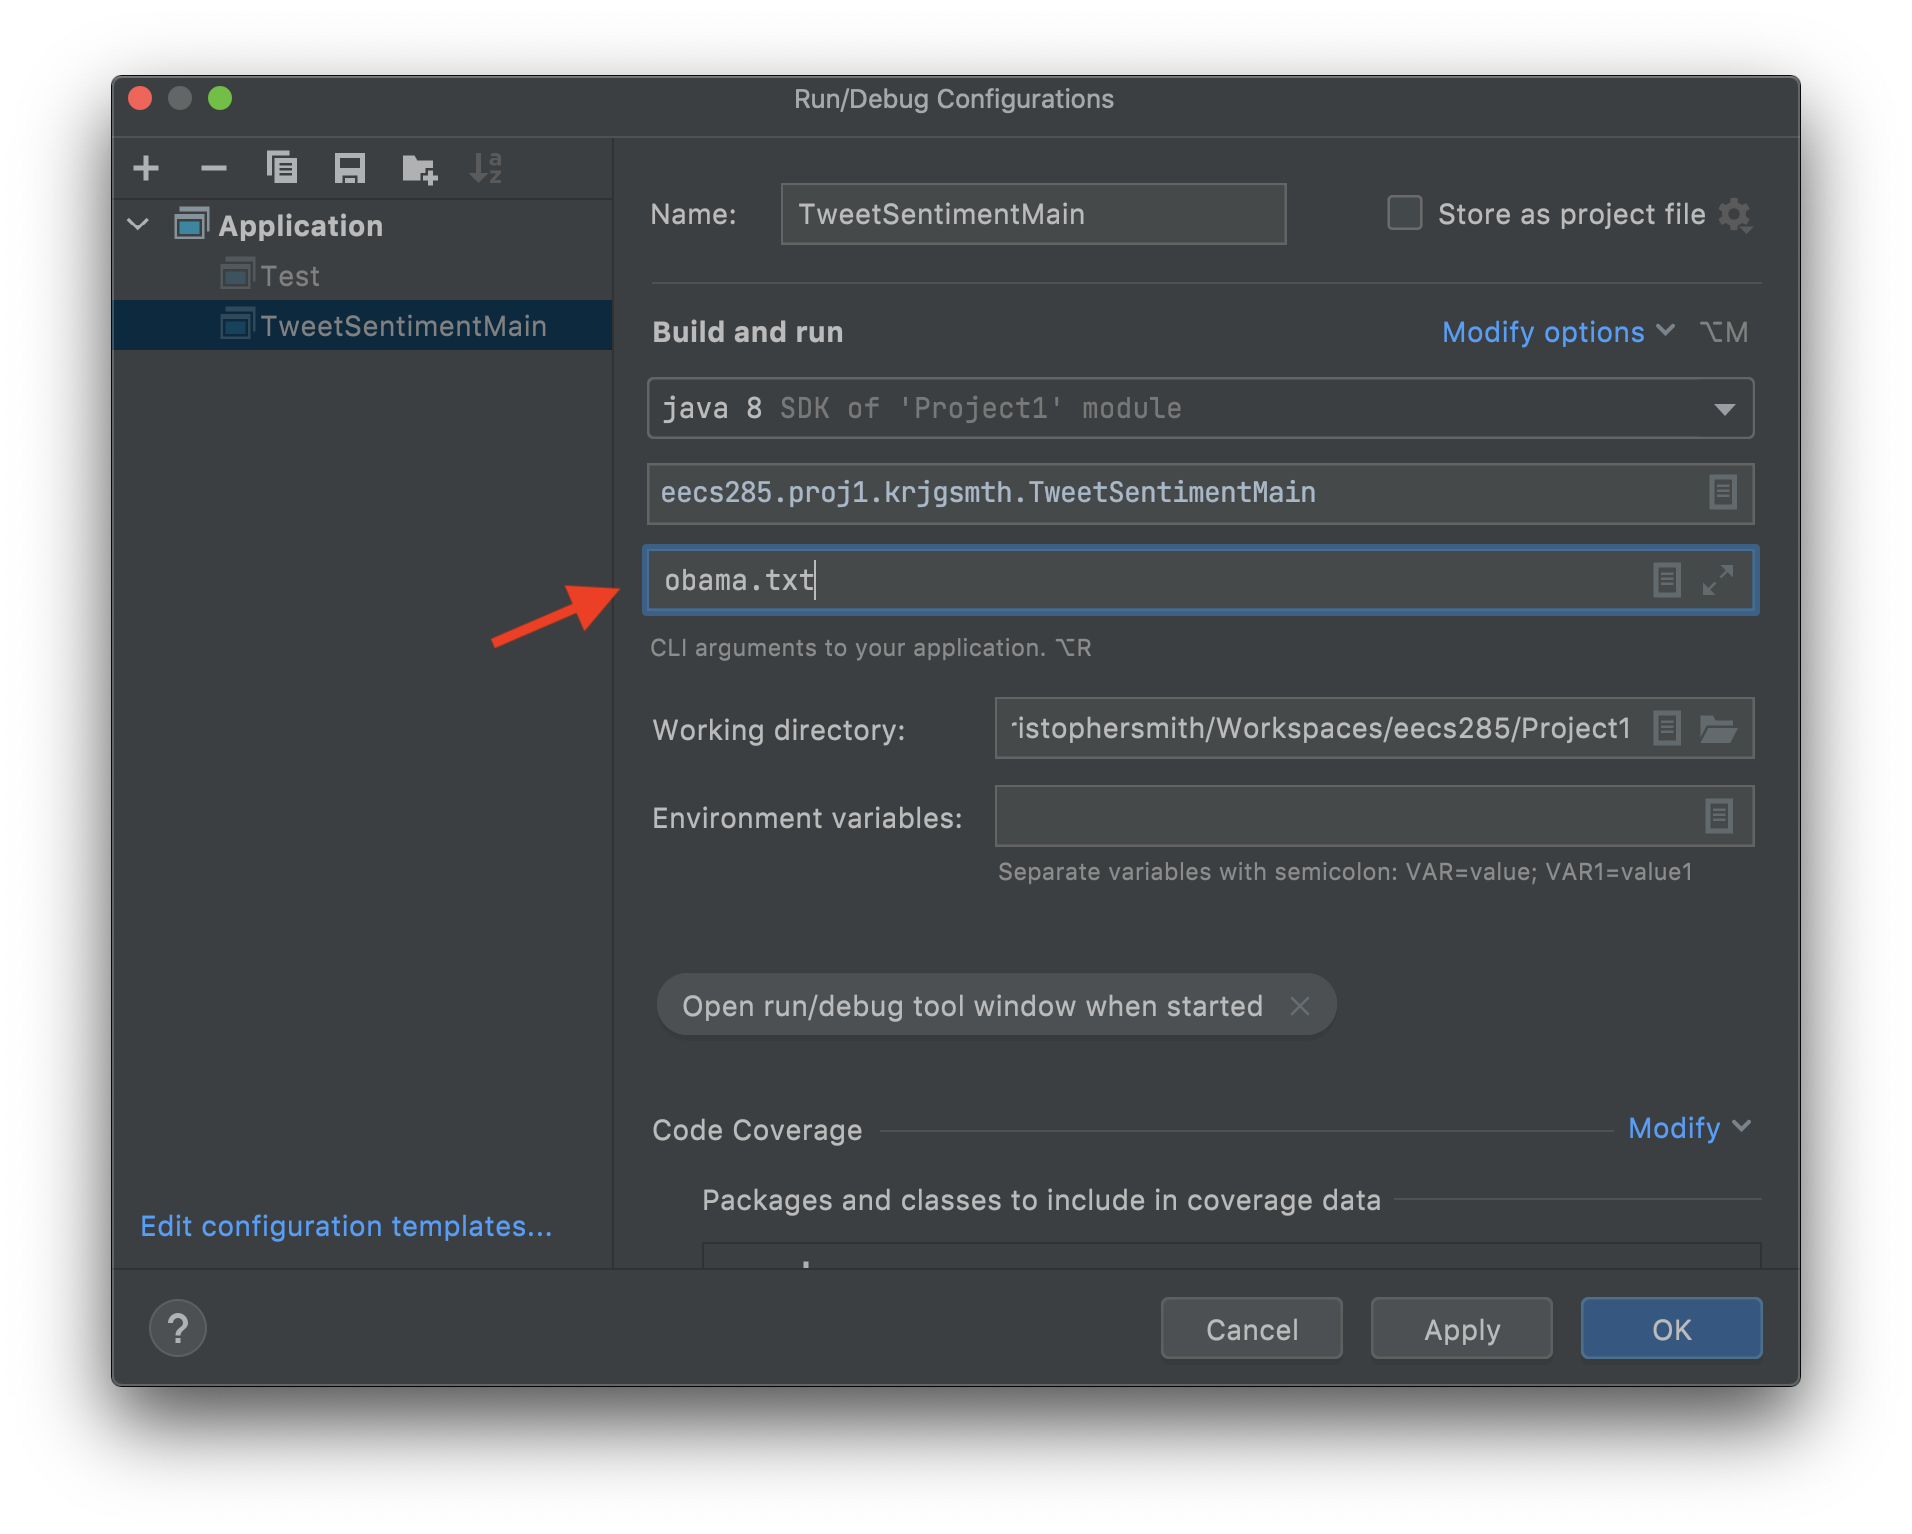
Setting Command-Line Arguments
You can set command-line arguments by editing a configuration from the dropdown menu in the upper-right corner. Fill in the “Program arguments” box with the desired arguments.